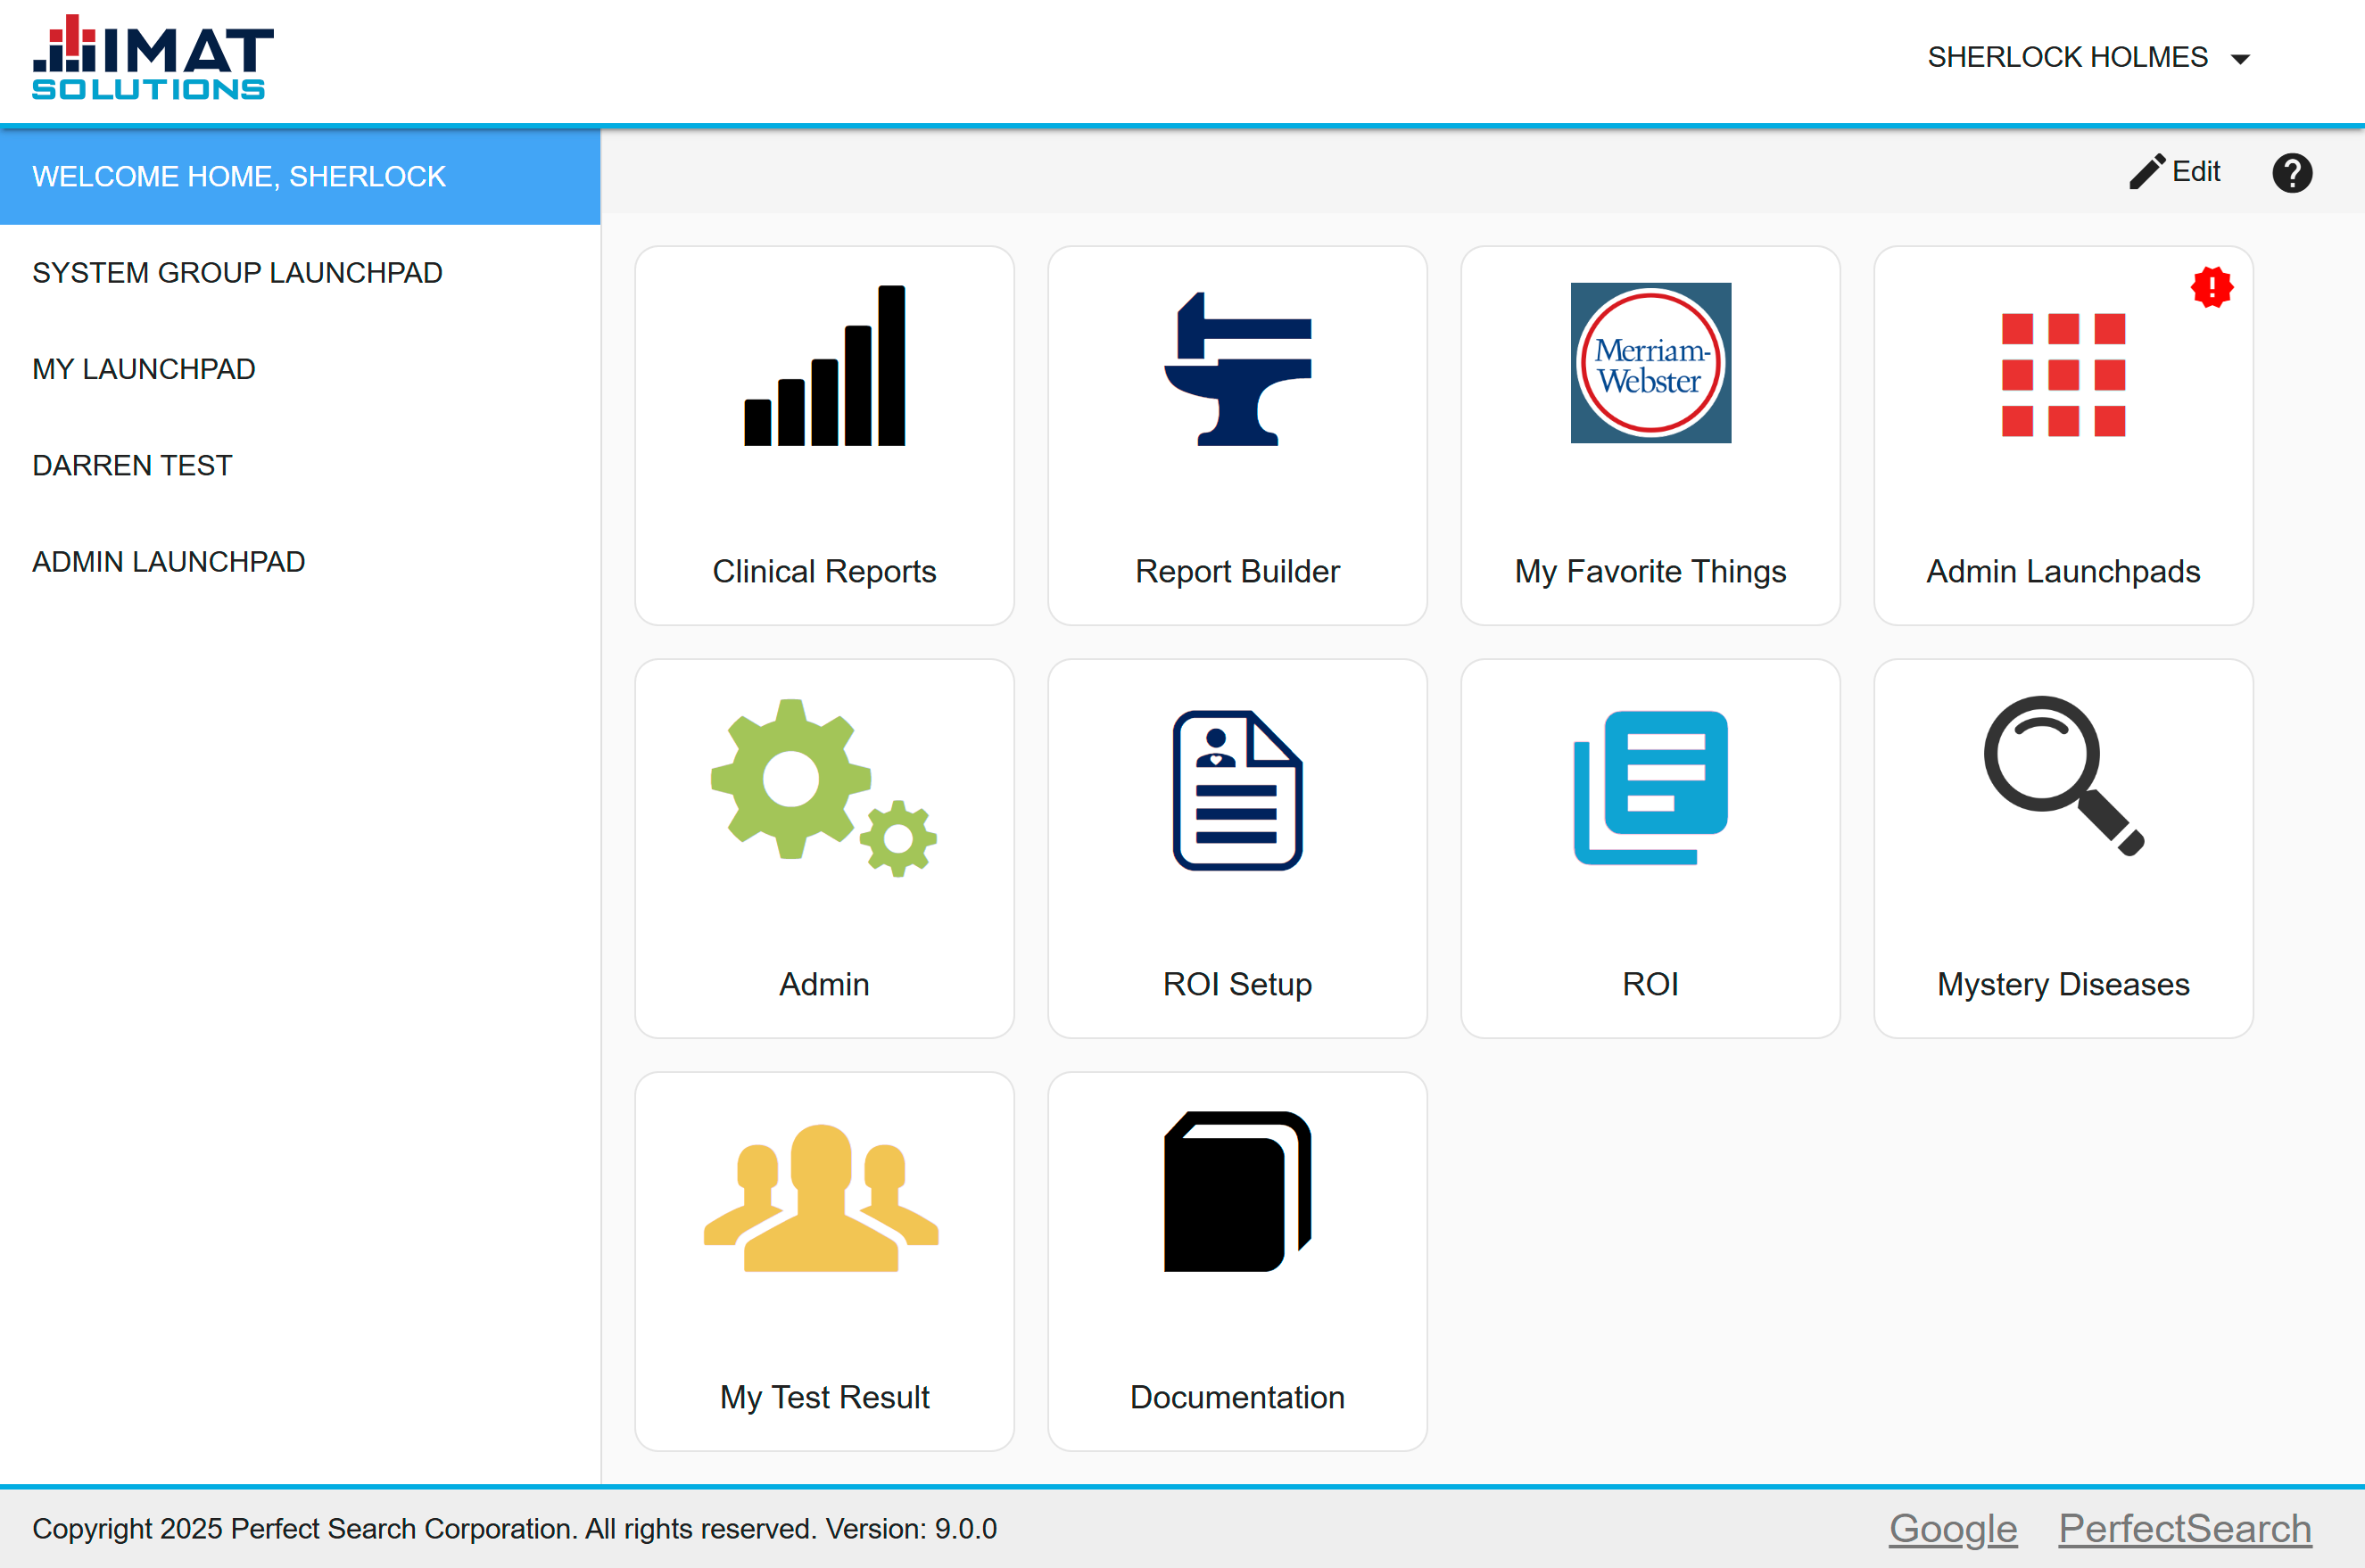
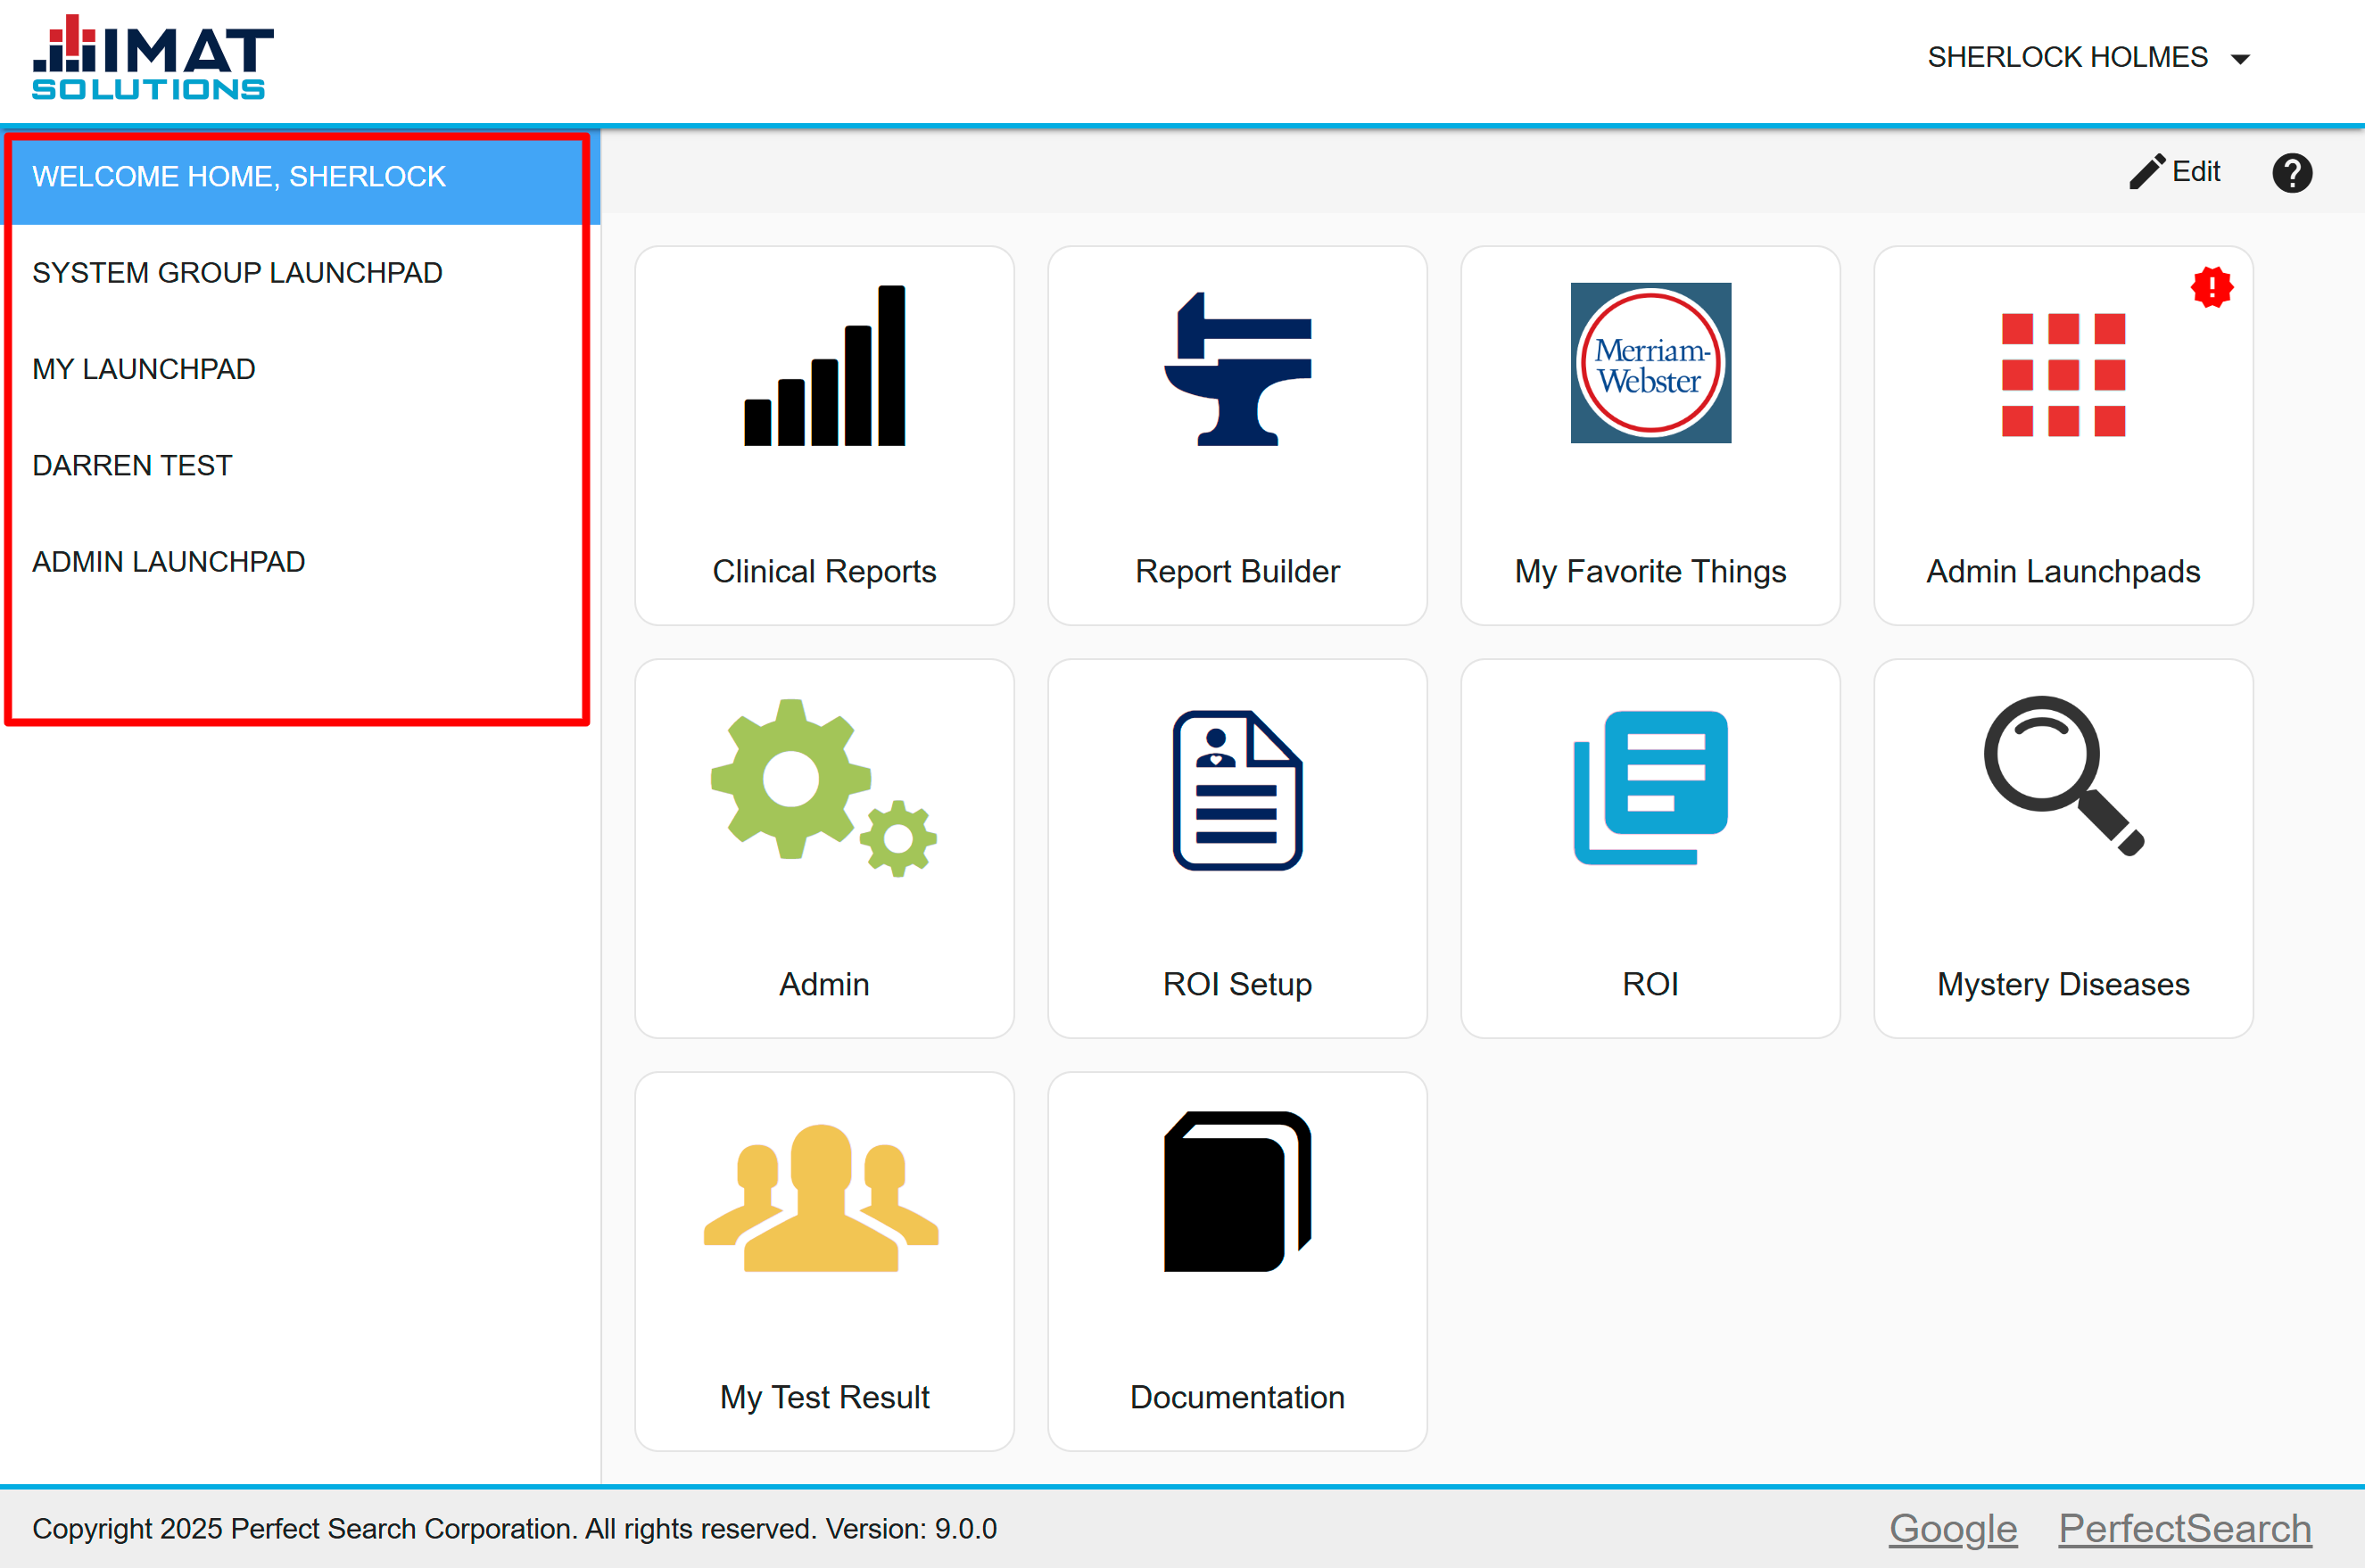
The IMAT Solutions Launchpad acts as the home page and launch page to access links to approved IMAT tools. The view can be customized to suit the user's needs. Each tile provides easy access to the data or tasks.
 Click on image to zoom
Tiles
Tiles are customizable sections of the launchpad that can be configured to open reports, results, Clinical Reports, custom web pages and more. By default the ability to edit a launchpad is turned off. Contact your administrator for rights to edit your individual launchpad.
Add a Tile
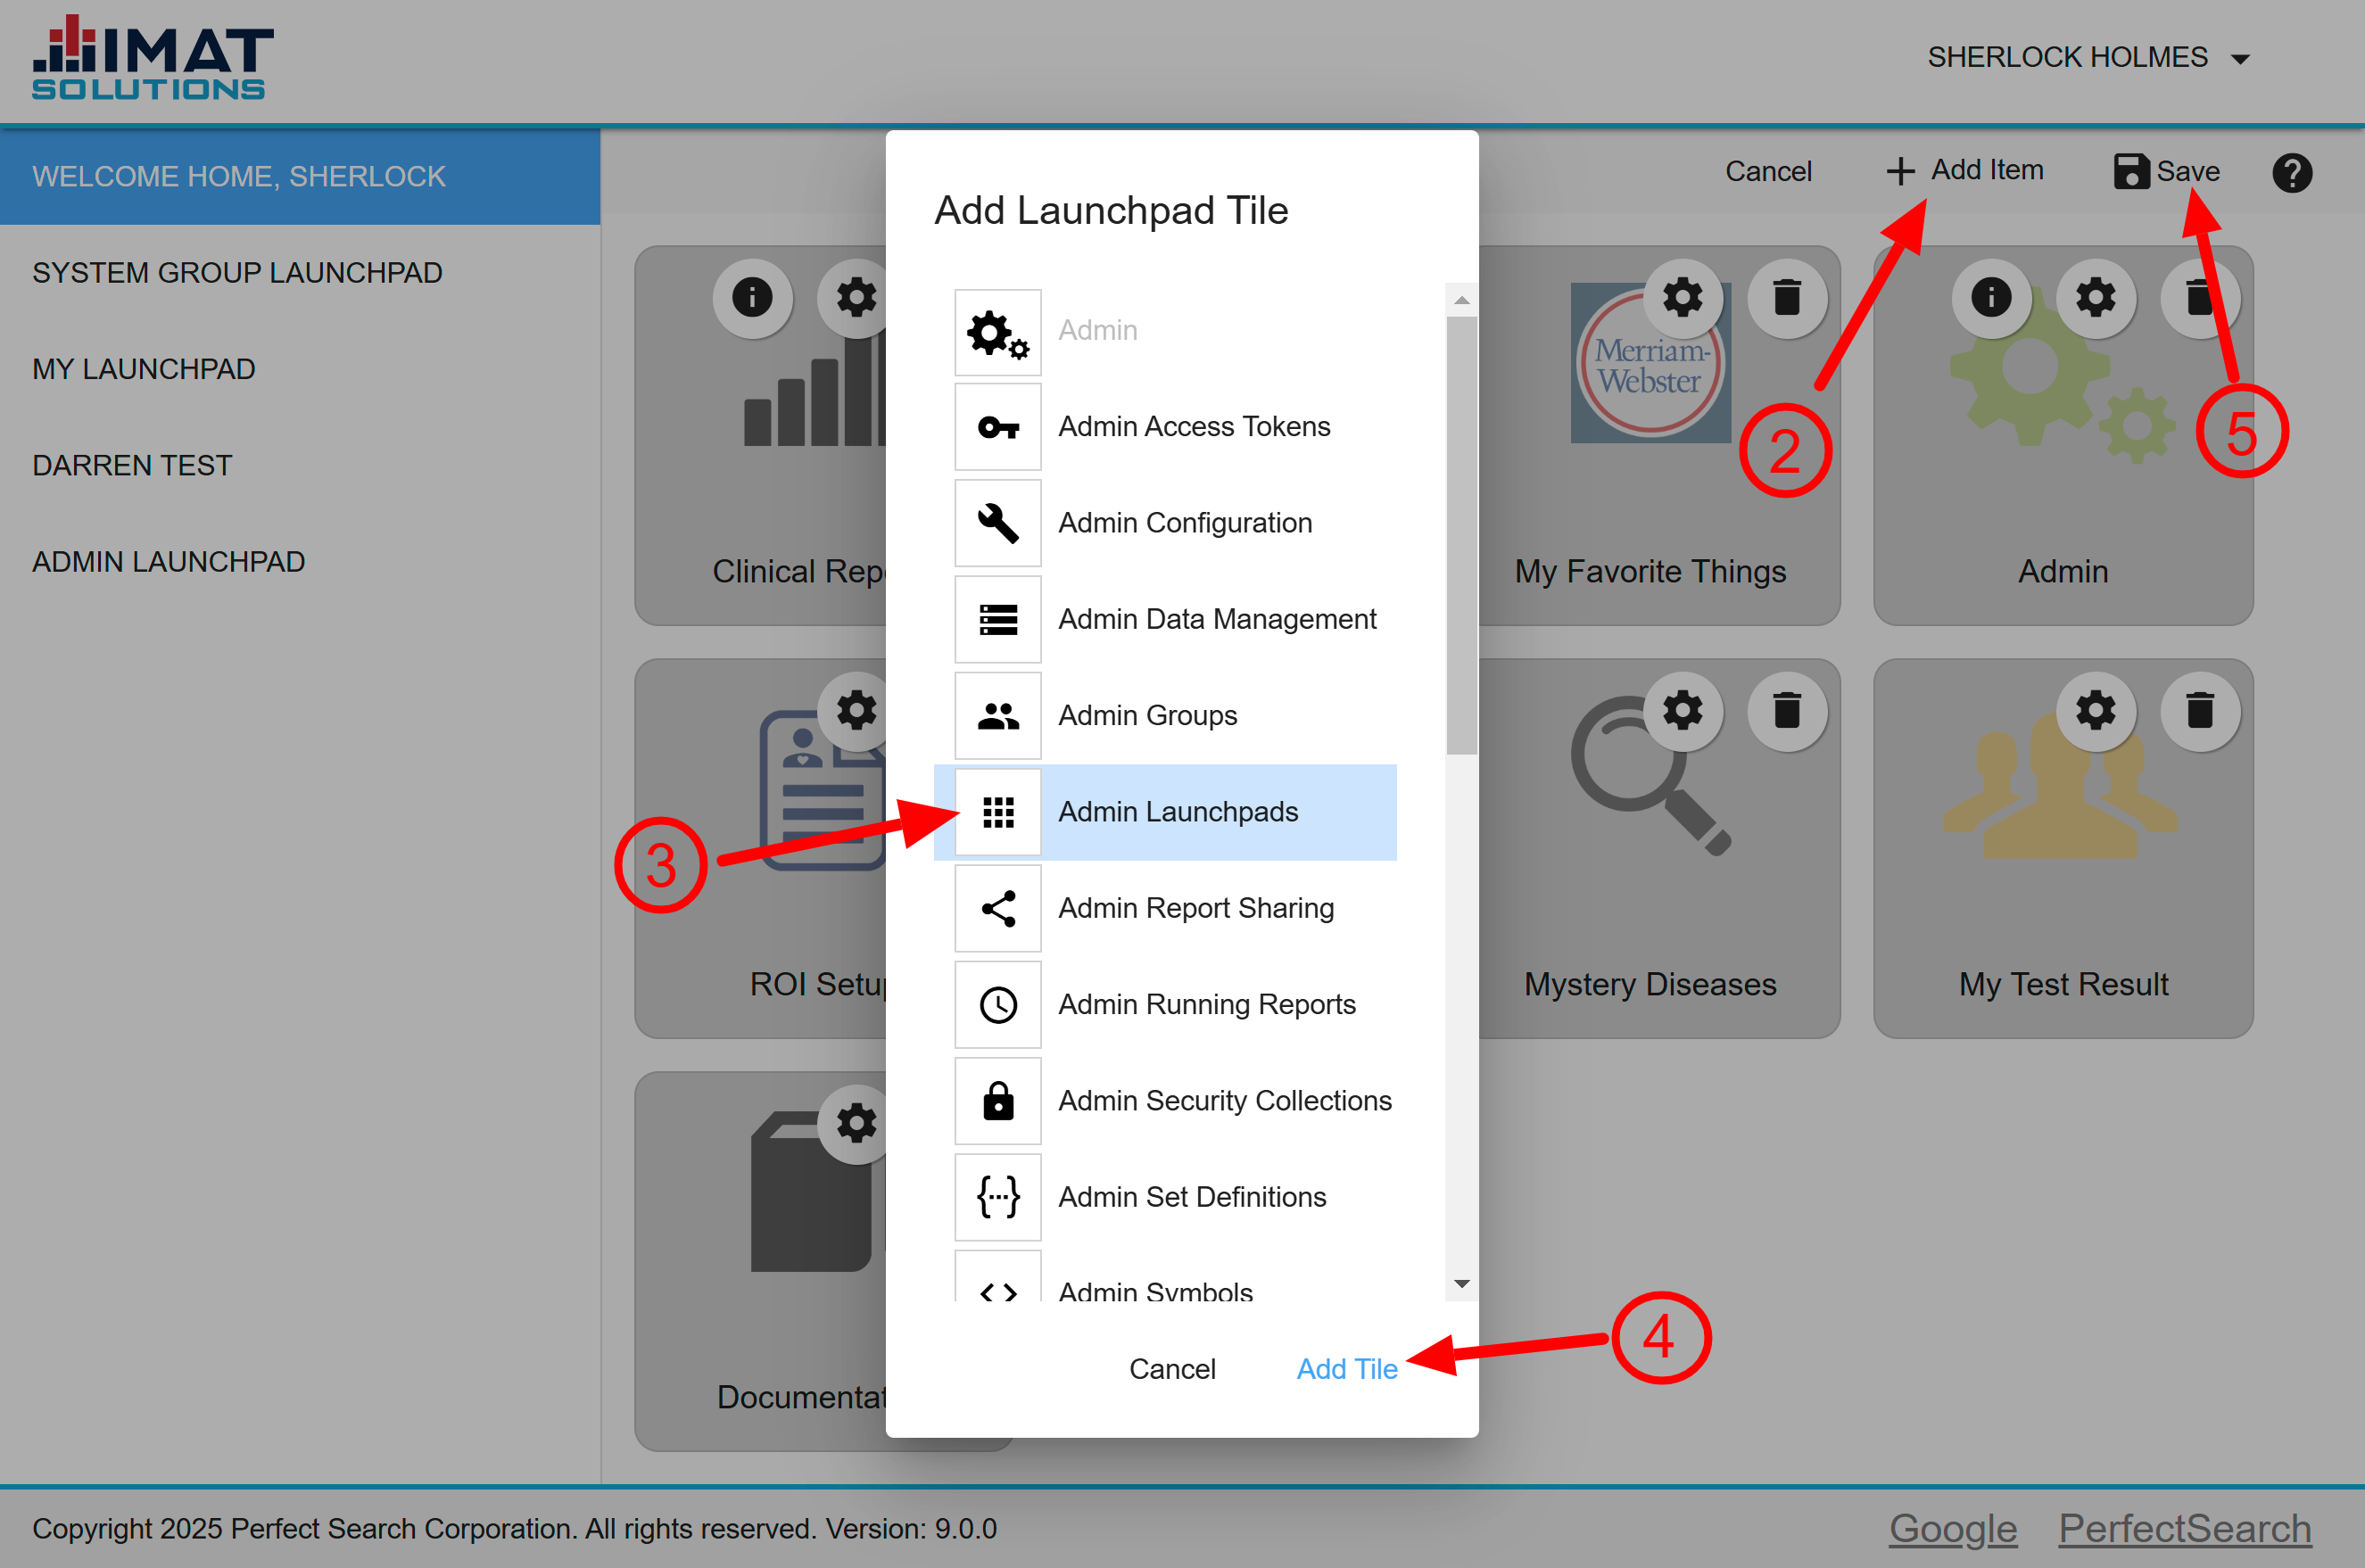
Those with the correct permissions may add tiles. To do so, follow the steps below:
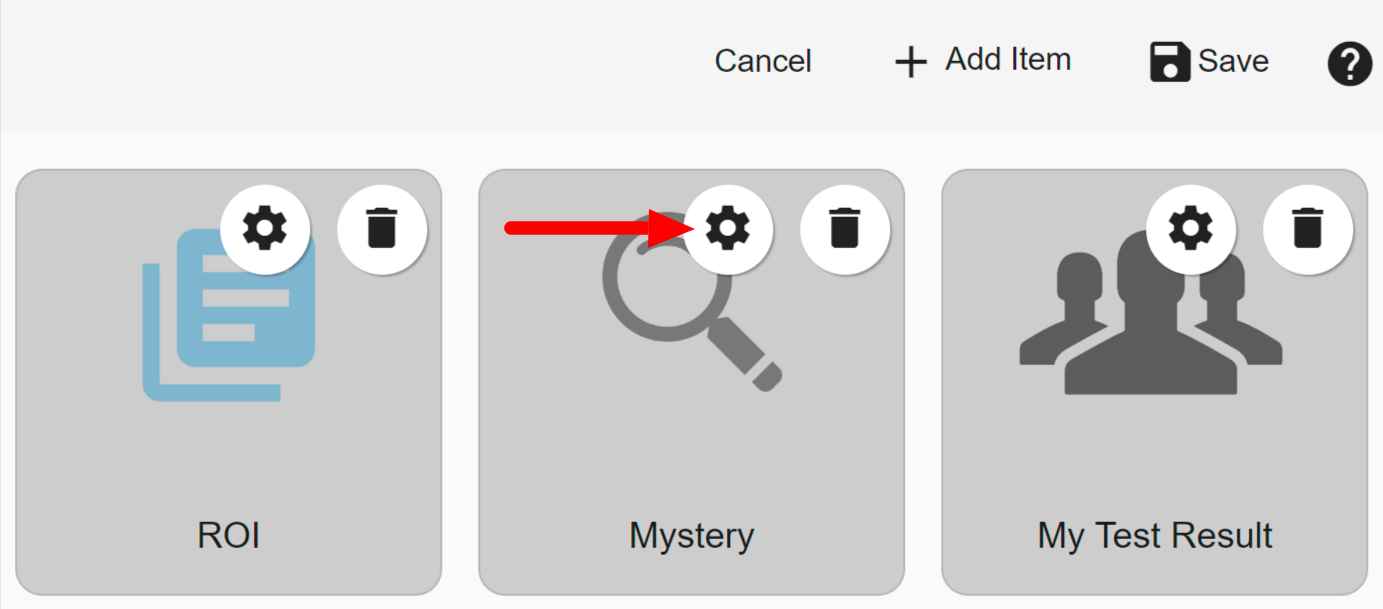
- Click Edit found in the top right corner of your launchpad.
- Click Add Item.
- Select the type of tile desired.
- Click Add Tile.
- Click Save when done adding tiles. No changes are permanent until this button is clicked.
Add a Saved Report Tile
A saved report tile runs a report that has been previously saved in the Report Builder.
- Click Edit from the launchpad.
- Select My Report from the Add Item list.
- Click Add Tile to close the tile list and add the tile to the launchpad.
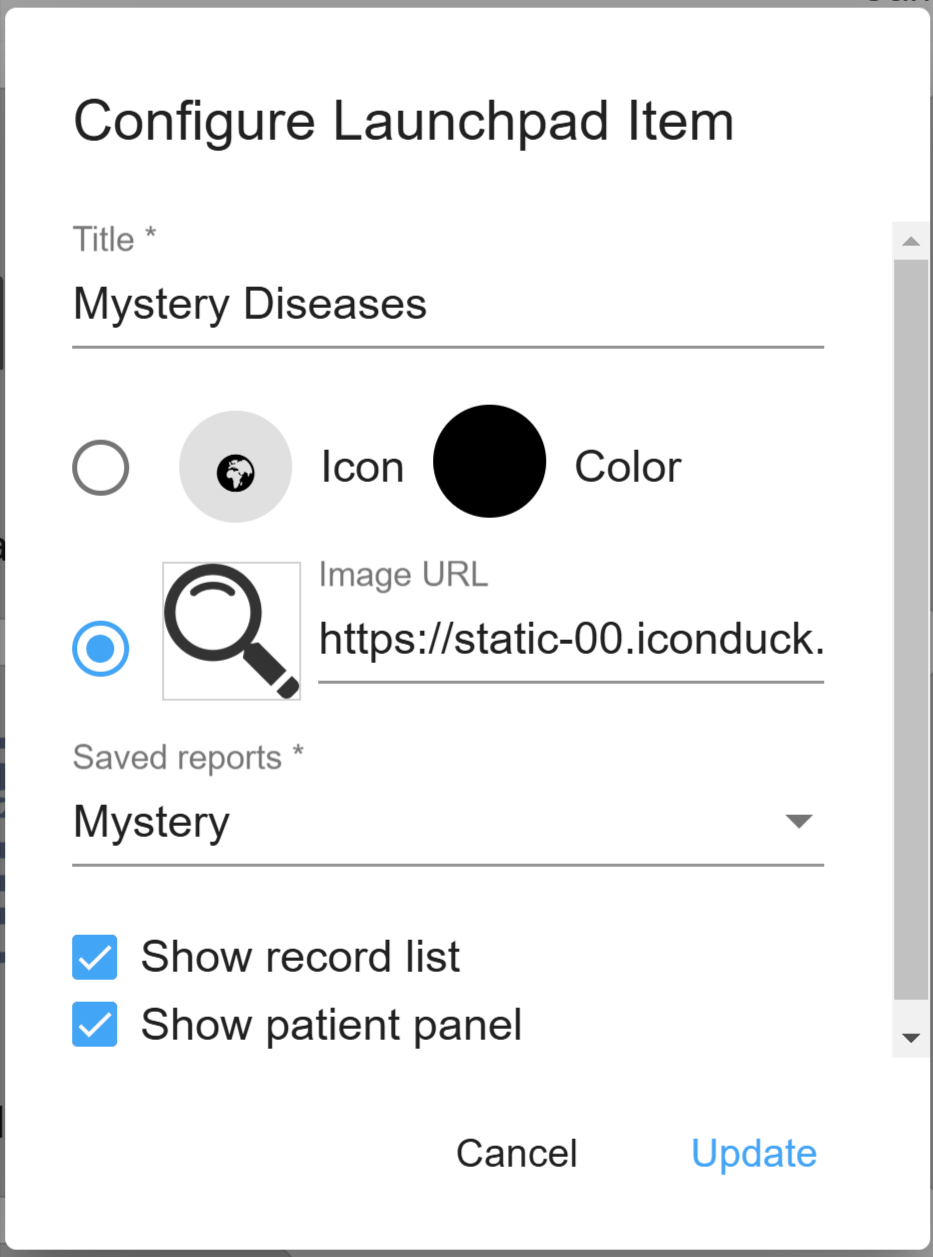
- Click found on the tile.
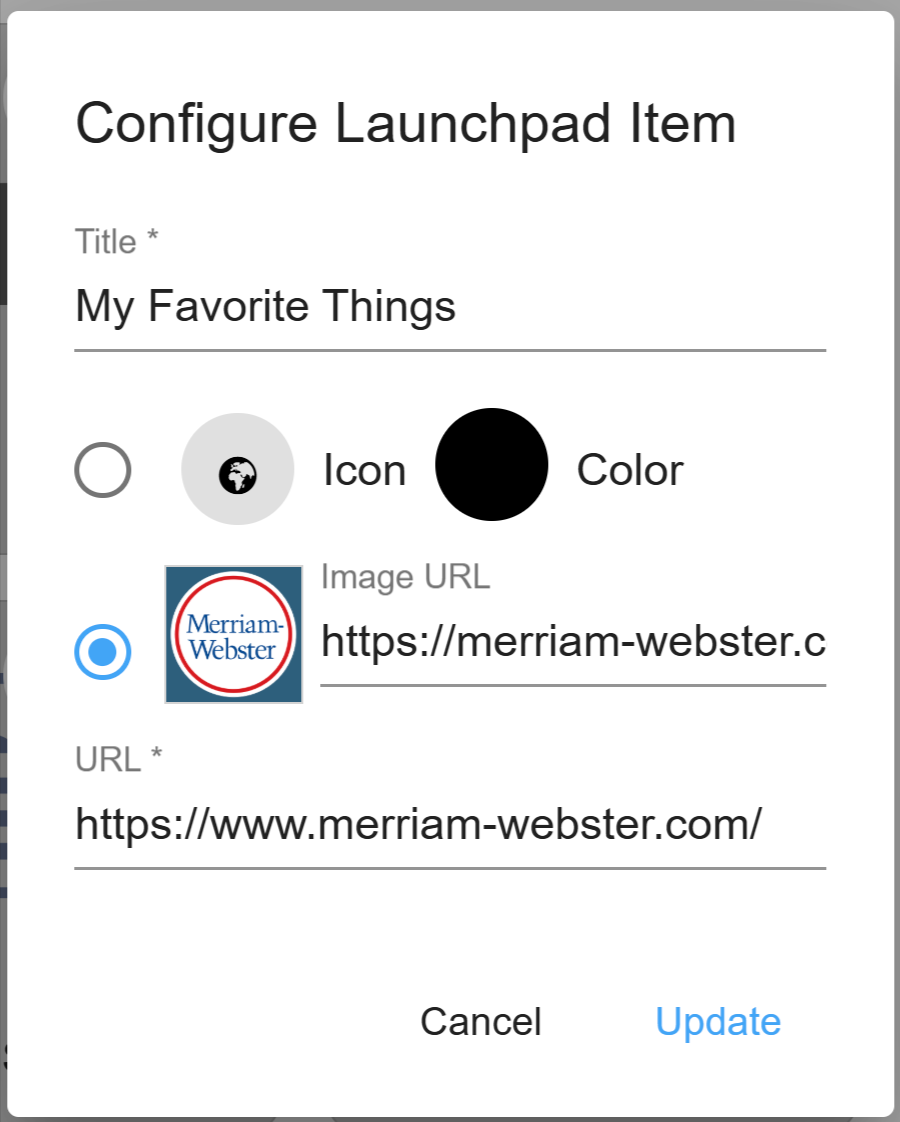
- Enter a title in the Title text field. This can be the report title or another title, but it is best to give it a title that reflects the report content.
- To select a custom Icon, select an icon from those provided.
- To choose a custom Color, select a color from the swatches provided.
- To insert a Image URL, copy and paste an image URL from another website. Adding an image URL is not required.
- Choose the desired report from the Saved Reports drop-down list.
- If desired, check the Show record list check box to show a grid of individual results summary. Then check the Show patient panel check box if the patient panel should be visible for this report. The patient panel allows the user to select an individual result and view details for that record.
- Click Update.
- Click Save when done adding tiles. This closes the edit mode and returns you to the launchpad. No changes are final until this button is clicked.
Add a Saved Result Tile
A saved result tile displays the results of a previously run report. Make sure to export the results when running the report.
- Click Edit from the launchpad.
- Select My Result from the Add Item list.
- Click Add Tile to close the tile list and add the tile to the launchpad.
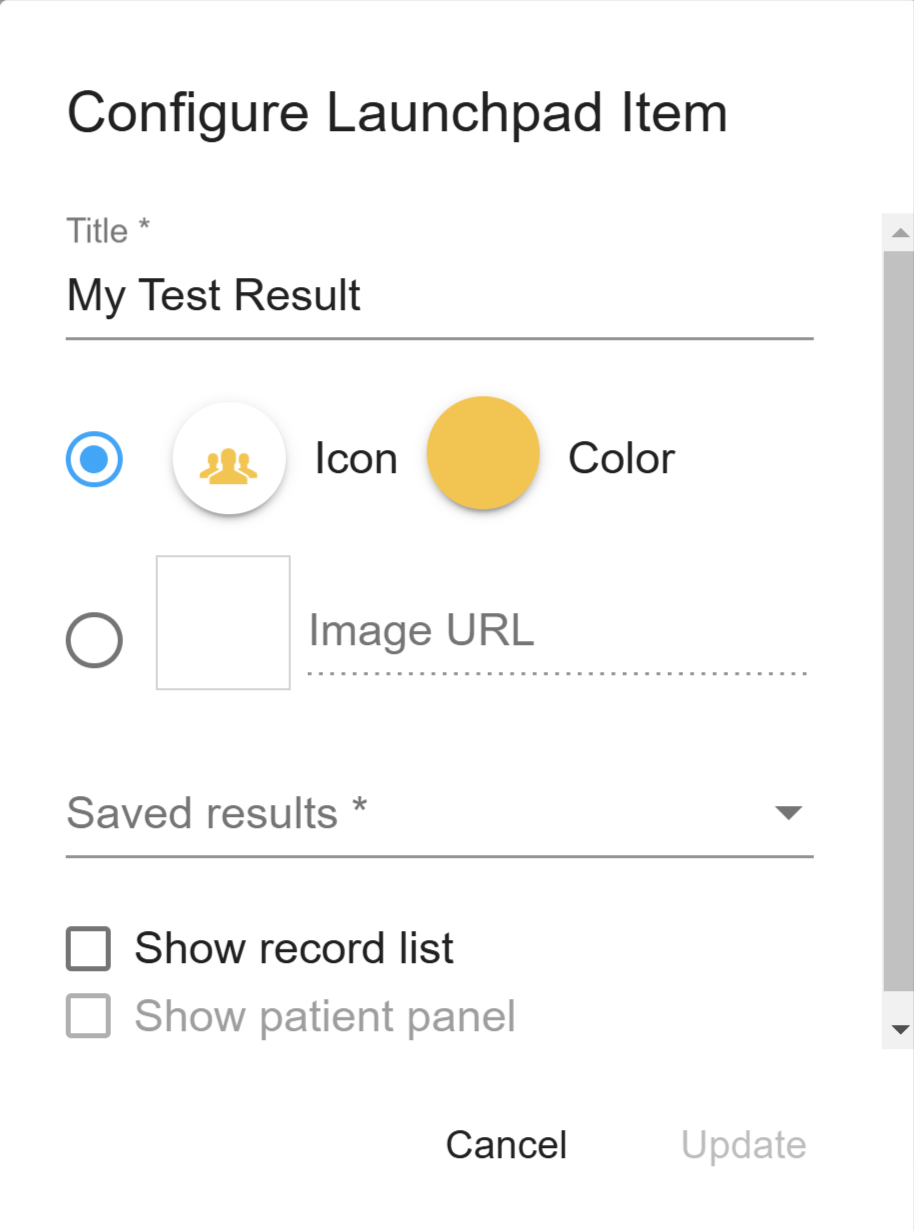
- Click found on the tile.
- Enter a title in the Title text field. This can be the result title or another title, but it is best to give it a title that reflects the result content.
- To select a custom Icon, select an icon from those provided.
- To choose a custom Color, select a color from the swatches provided.
- To insert a Image URL, copy and paste an image URL from another website. Adding an image URL is not required.
- Choose the desired result from the Saved Results drop-down list.
- If desired, check the Show record list check box to display a grid of individual results summary. Then check the Show patient panel check box if the patient panel should be visible from this result. The patient panel allows the user to click on an individual result and view details for that record.
- Click Update.
- Click Save when done adding tiles. This closes the edit mode and returns you to the launchpad. No changes are final until this button is clicked.
Add a Link Tile
A link tile provides a link to any site desired. If there is a website that is continually used as a reference site, it may be useful to create a link on the user's launchpad that directly links to that site. To set up a link tile, follow these steps:
- Click Edit from the launchpad.
- Select the Link tile from the Add Item list.
- Click Add Tile to close the tile list and add the tile to the launchpad.
- Click found on the tile.
- Enter a Title in the text field. This may be any title desired, but it is best to reflect the linked site.
- To select a custom Icon, choose an icon from those provided.
- To choose a custom Color, select a color from the swatches provided.
- To insert a Image URL, copy and paste an image URL from another website. Adding an image URL is not required.
- Enter a URL, in the URL text field. This must include either https:// or http://.
- Click Update.
- Click Save. This closes the edit mode and returns you to the launchpad. No changes are final until this button is clicked.
Add a Preconfigured Tile
Some tiles come with our IMAT tools: VHR, Queries, Admin, etc. When adding these tiles, no additional configuration is required. However, you can configure the title and icon if you would like. To do so, enter edit mode and click the configure icon.
Edit a Tile
Editing allows for the editing, arranging, or deleting of tiles.
- Locate and click the Edit button found in the top right corner of the launchpad if not already in edit mode.
- Click on the gear in the top right corner of the tile.
- The settings page for the tile is displayed.
- Make the necessary edits in the appropriate fields.
- Click Update.
- Click Save. This closes the edit mode and returns you to the launchpad. No changes are final until this button is clicked.
If there are questions on how to edit a specific field on the settings page, refer to the Adding a Tile section of the user guide.
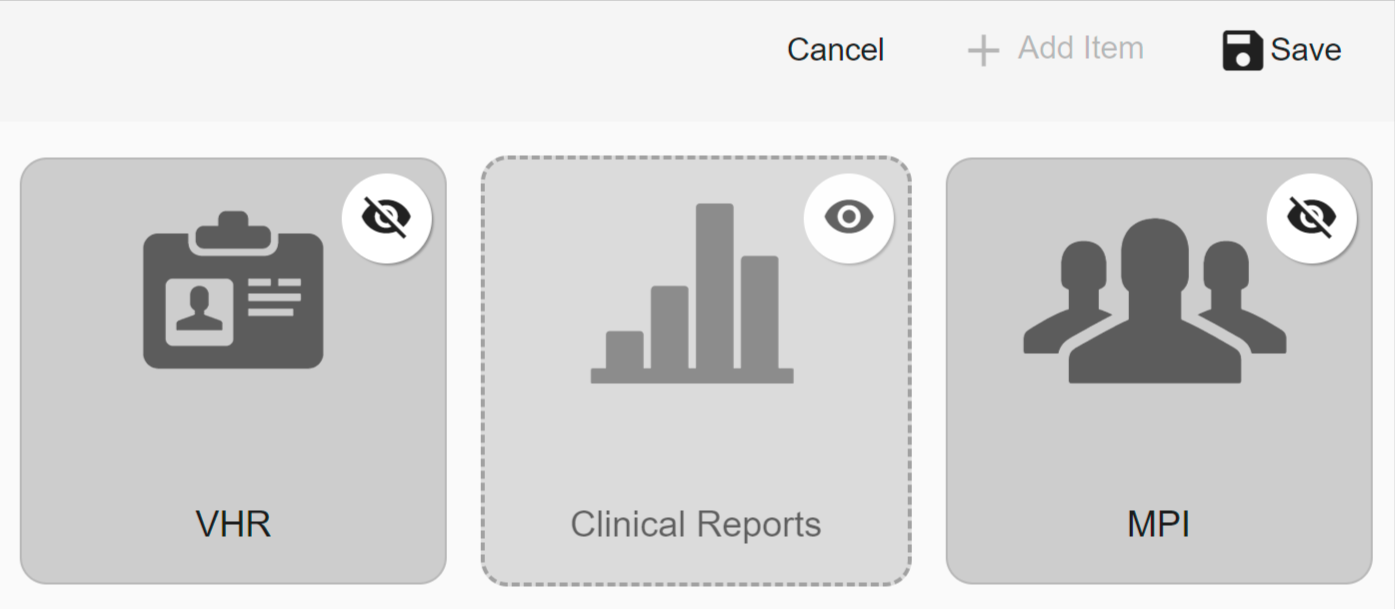
Hide a Tile
Some tiles may appear on multiple launchpads, with editing permissions also comes the ability to hide duplicate tiles. If would like to hide the tiles on the group launchpads, follow the steps below while in edit mode:
- Click on the group launchpad.
- Locate the tile you want to hide.
- Click .
- Click Save. This closes the edit mode and returns you to the launchpad. No changes are final until this button is clicked.
Hidden tiles are slightly lighter and have a dashed line around them. To display a previously hidden tile, click .
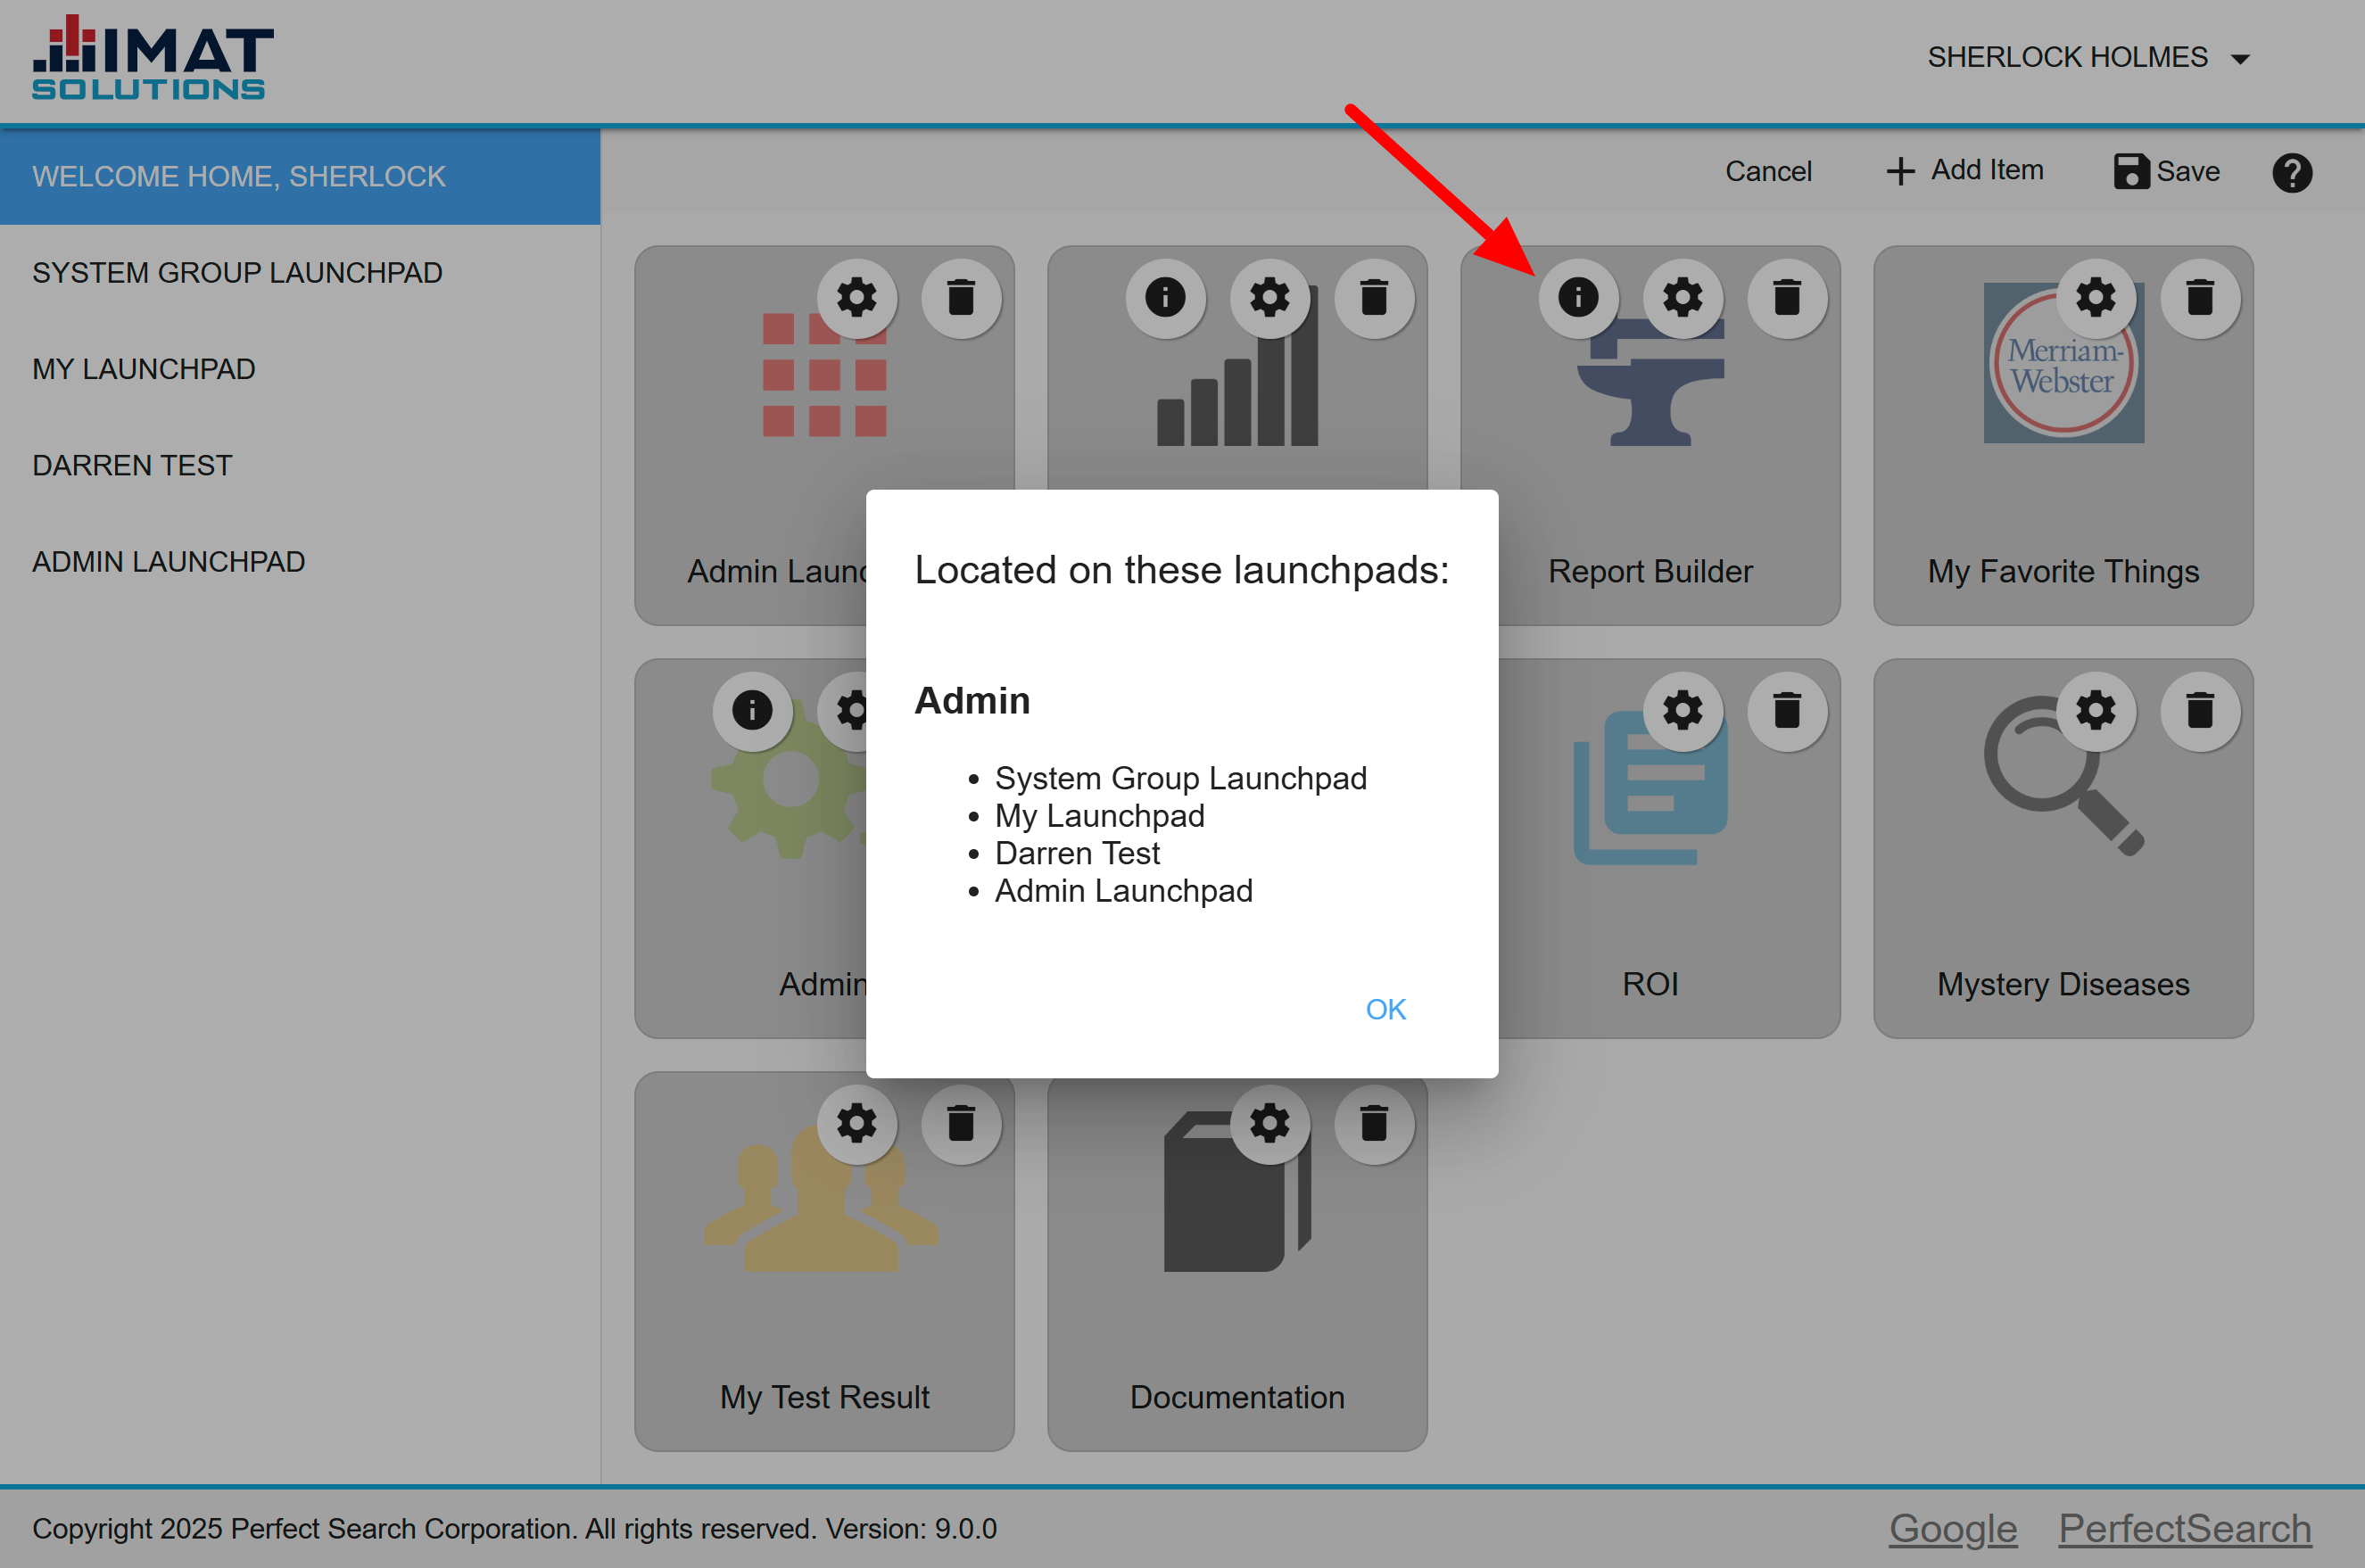
View All Launchpads for Tile
If a tile appears on multiple launchpads available to the user, a appears on the tile while in edit mode on your personal launchpad. Click on the icon to reveal on which launchpads the tile is available. This information can be used to determine if the user wants to hide tiles on the launchpad.
Arrange Tiles
To arrange tiles on the launchpad, follow the guidelines below:
- Locate and click the Edit button on the launchpad.
- Drag and drop the icon to the desired location. All tiles shift to the right or left when icons are moved.
- Repeat Step 2 until the edits are complete.
- Click Save in the top right corner if no more edits are desired.
Cancel returns you to the launchpad without saving your changes.
You can move tiles around on group launchpads assigned to you. These changes only show on your personal account and do not affect the underlying configuration created by the administrator.
Delete a Tile
To delete a tile, click the garbage can found in the top right corner of the tile.
View All Assigned Launchpads
If a group launchpad or launchpads have been assigned by an administrator, each launchpad can be viewed in the left panel. Each launchpad is labeled with the group's launchpad name as assigned by the administrator.
Navigate among launchpads by clicking on the launchpad name found to left of the screen. By default, the personal launchpad is displayed if the user has one. If not, a group launchpad is displayed upon login.
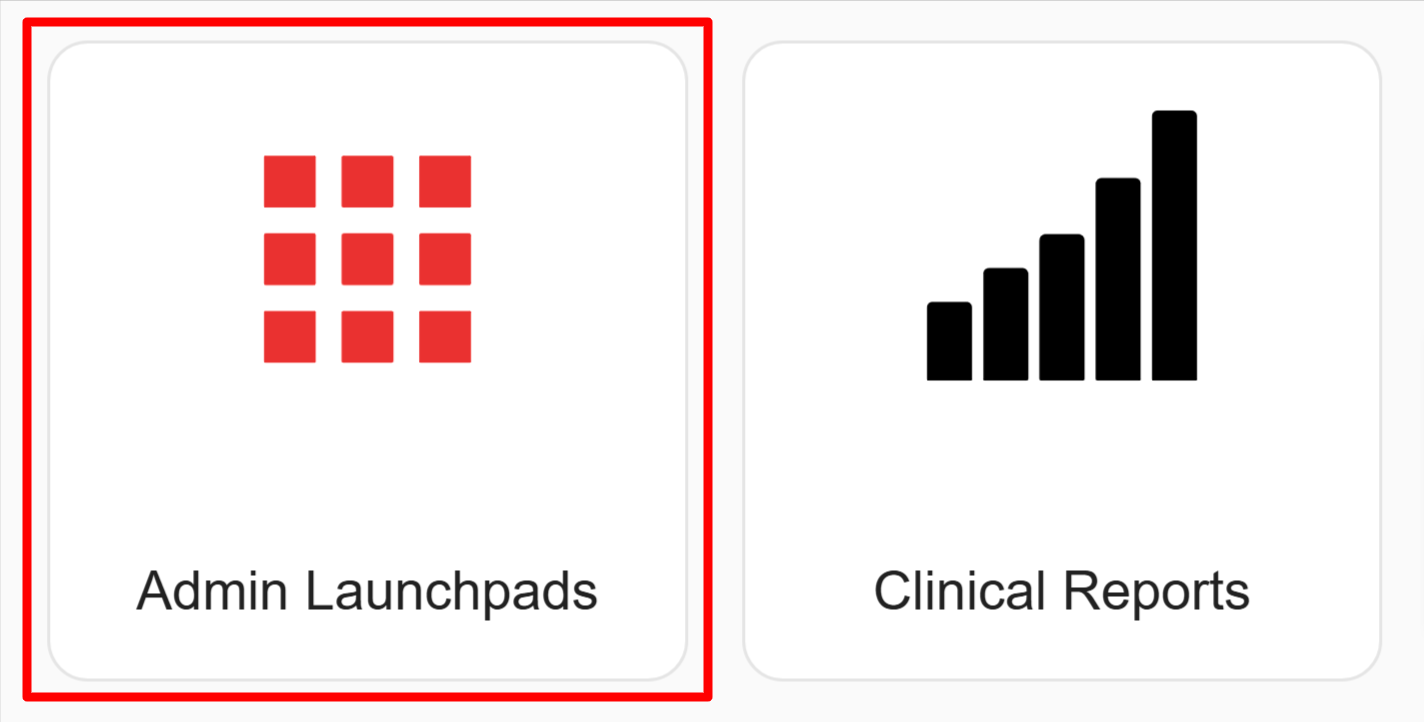
Access Admin Launchpads
From the Admin tile, administrators have the ability to create, edit, and delete users' and groups' launchpads and tiles. The administrator can also view others' launchpads and modify the users' editing permissions. There is also an Admin Launchpads tile available when adding new tiles.
System launchpads can be edited, created, viewed and deleted just as user and group launchpads.
See the Launchpads documentation for more information.