The indexer receives information from the fed documents and places it in the search stores. It is responsible for identifying each search record and merging that record into existing search stores. When receiving records, the indexer stores records in a temporary cache before placing them in the search stores. Depending on the settings in the SearchServer configuration files, the indexer commits the records from the cache into the search store at defined time intervals, when the cache contains a specified number of records, or when the cache reaches a specified size.
Manage Stores
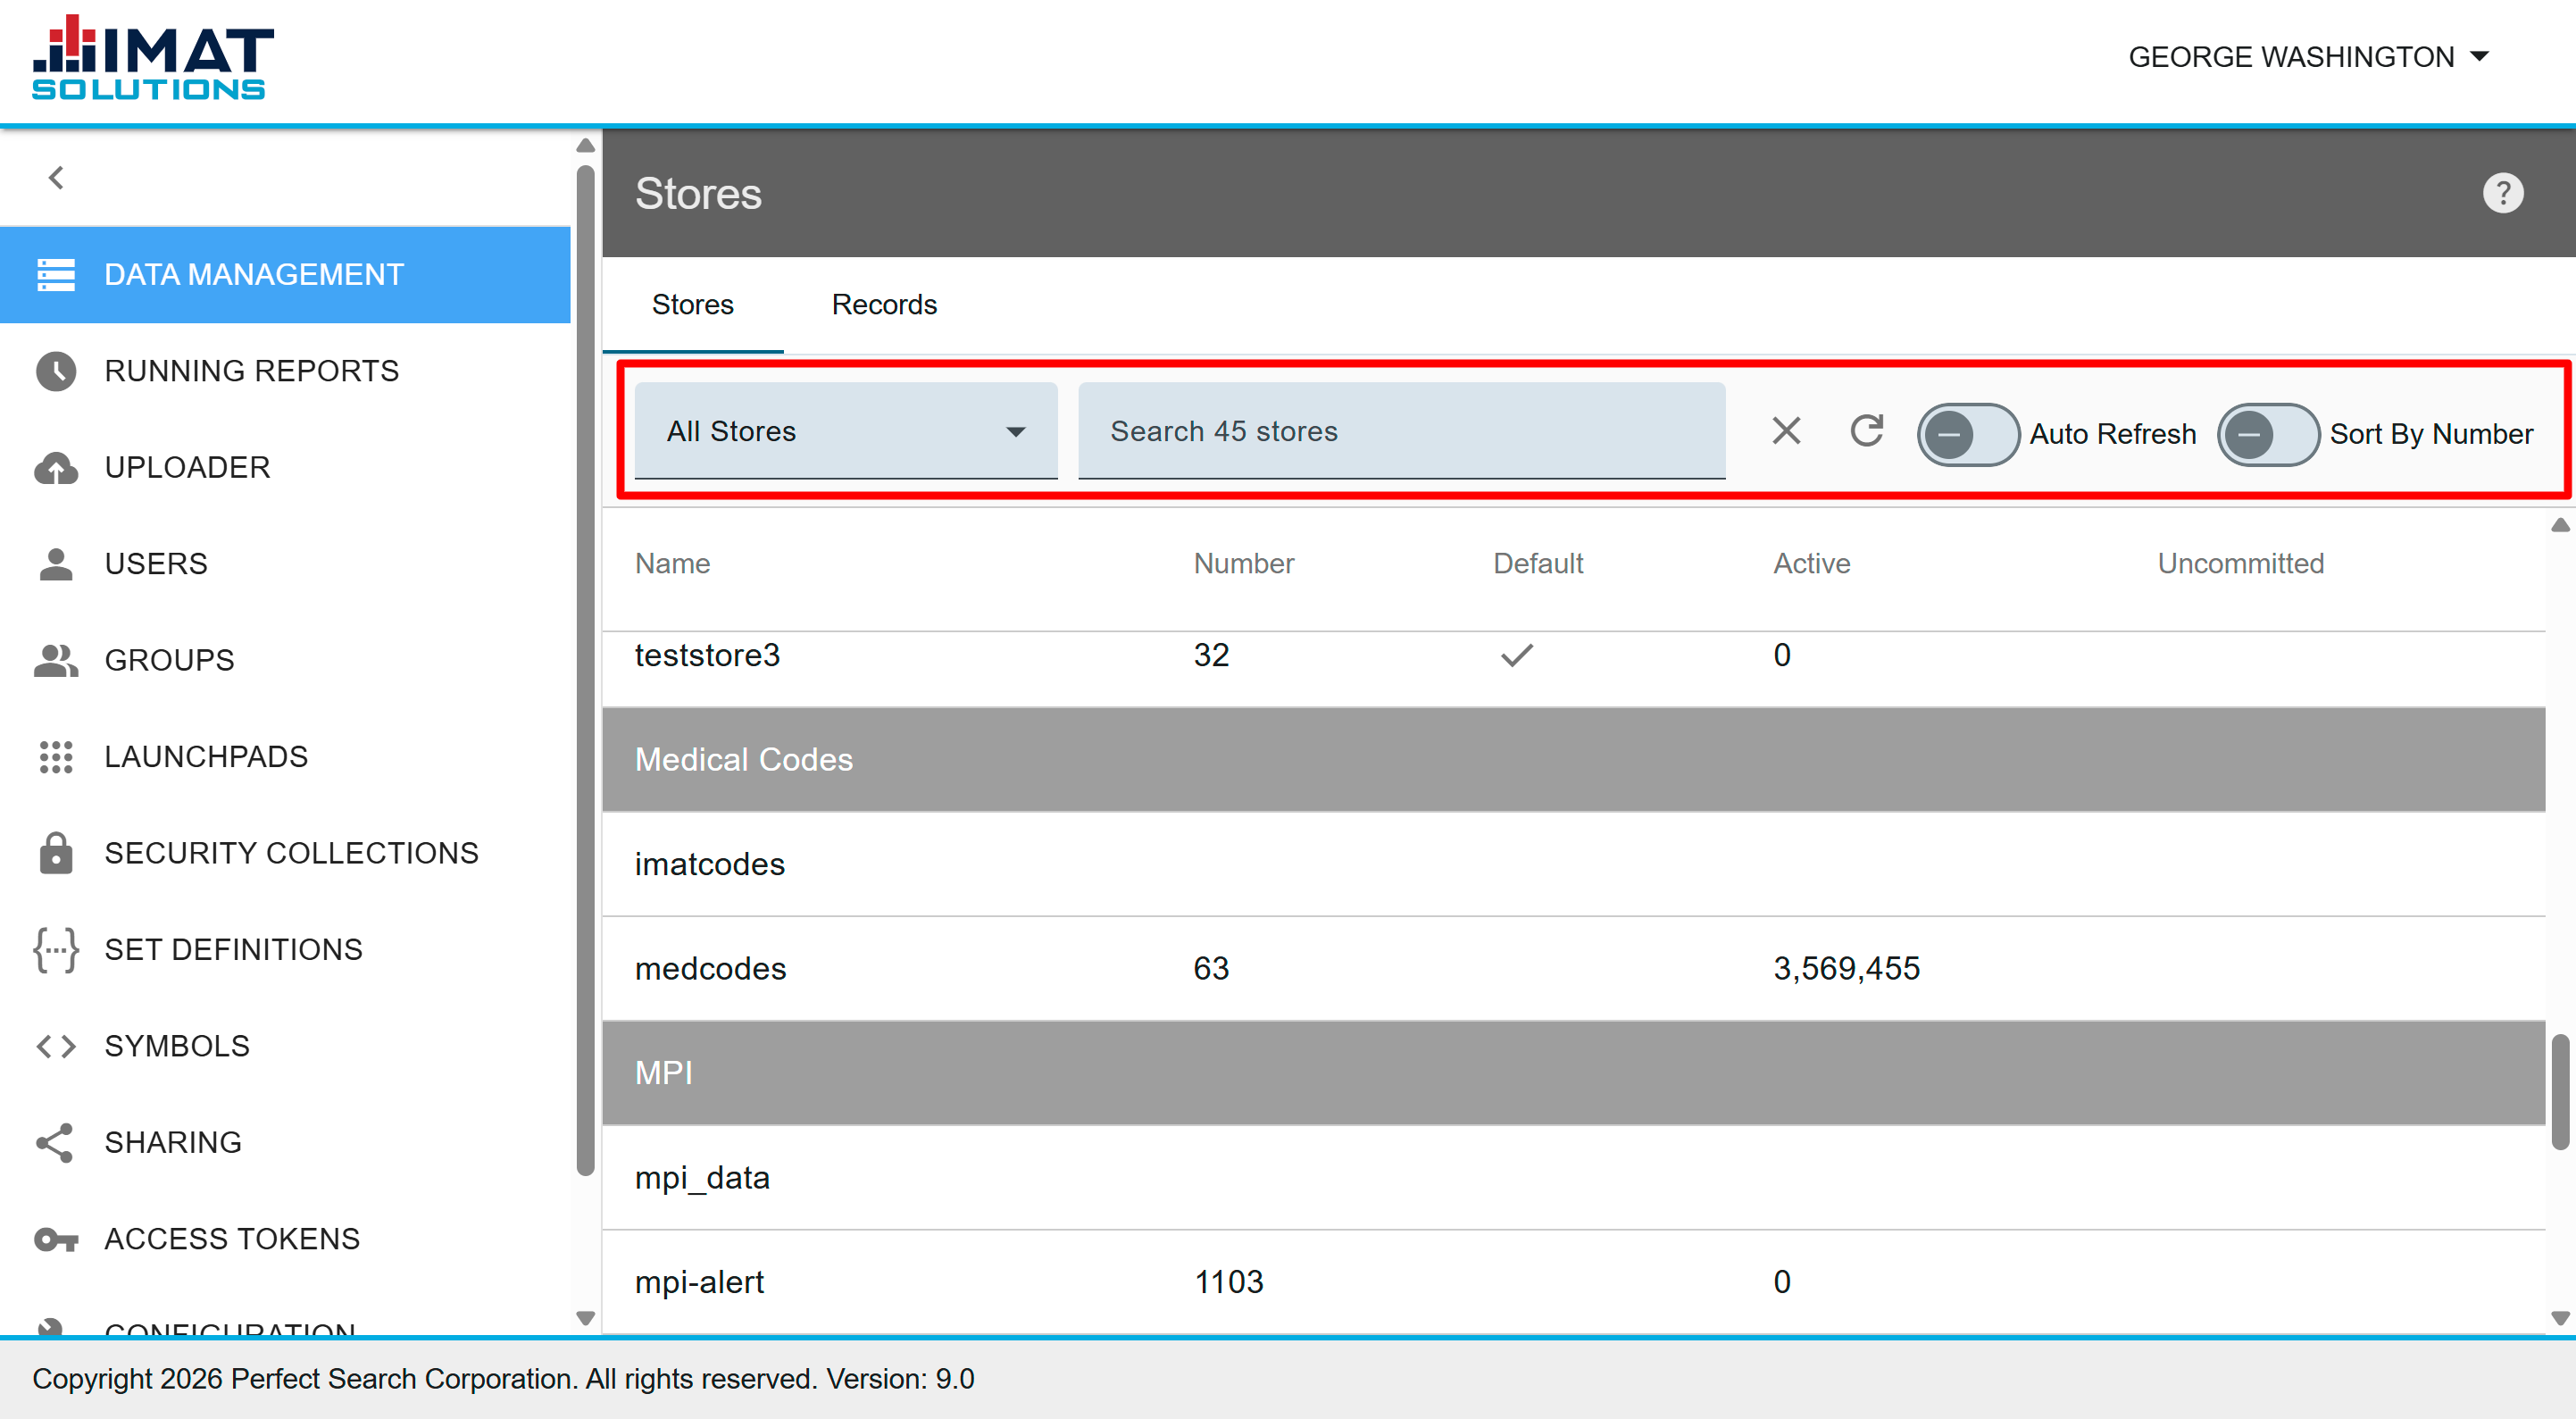
Use the Stores screen to delete data, make data immediately available, and find specific store or record information.
To search for a specific store:
- Select either All Stores or Uncommitted from the drop-down list provided.
- Begin entering the store name. As long as the letter or number combination appears anywhere in the store name or number, the store appears in the results list.
- Click to clear the search fields.
Click to refresh the store list as documents are being fed to get an accurate record count.
Choose to automatically refresh the stores as they feed into the server by changing the toggle from faded to dark, .png) . Leave Auto Refresh turned off if you do not need constant updates. (Note that if you are using a version before 9.x and Auto Refresh is toggled on, your account will not time out.)
. Leave Auto Refresh turned off if you do not need constant updates. (Note that if you are using a version before 9.x and Auto Refresh is toggled on, your account will not time out.)
By default, stores are sorted alphabetically; however, you can sort by store number by using the Sort by Number toggle. This is not available for releases previous to Version 9.
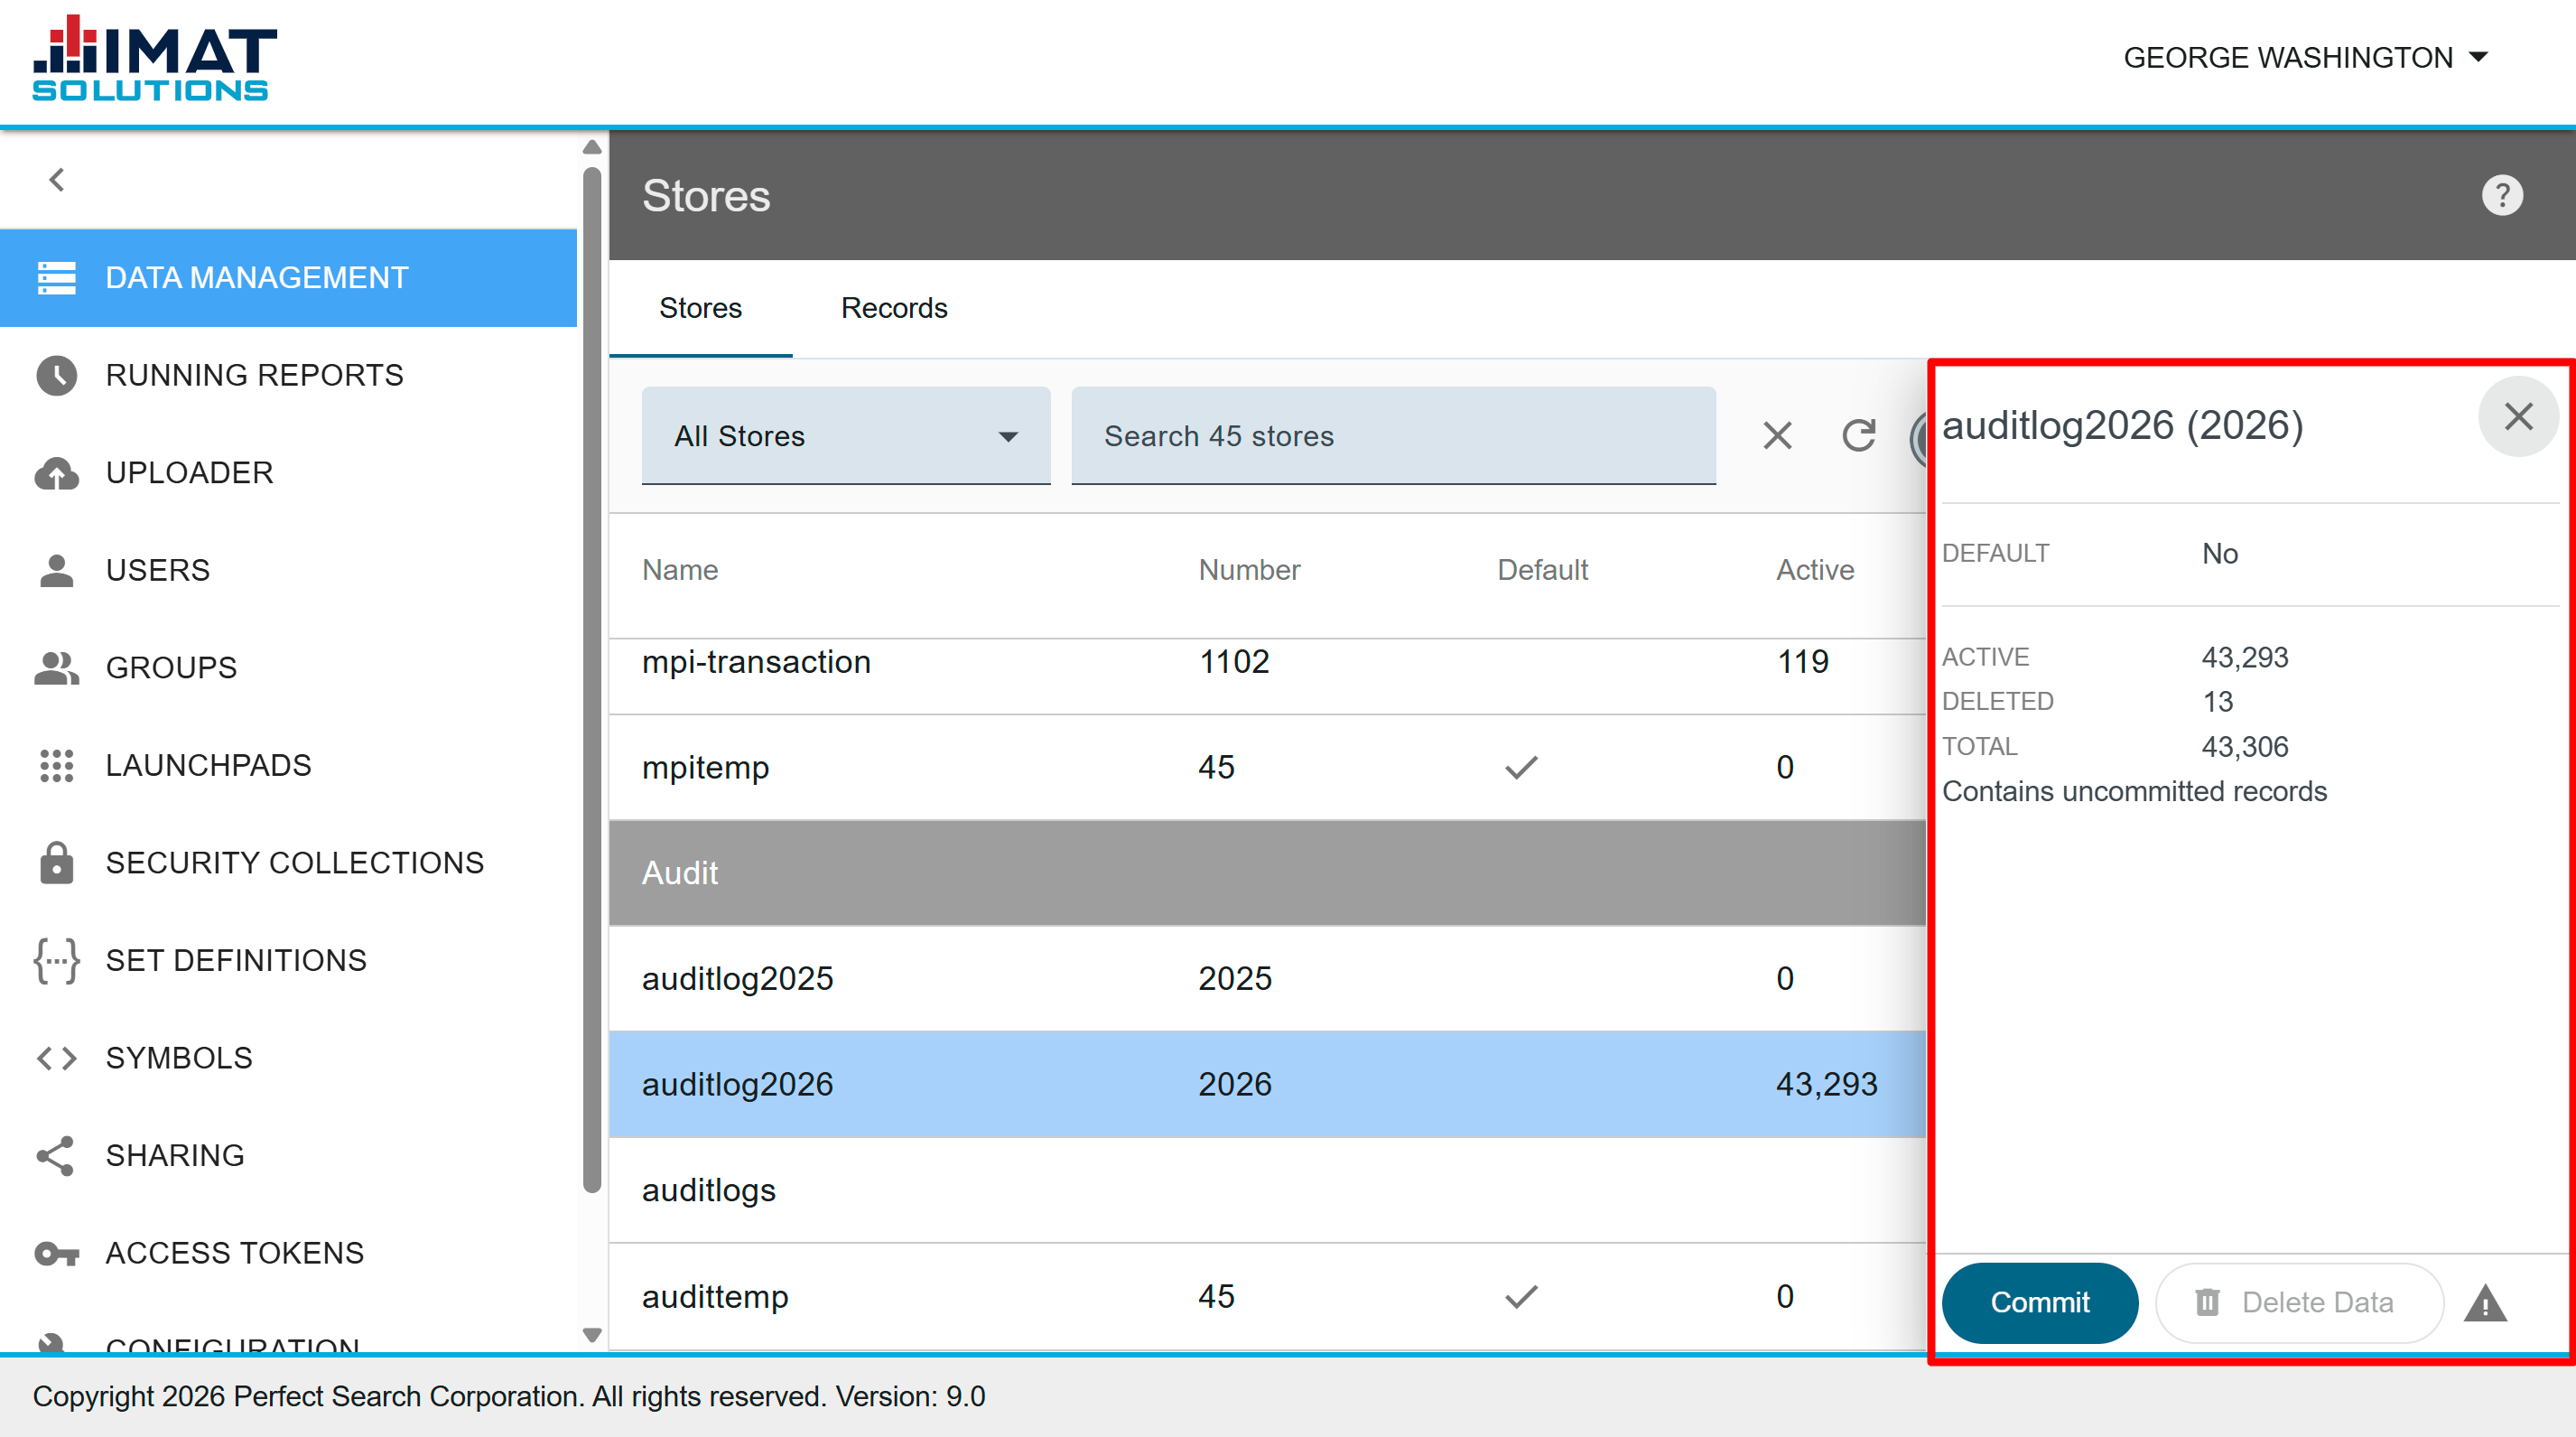
View Store Details
View the store details by clicking on the desired store. Store details include the number of active records, the number of deleted records, the total number of records, and if the store contains uncommitted records.
A store is considered a default store unless it is added to the configuration file's list of excluded stores.
TYPE: Store Group is the only information provided when viewing a store group.
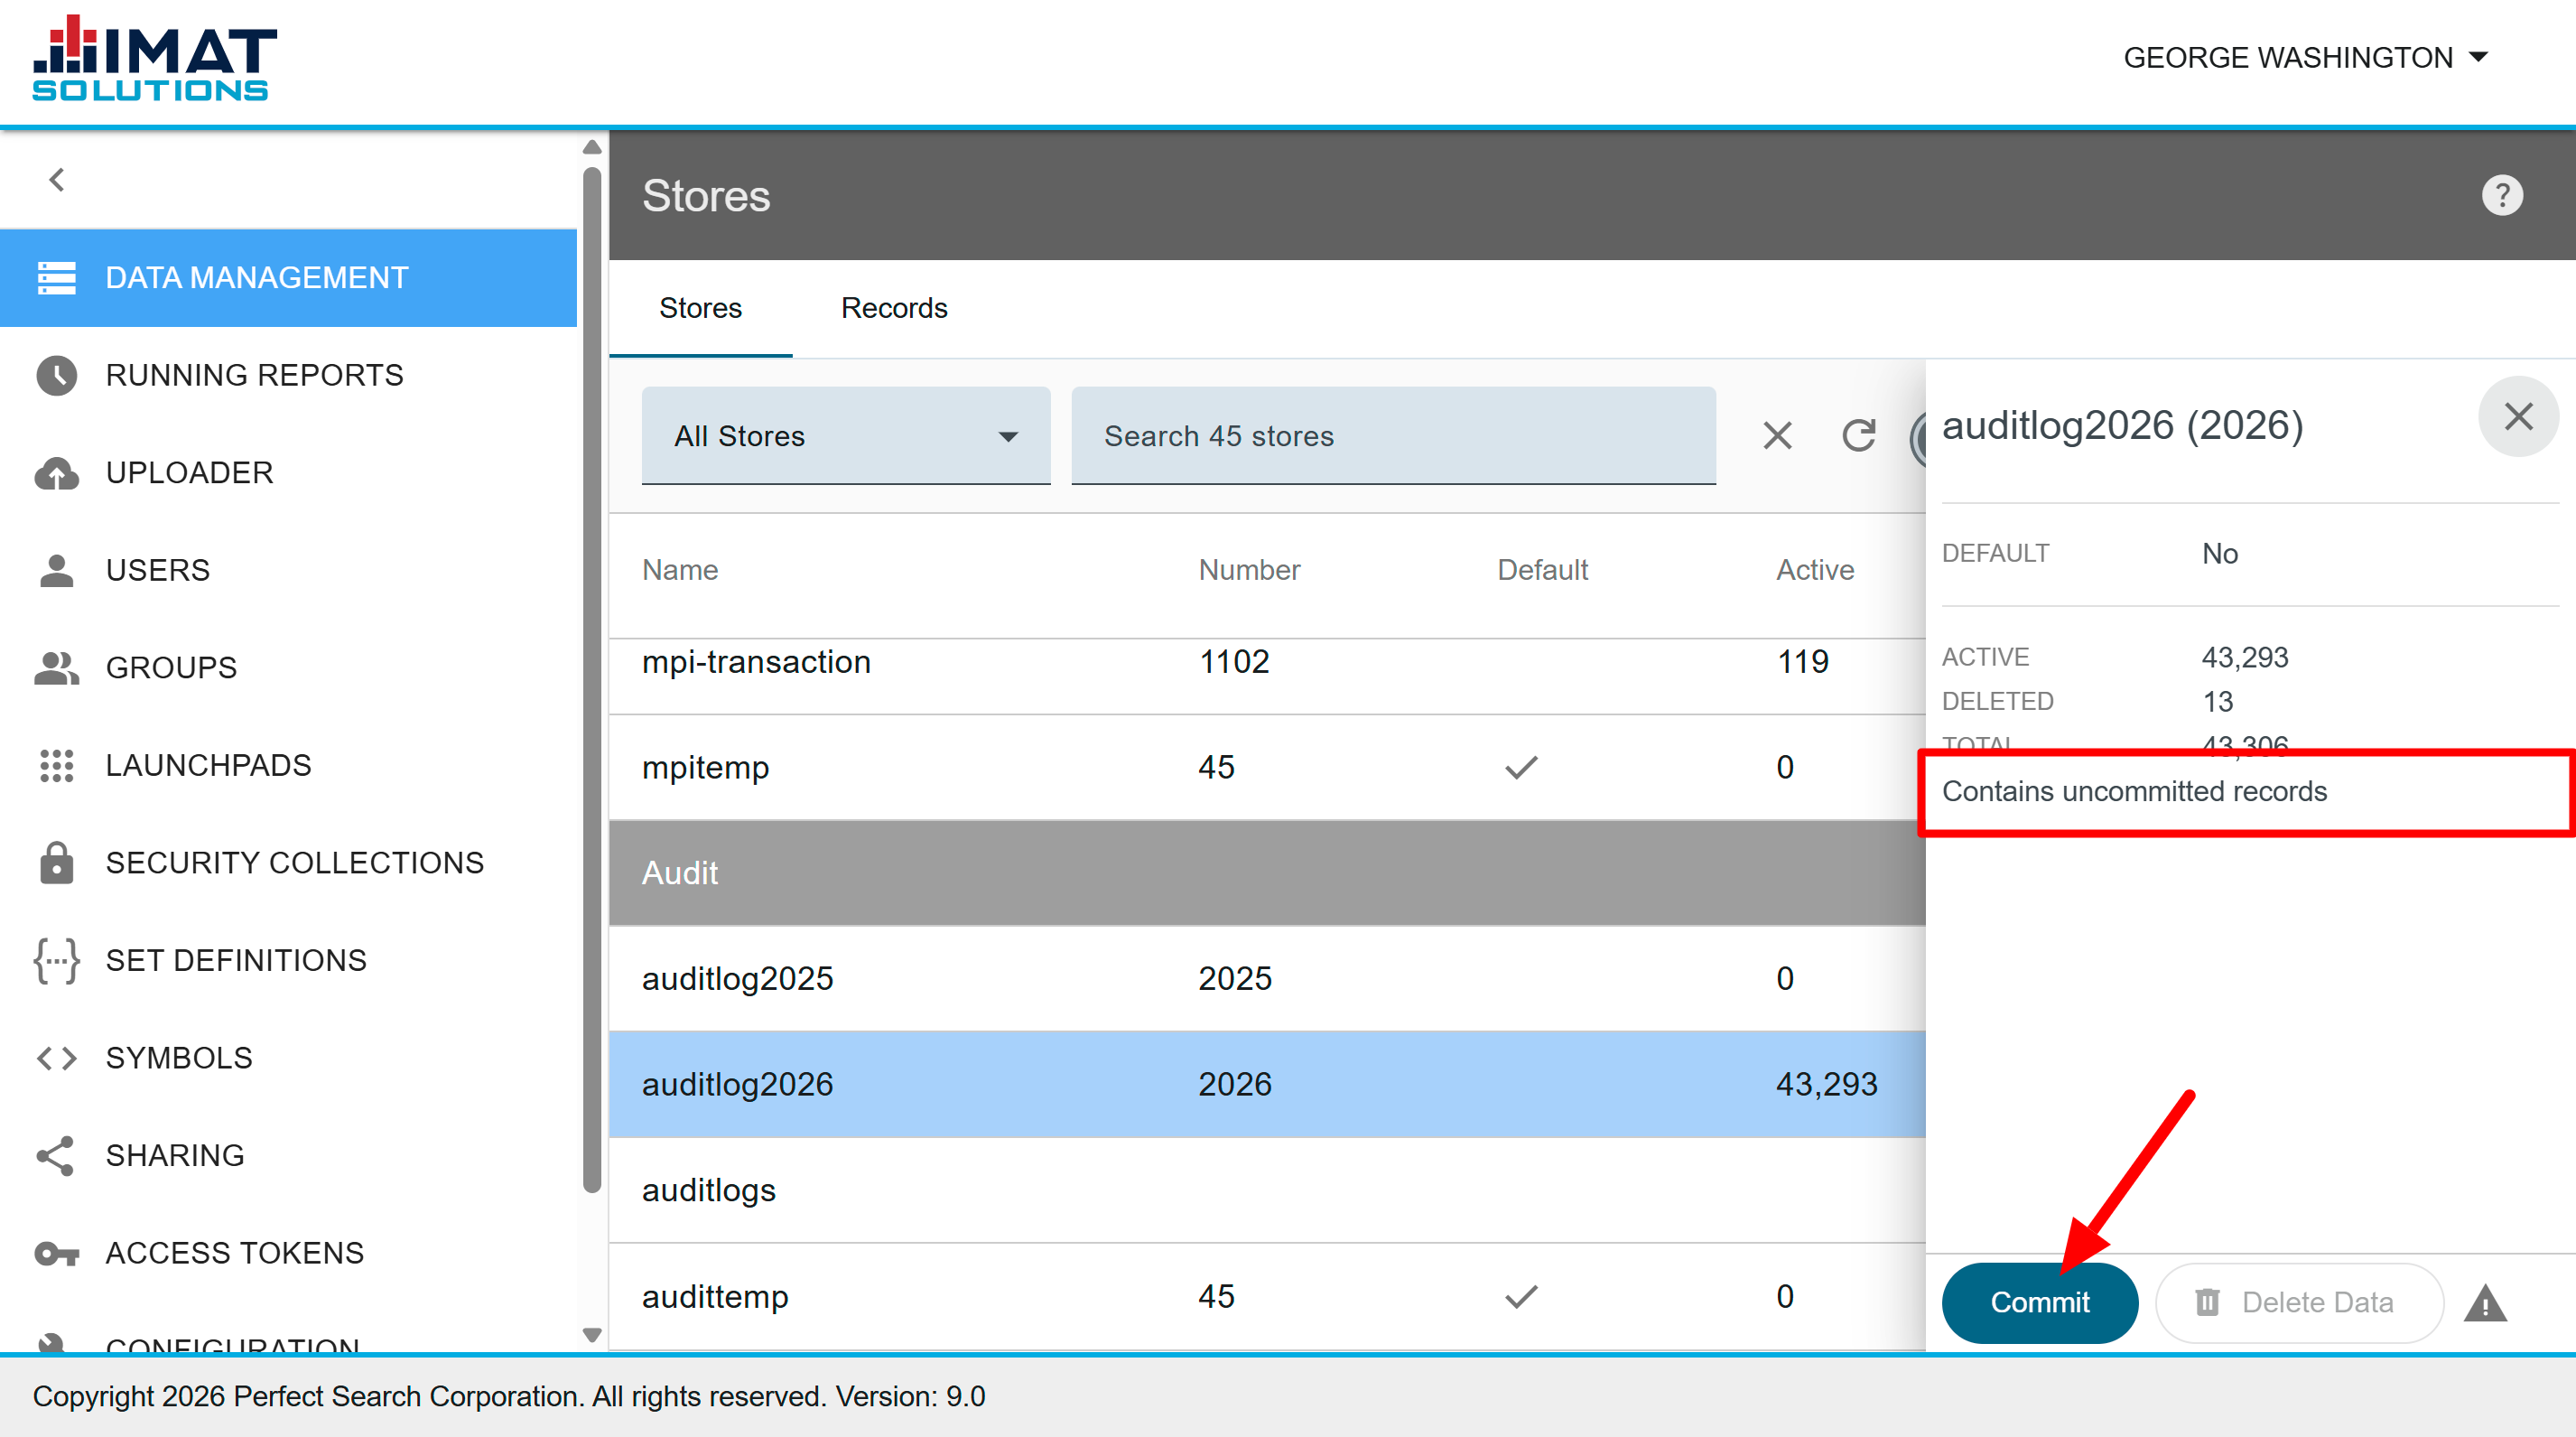
Commit Records
Recently completed feed jobs do not appear in the search results until they go through a transfer process called committing. Your search appliance configuration determines how frequently records are moved from the cache and committed to the server. However, if you need the records available for immediate searching, click to manually commit records. You can commit cached records while records are still being fed into the store.
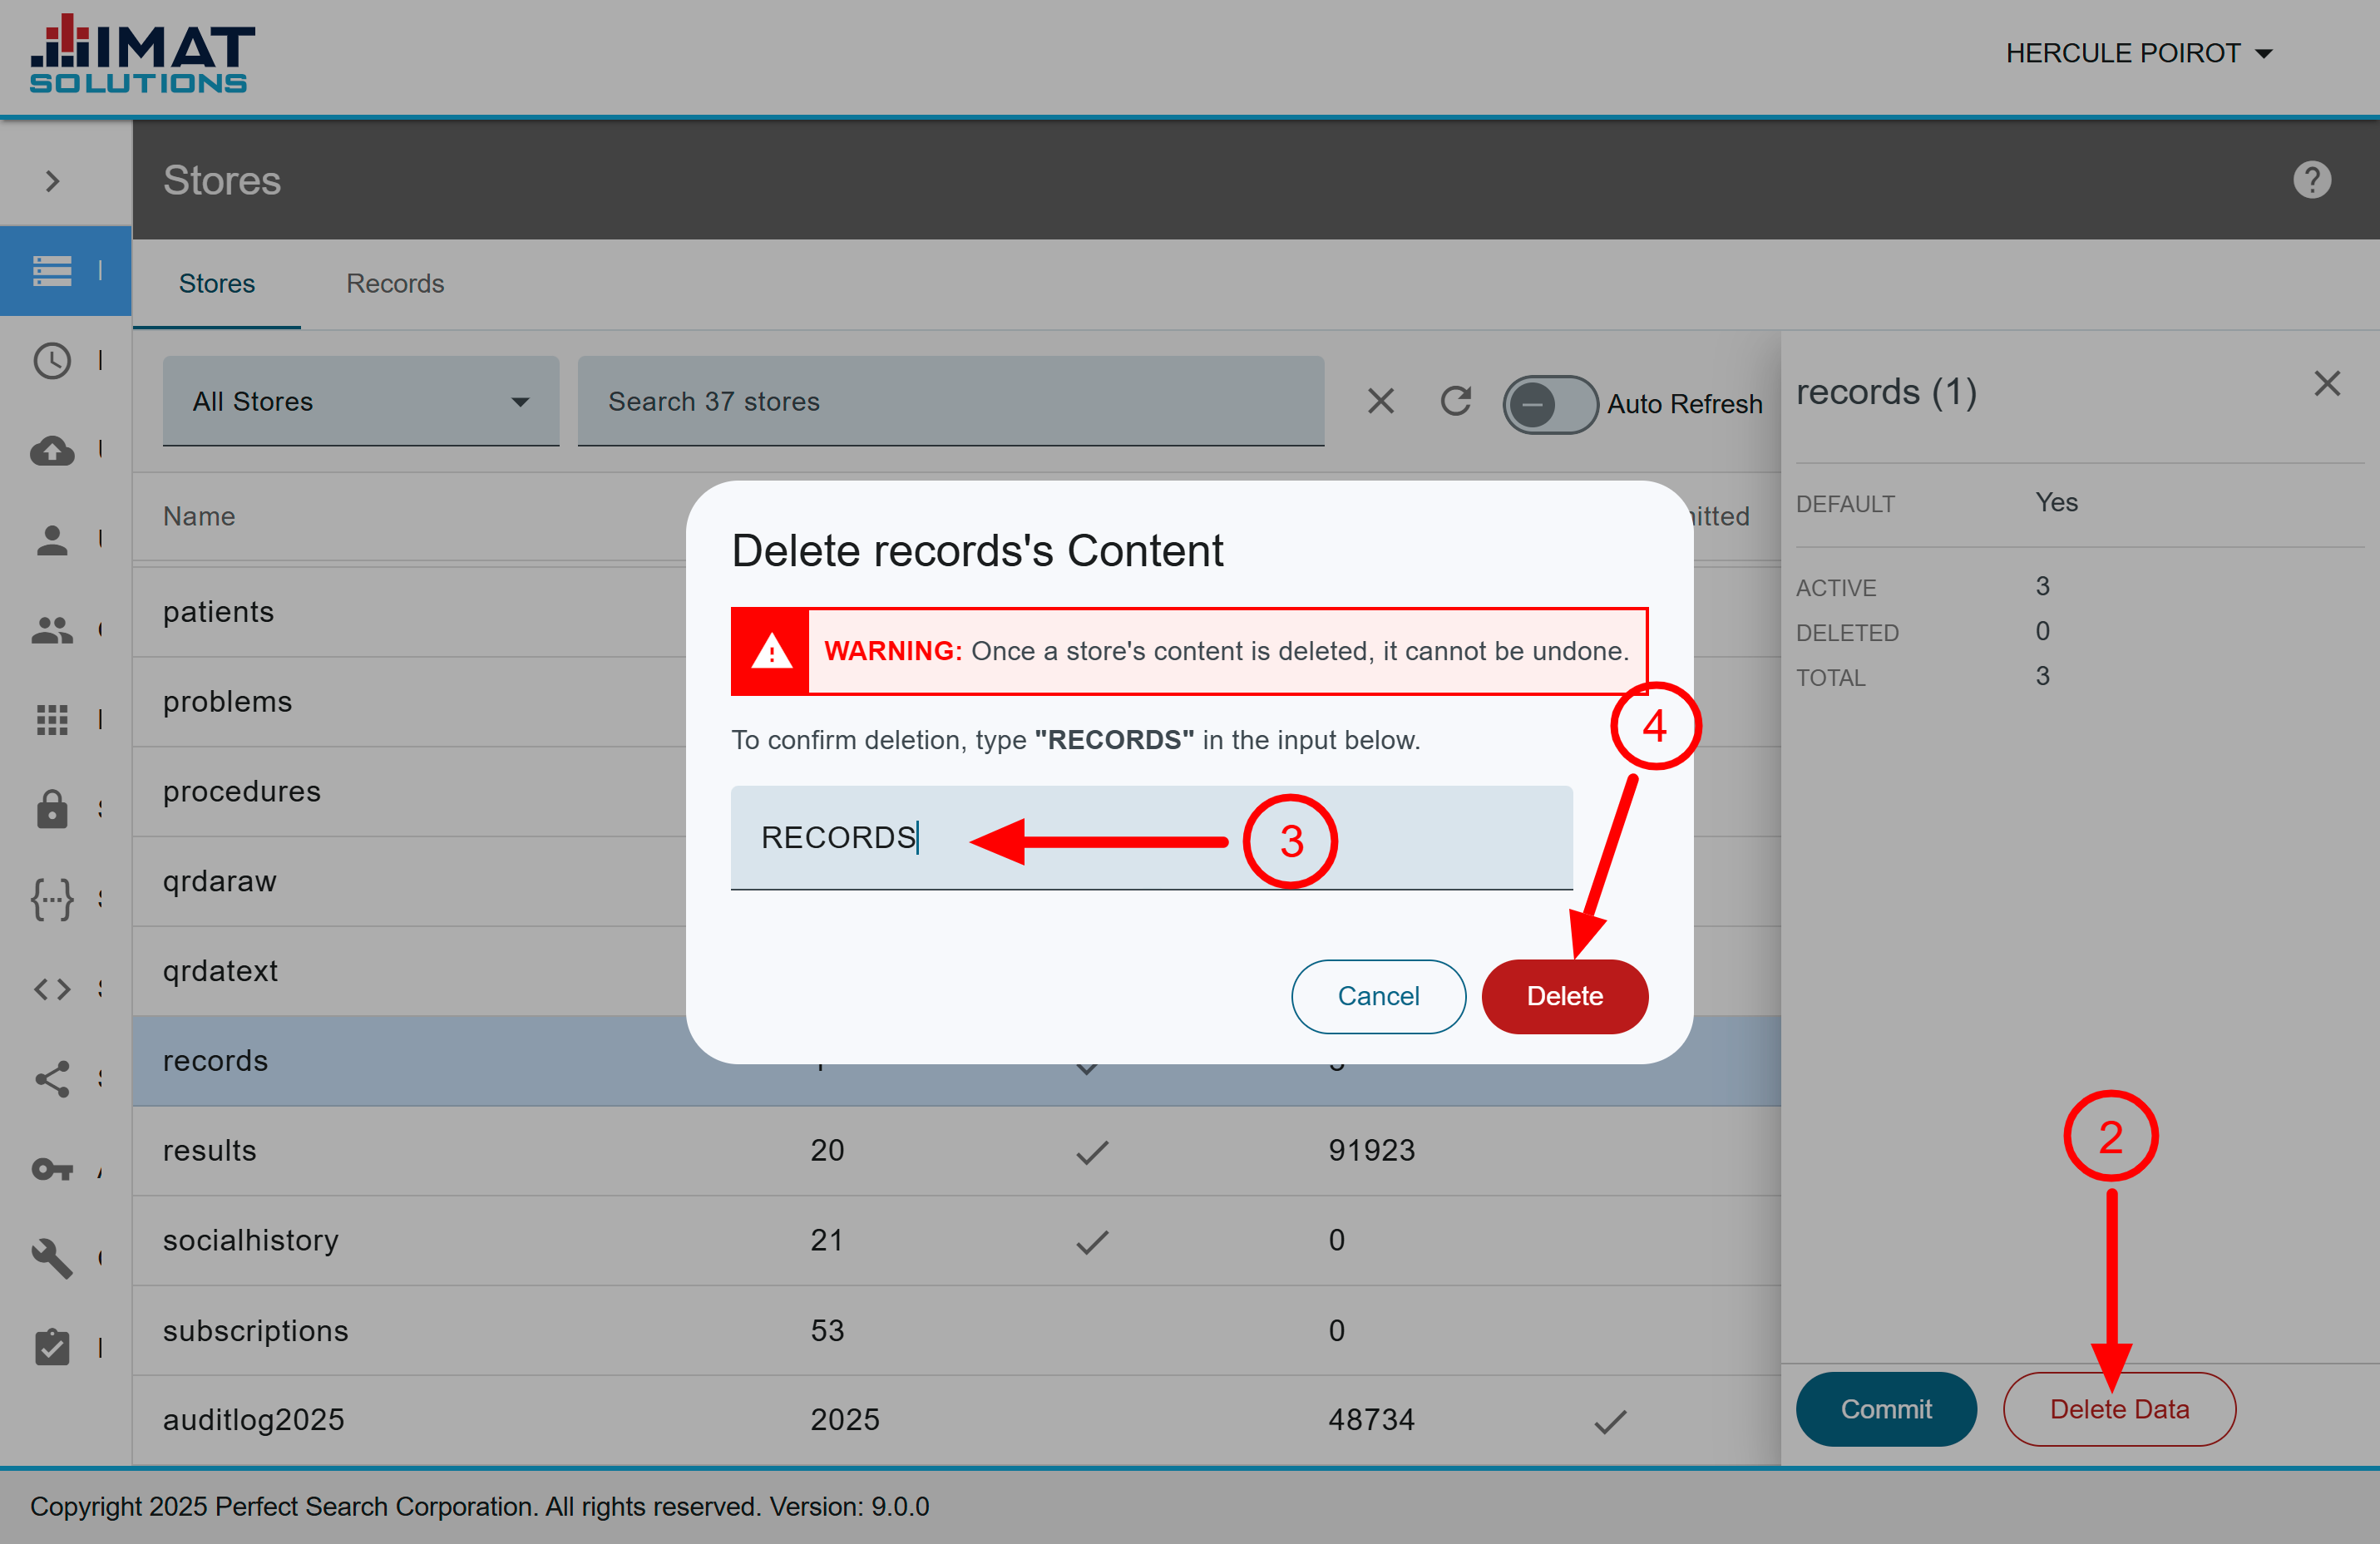
Delete Store Data
Deleting data removes only the data from the store and not the store from the server. Once data has been removed, it cannot be recovered. A refeed is necessary to add the data back in.
- Locate the store you want to clear.
- Click found in the pane on the right.
- Type the store name as it appears in the prompt, confirming you want to remove the data from the store.
- Click .
Audit stores and MPI stores cannot have data removed. You'll see a gray button and .
Manage Records
This feature accesses an item's XML listing and details such as the store, URI, and index time. It can be used to look at the source of files that are improperly displayed. However, it is most often used by support personnel to diagnose problems or delete faulty records.
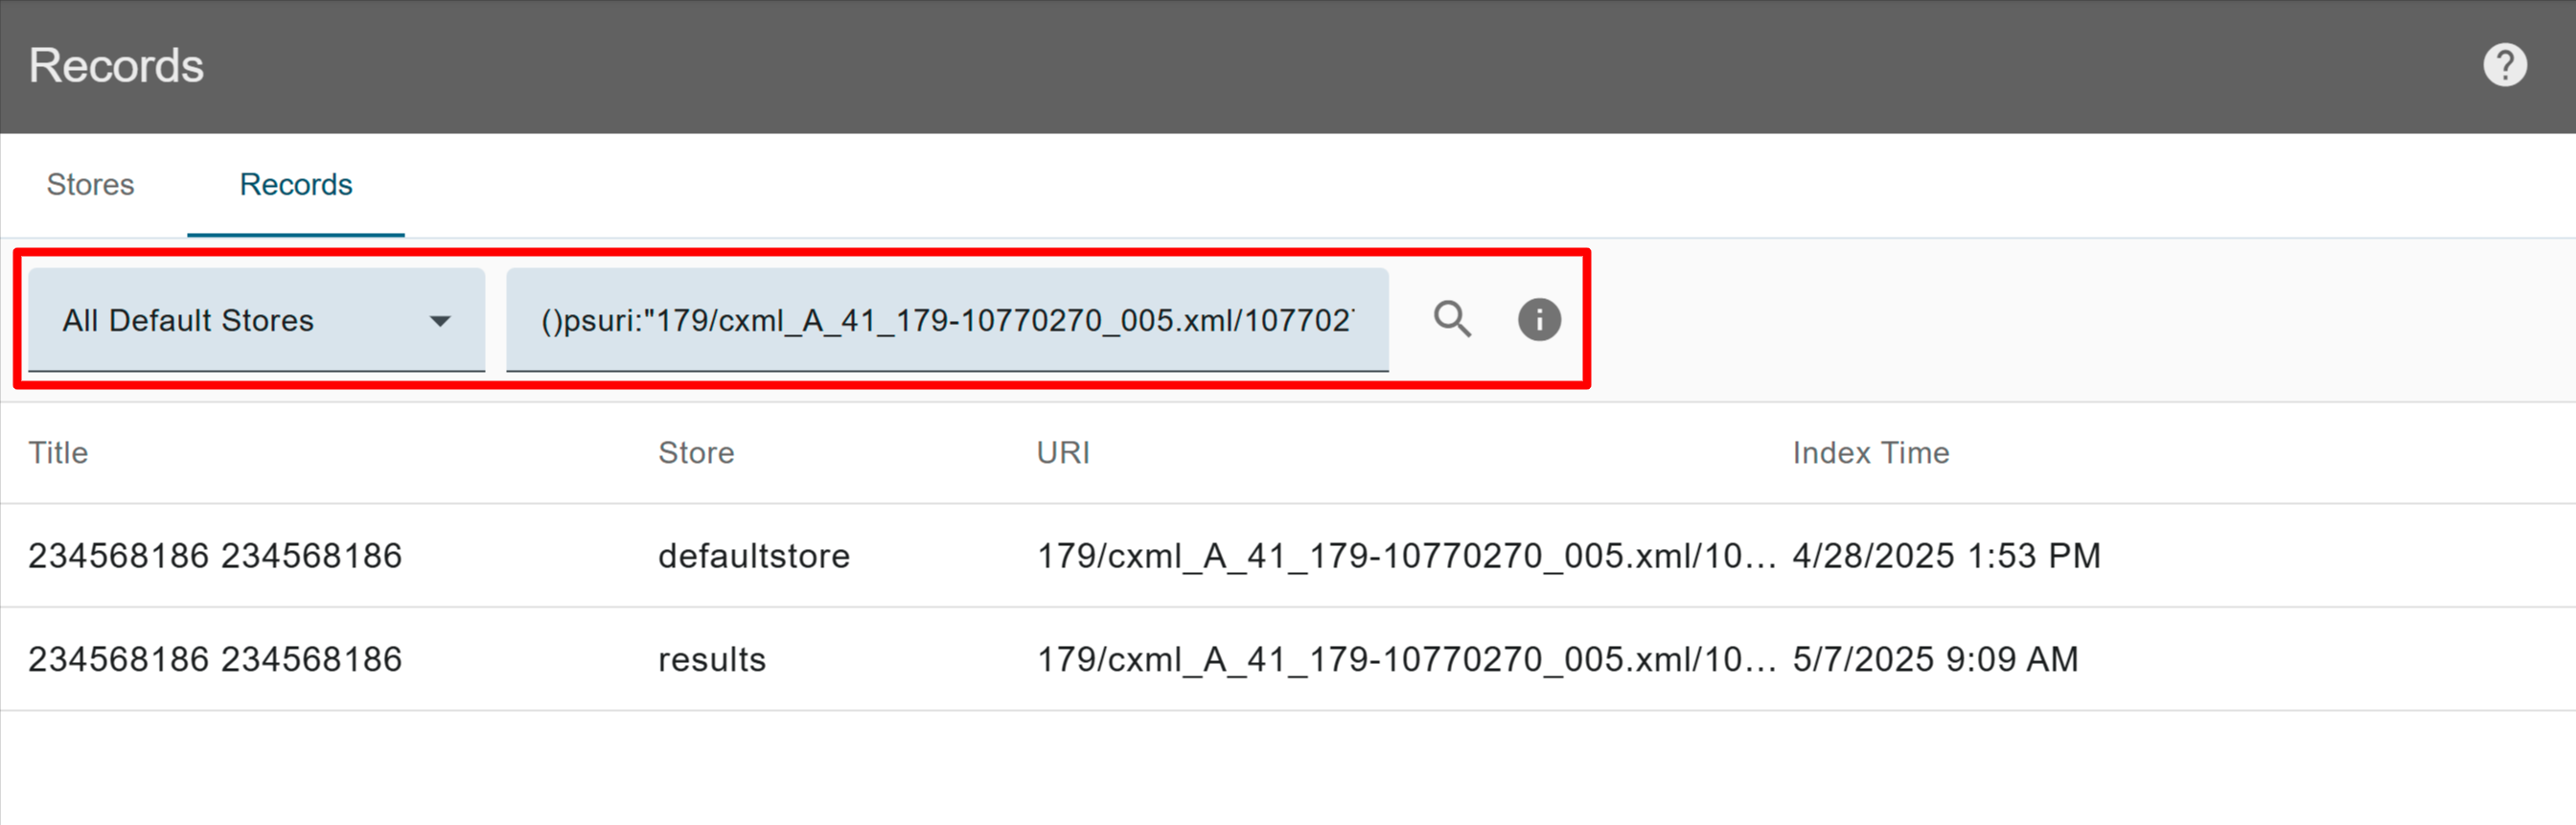
Search Records
To search, use a single query:
- Click the Records tab.
- Select the store or stores you want to search from the drop-down list.
- Enter a query on the line.
The most common search is for a record URI. The query for the record should include the field name psuri, a colon, and quotes around the URI: ()psuri:"/MPI_records/GregFHIRRecords/F1_cleaned/10101117_005.xml". The code below displays the full URI when entered into the compound script box of Clinical Reports (replace search term with the term of your choice).a = get_hits('()search term', fields='URI') # use your own search term for i in a['URI']: print(i)
A second common search is the index time. The query for the index time should be modeled after this example: ()psfirstindex:[20170616194208]. The date-time stamp is yyyymmddhhmmss. For releases including 9.0 and beyond, all index time fields use a UTC stamp. For previous versions, see the 8.x Time Stamps. - Click .
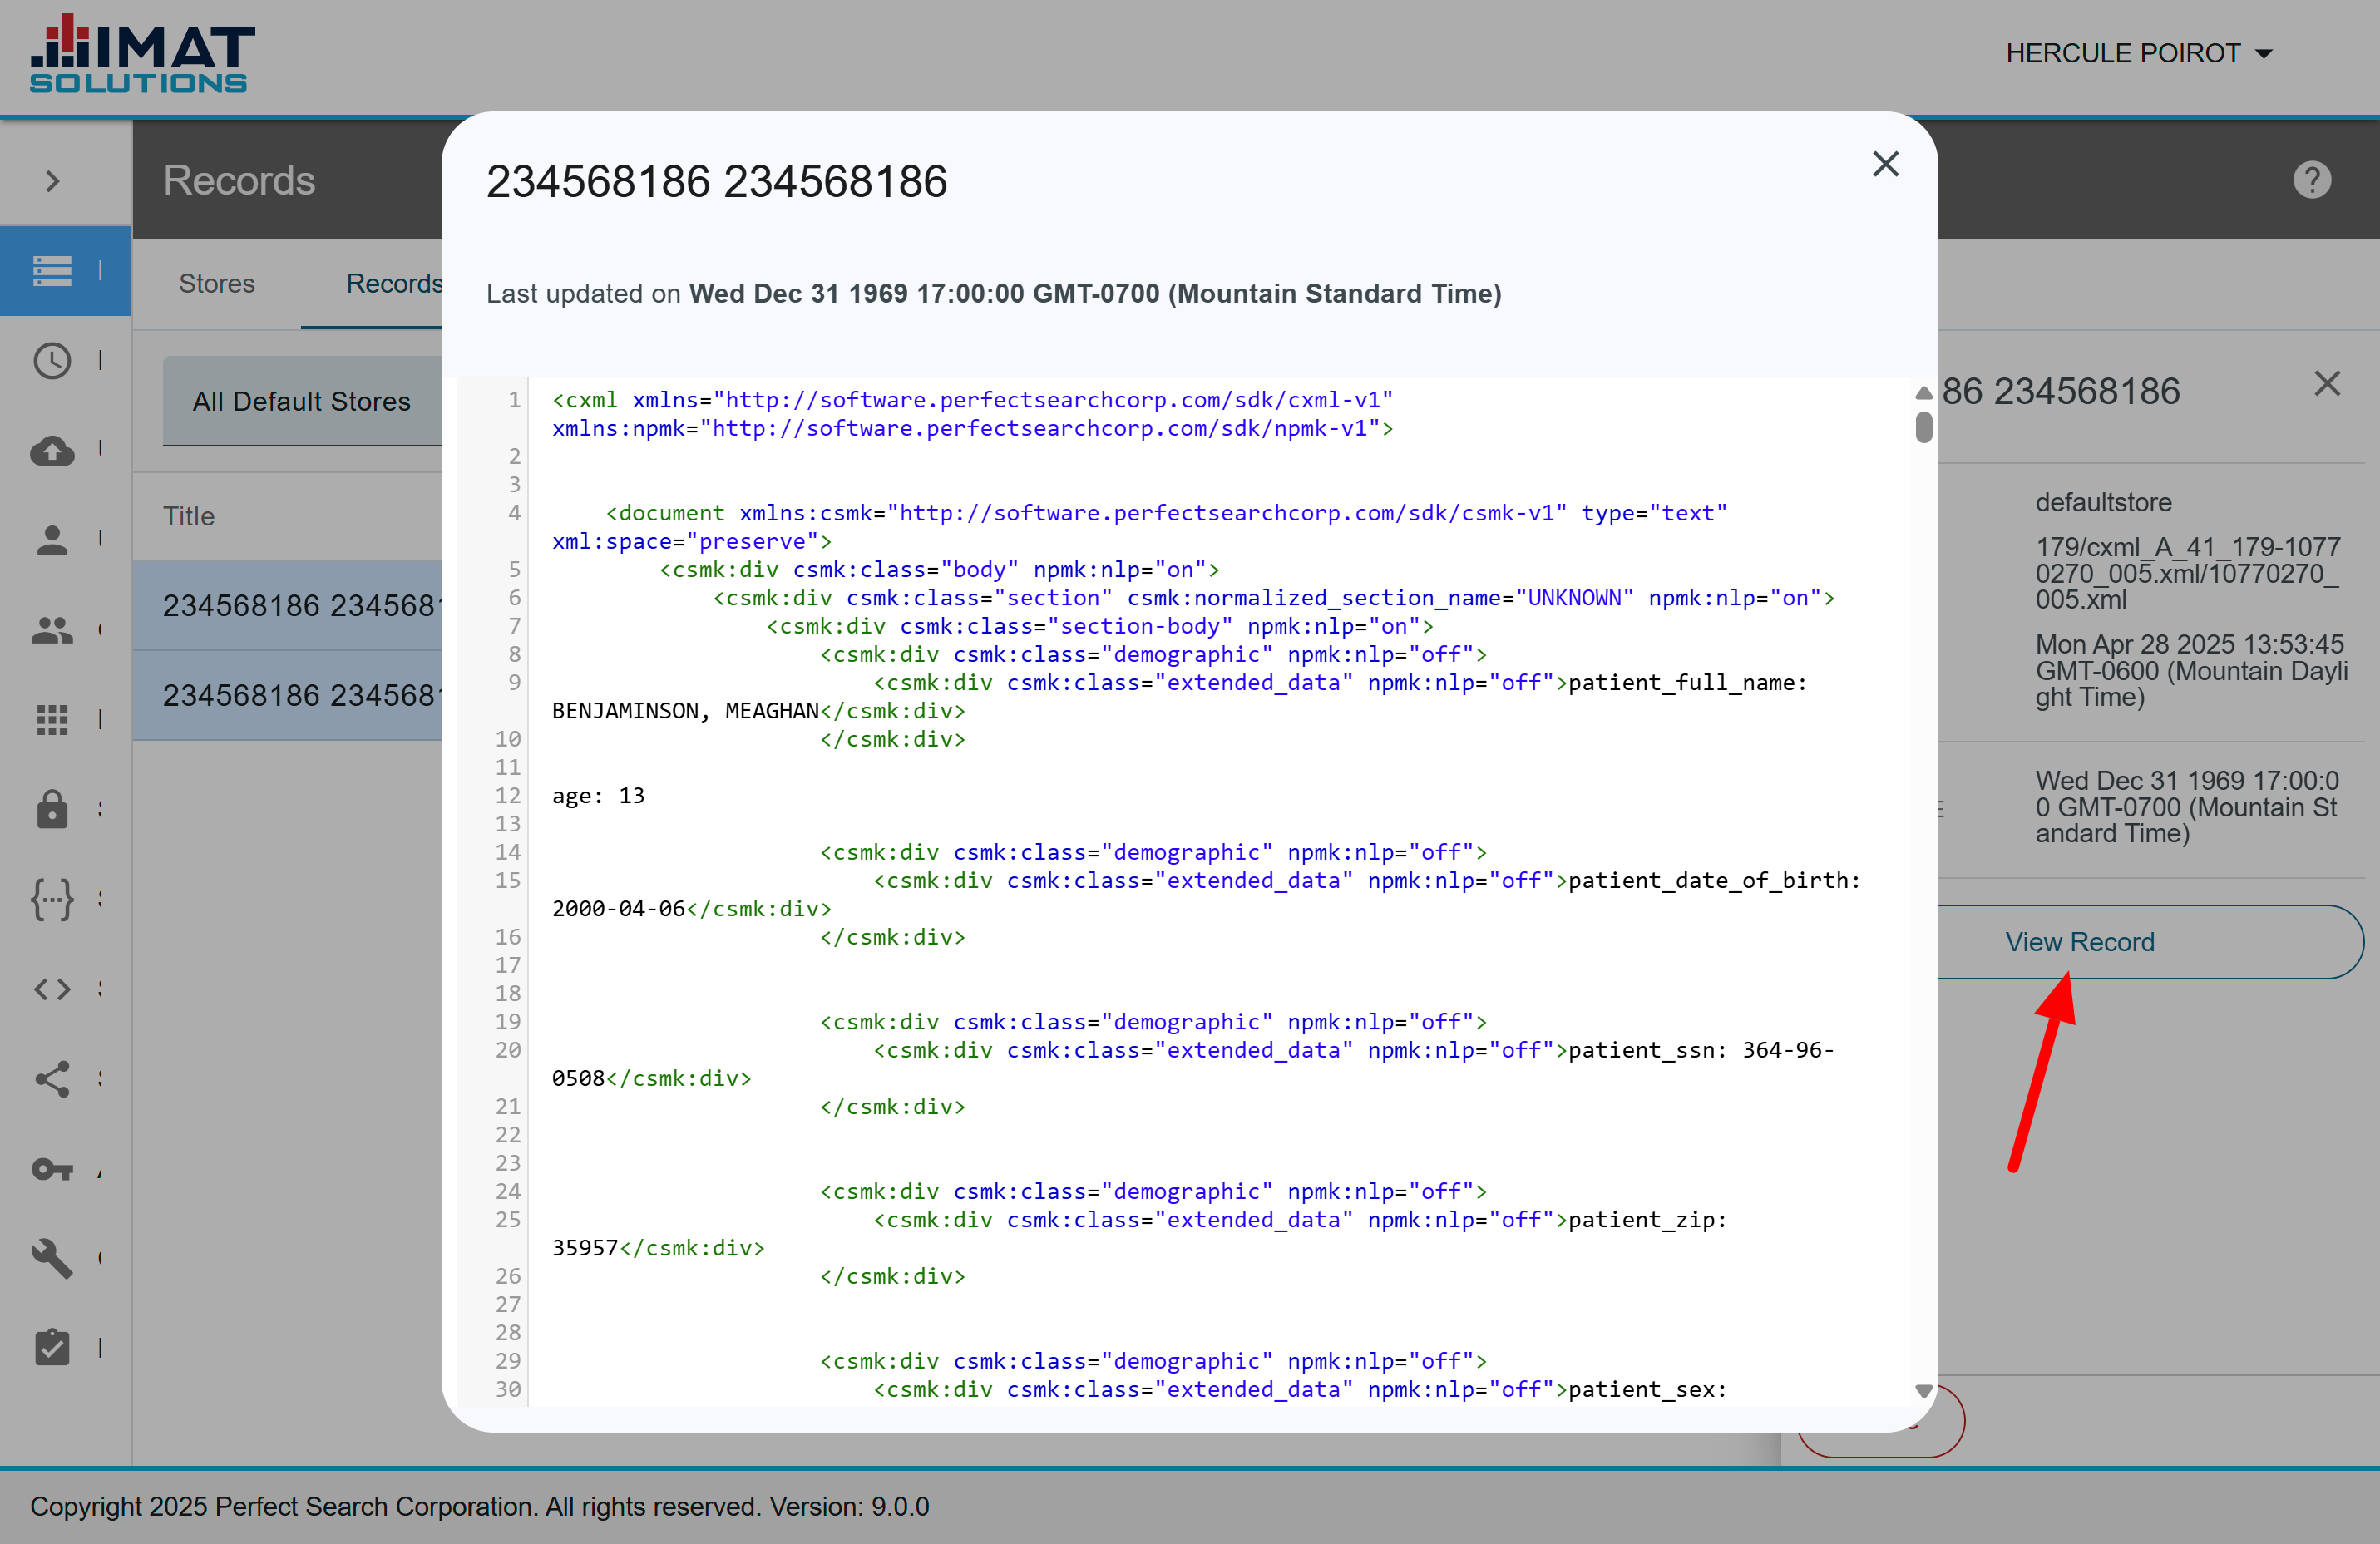
View Record
Click to view the XML record.
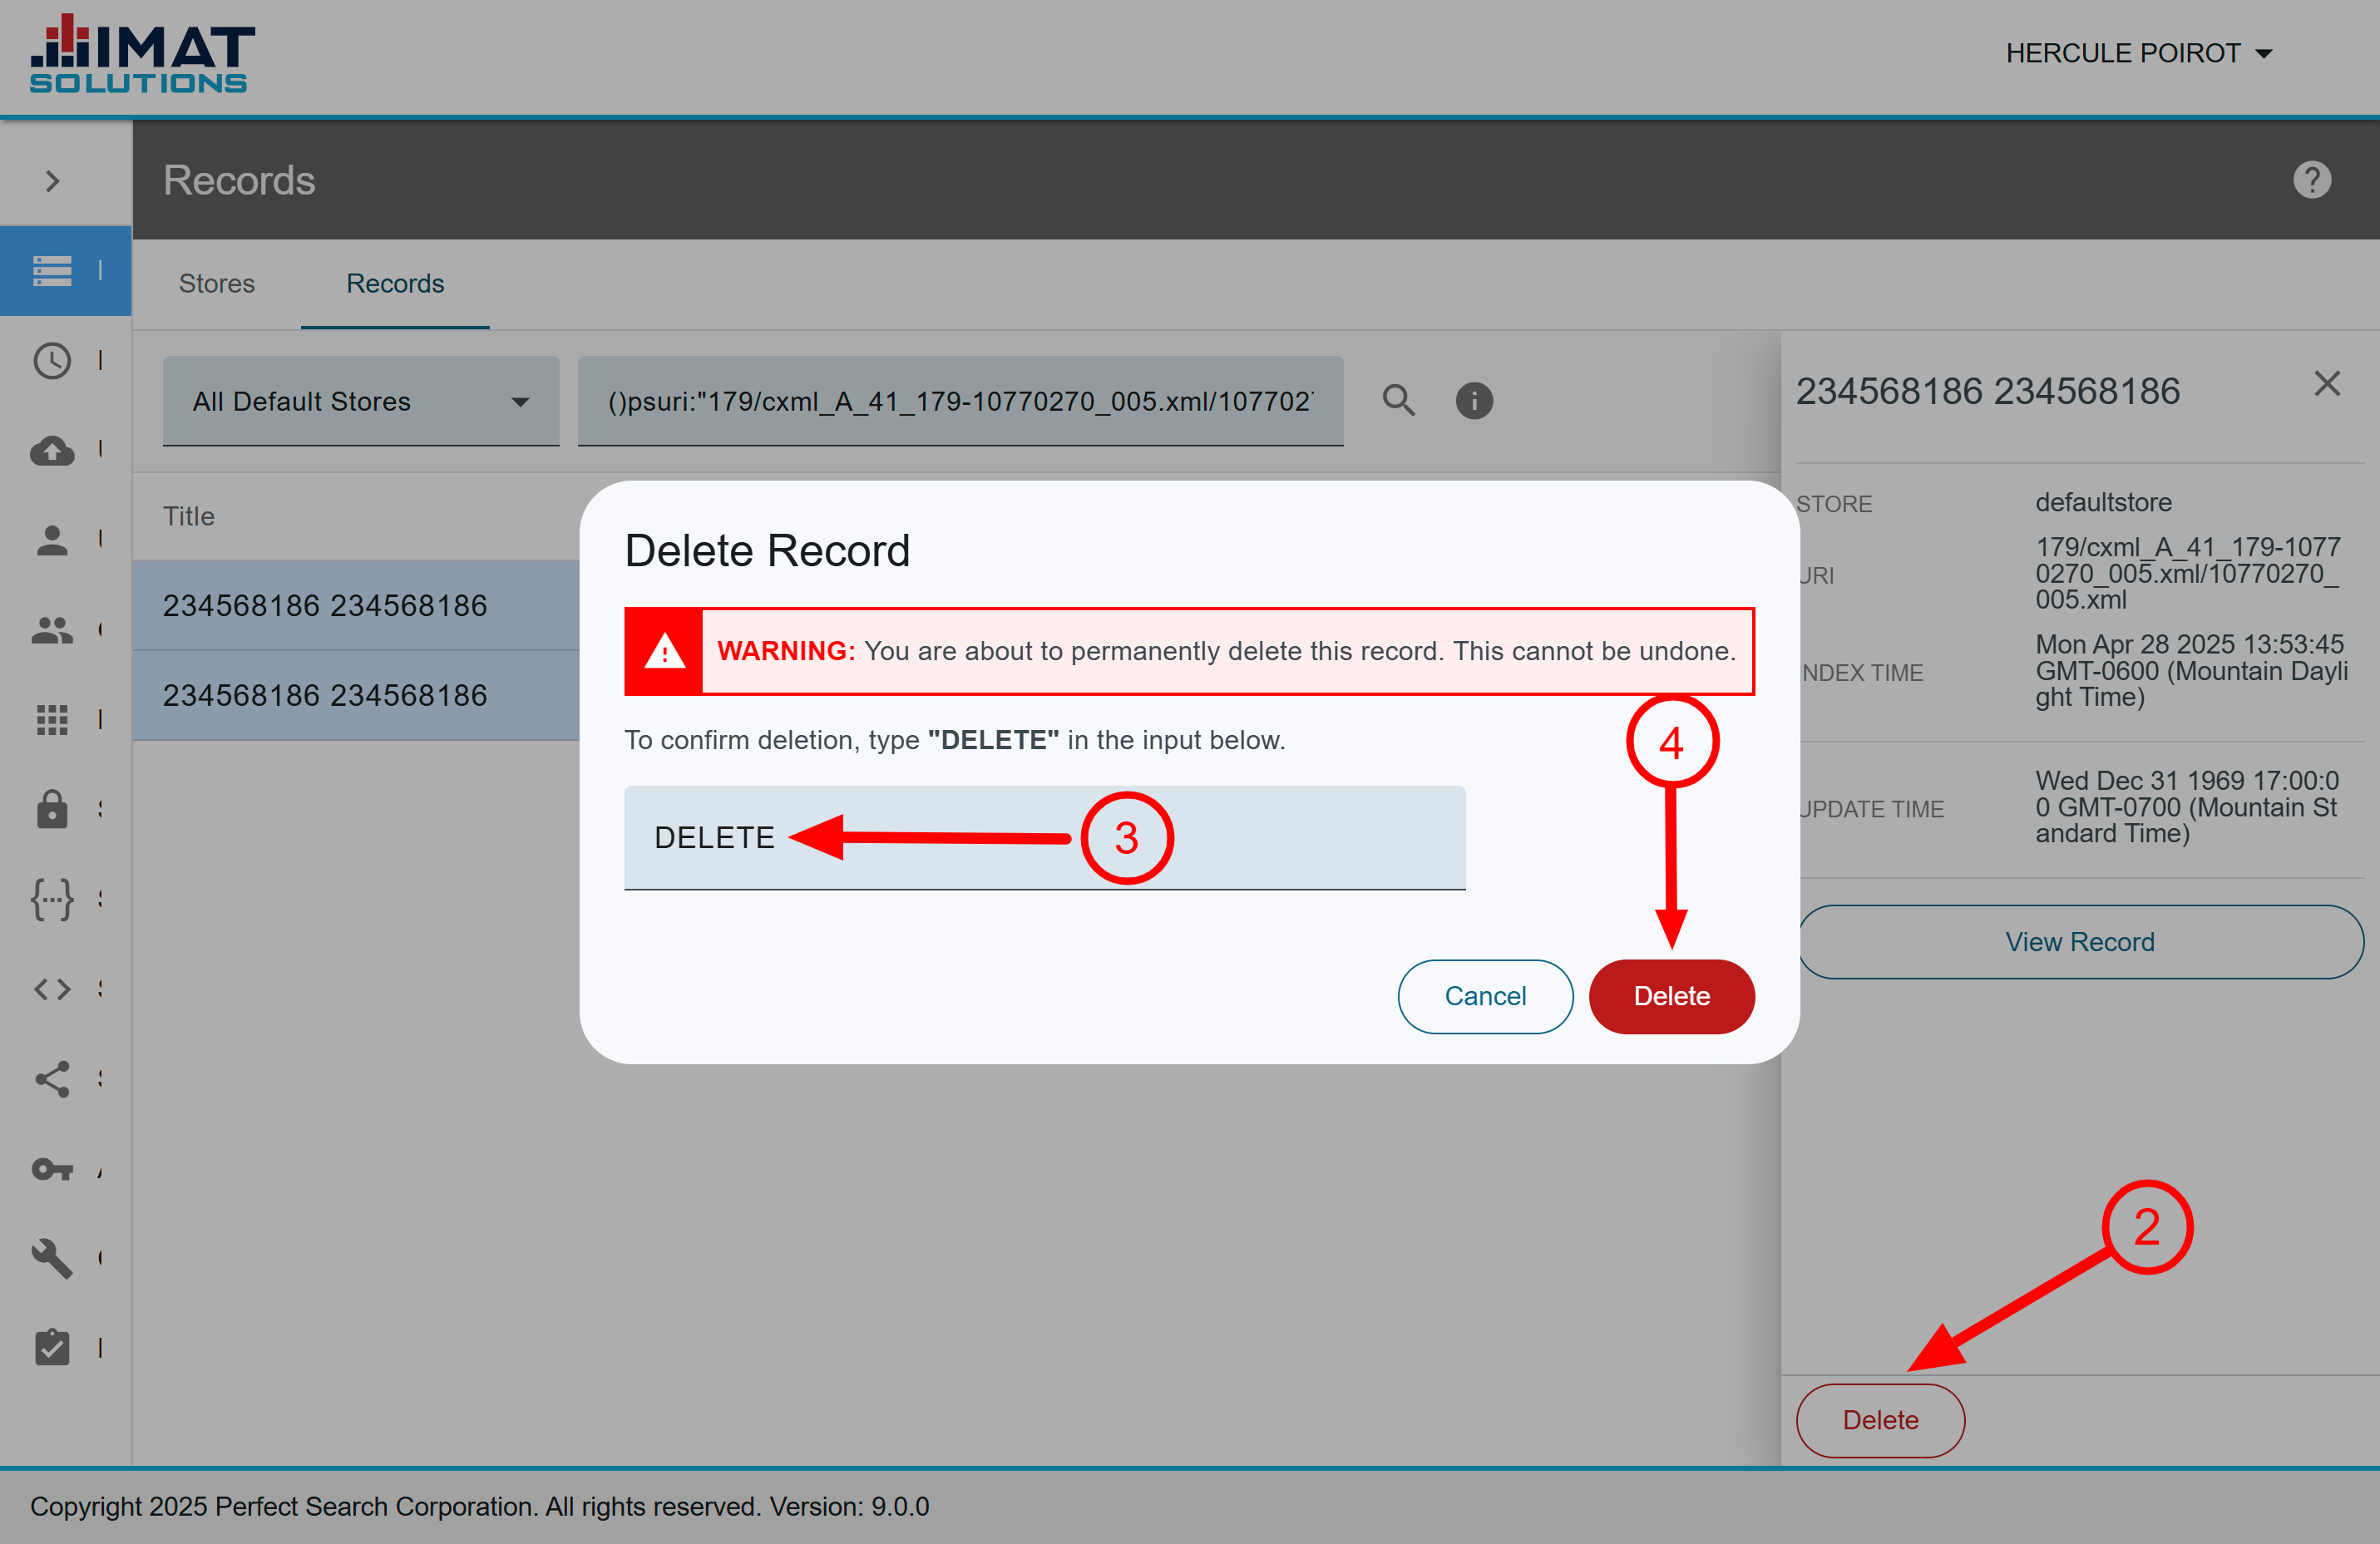
Delete Records
There may be times when a record is flawed. If that is the case, you can delete the record to ensure it is not included in the search results:
- Locate the desired record.
- Click found in the pane on the right.
- Enter delete in the input box provided, confirming you want to remove the record.
- Click .
You may delete only one record at a time.