The Users page allows administrators to create and edit users. At a glance, the administrator can also see if a user's password is expired or if the user is locked or disabled.
Create a Normal User
Admins give Users access to the search appliance to the data. The amount and type of data available to the user depend on the user’s group permissions and security collections. Normal users require a username and a password to sign in to the system. If a user needs to interact only with IMAT APIs, see the Script User section below.
In the navigation pane, click Users.
Click found in the top-right corner of the Users screen. This opens the Add User screen.
Choose Normal as the Account Type.
In the Username field, type the user’s sign-in name. Usernames can contain the following characters:
numbers
letters (uppercase and lowercase)
_ (underscore)
- (hyphen)
. (period)
* (asterisk)
@ (at)
Type the First name.
Type the Last name.
In the Password field, type the user’s password. This is a temporary password, and the user must reset it during their first sign-in. Remember the password, because you’ll need to share it with the user. Once you leave this screen, you will be unable to view the password again.
Confirm password by typing it again.
Enter an Email address. IMAT versions before 8.5 do not have this capability.
In the Available Groups area, click on the groups you want the user to belong to. The list of groups the user is added to is found in Added Groups. Different IMAT applications require different access roles, but all users must have either the searchappliance_search or the searchappliance_search_by_id role for search-related applications. See Search Appliance Roles for more information.
Click .
A notification appears confirming that the user has been added.
Clicking returns you to the list of users without saving the changes.
Note that only one user can be added at a time unless the Add via CSV wizard is used.
Password Requirements
Basic password requirements are found below; however, the rules regarding passwords may vary depending on how your organization configured password requirements:
Must contain at least 15 characters
Must contain at least 1 uppercase letter, 1 lowercase letter, 1 number, and 1 special character
Expires after 365 days
Cannot reuse the past 12 passwords
Cannot match the username
Cannot match the email address
 Click on image to zoom
Edit a Normal User
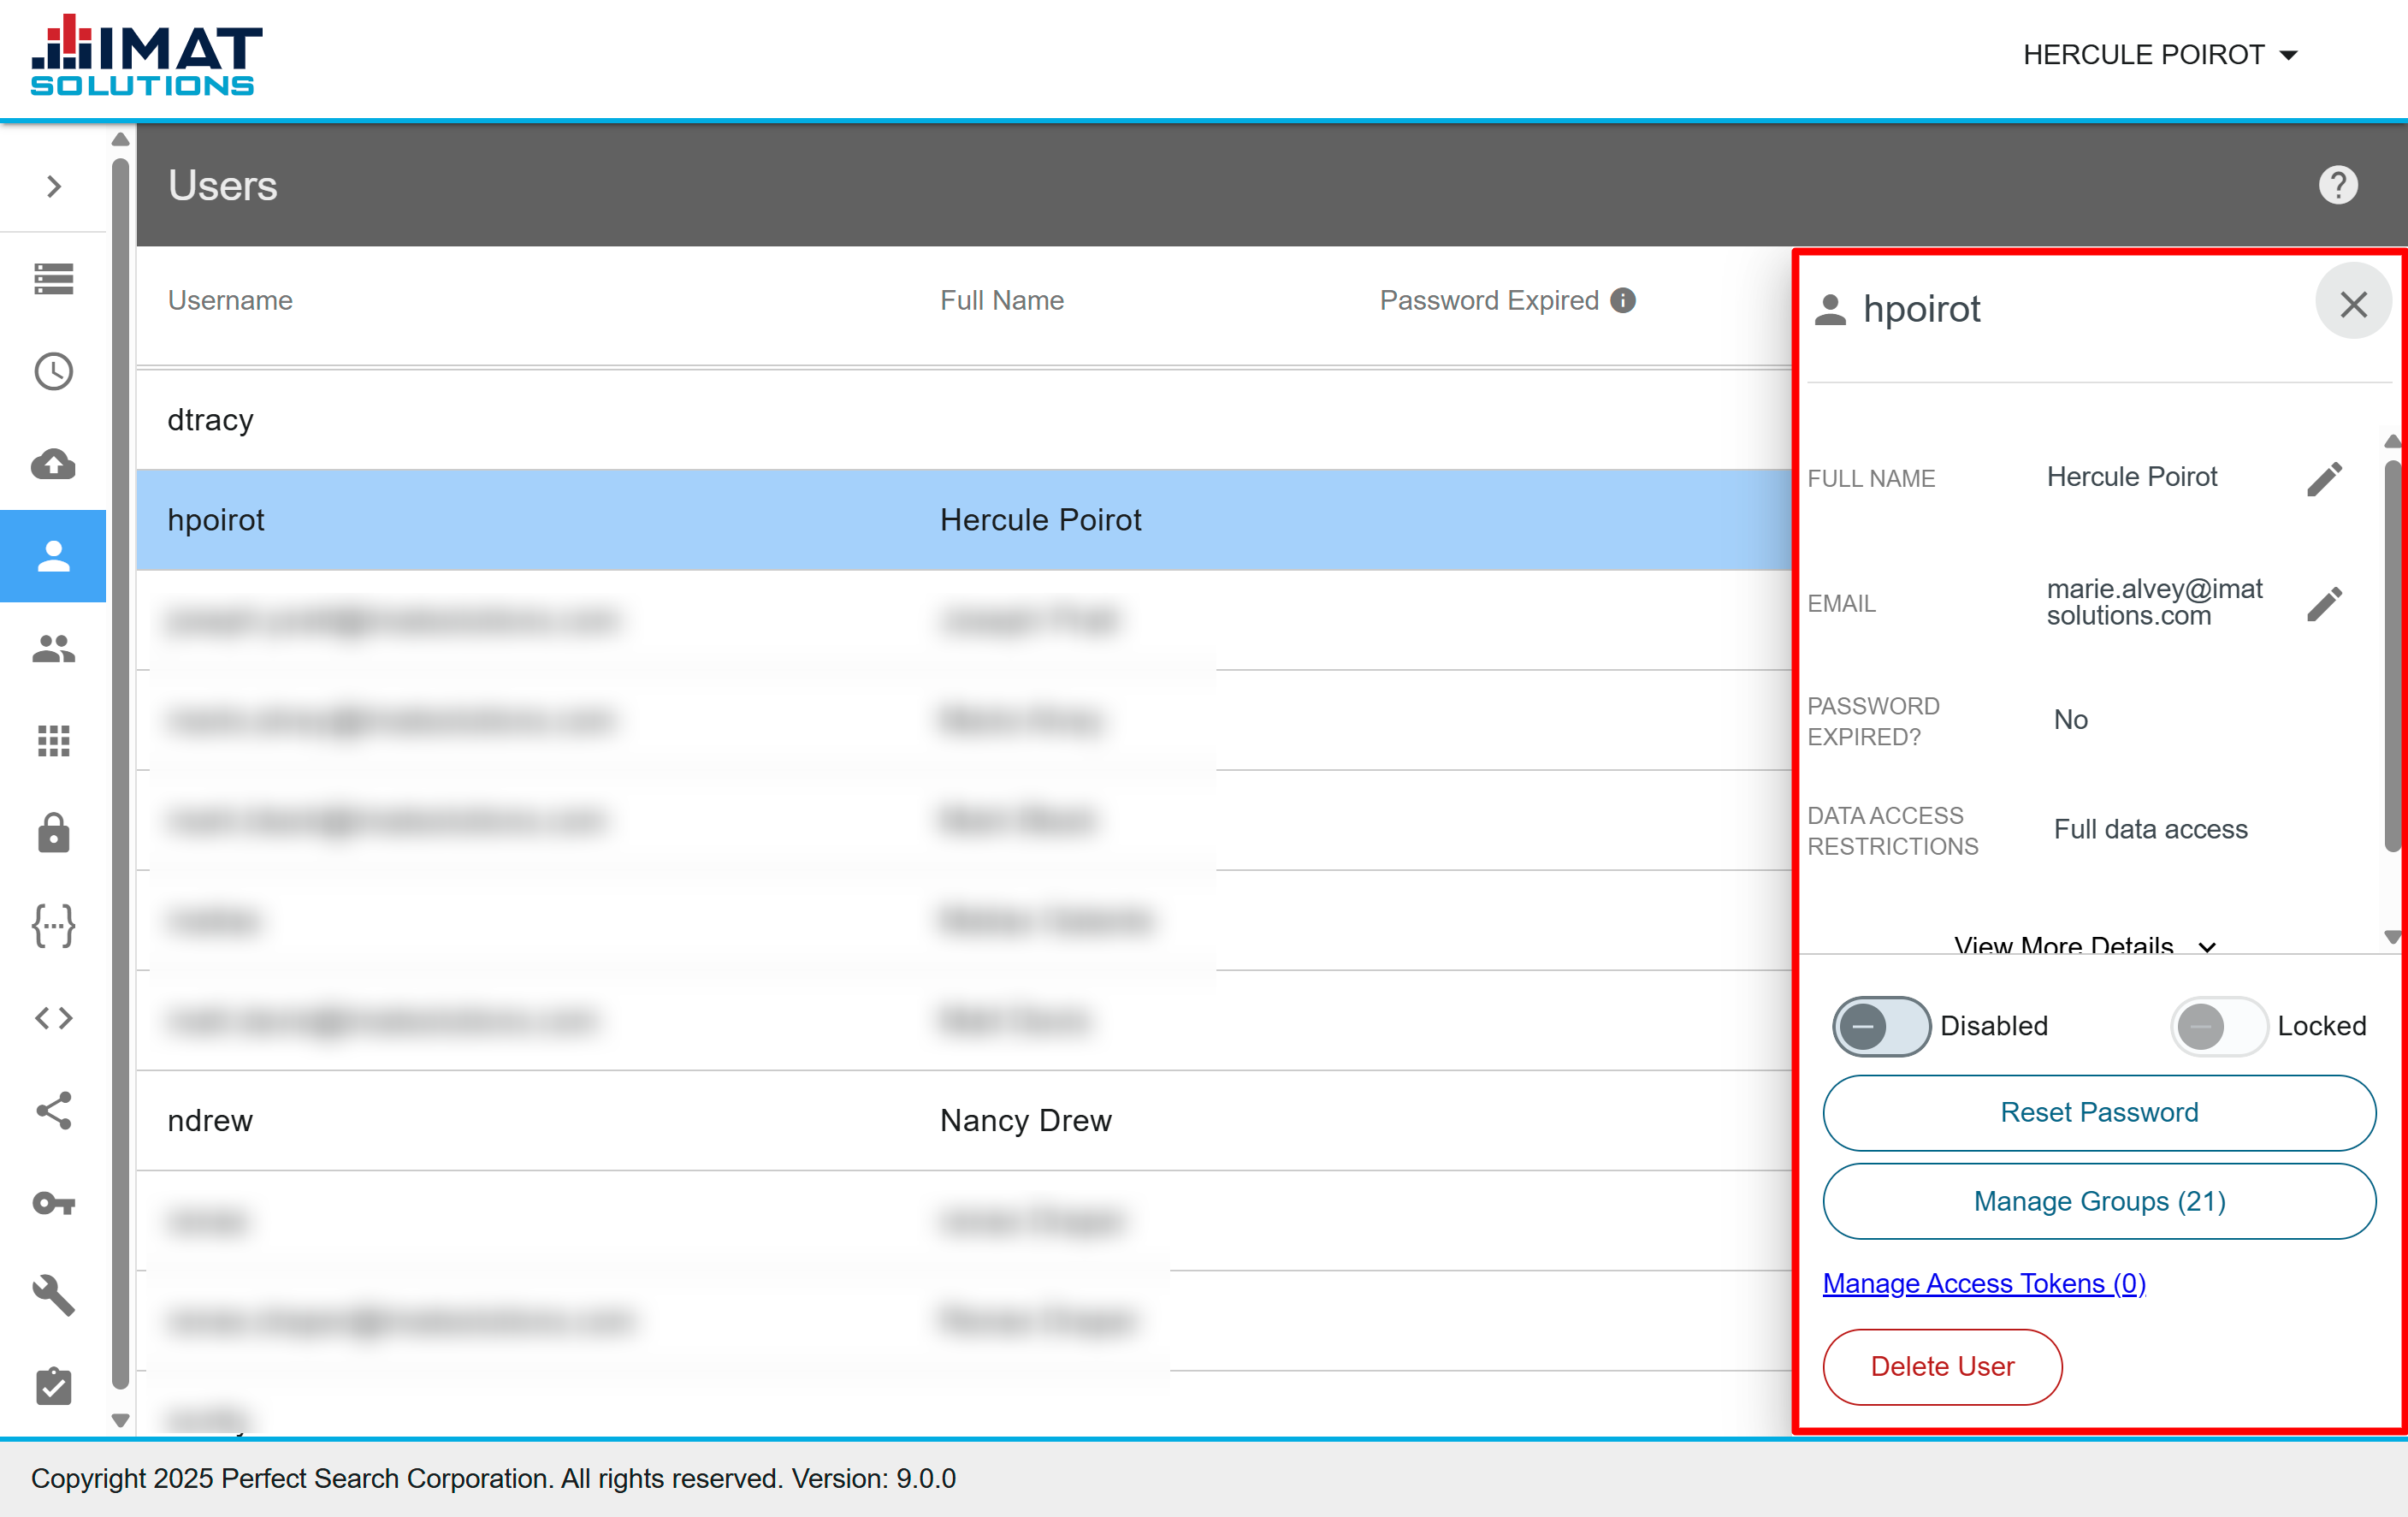
Normal users are identified by the person icon, . Edit a user's groups, lock or unlock a user, disable or enable the user, and reset a user's password in the User Details screen.
Clicking on any user opens a pane on the right to access the editing options.
 Click on image to zoom
Edit Full Name
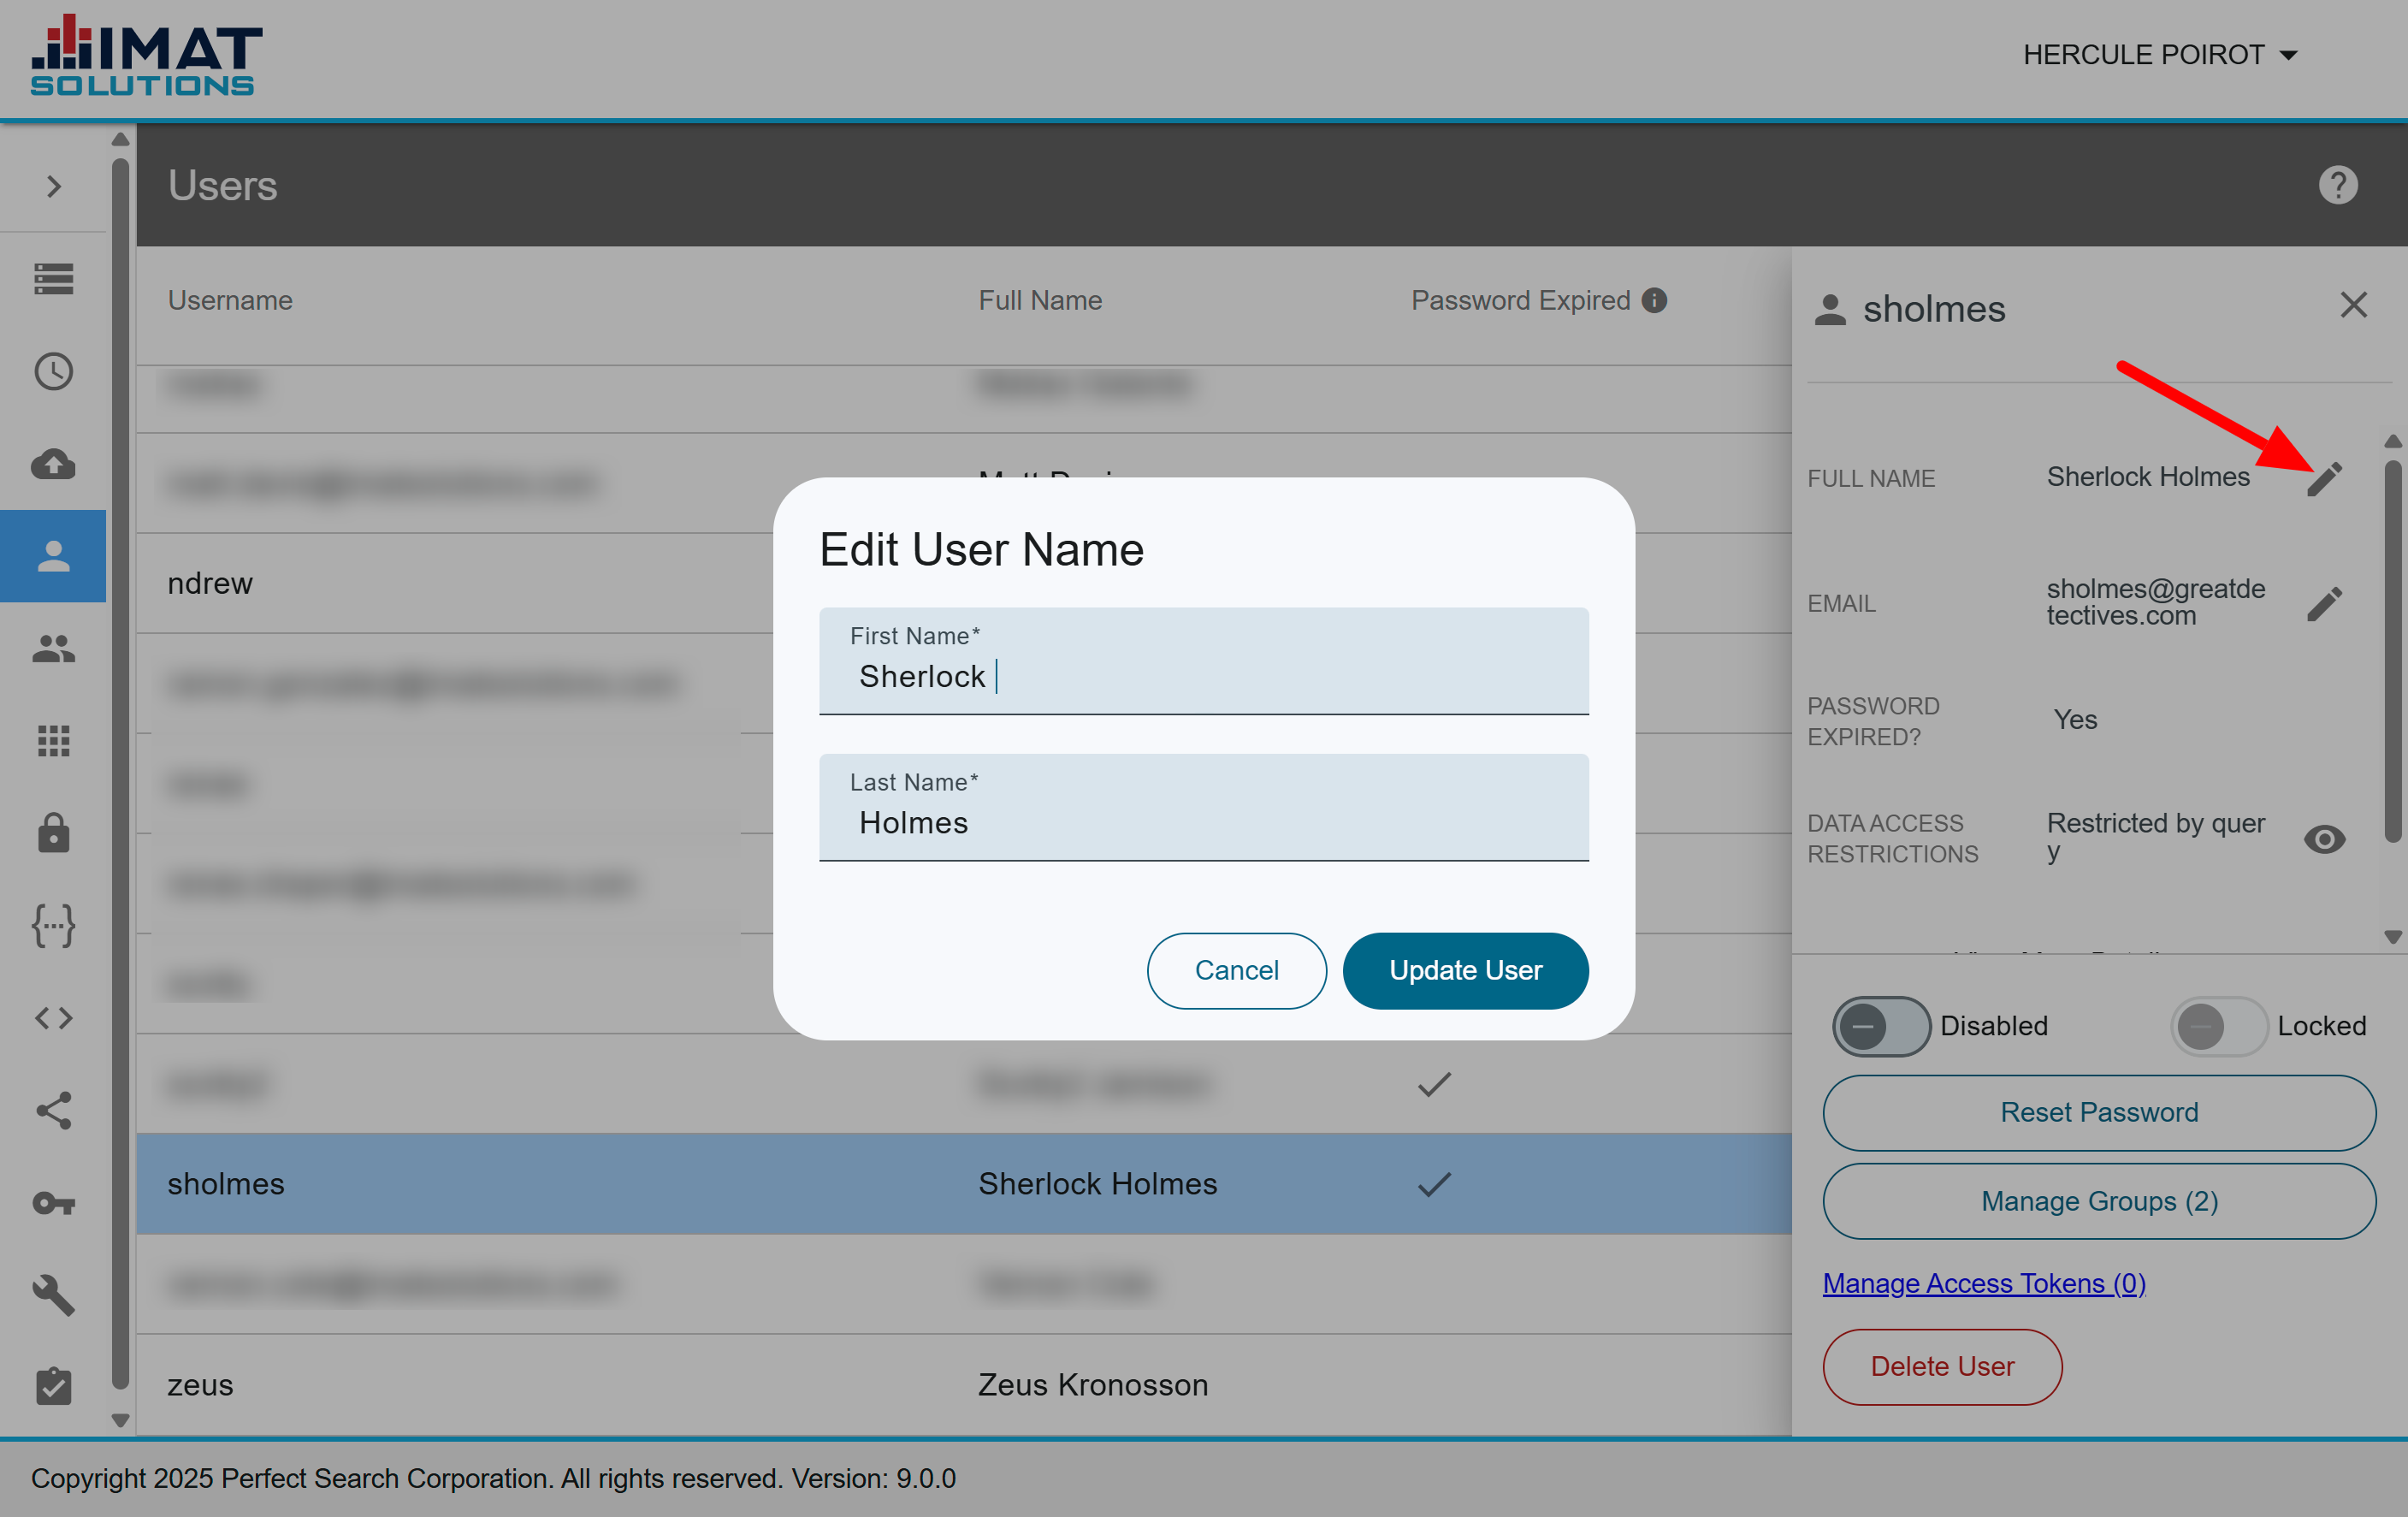
On occasion, an administrator may need to change the full name of a user. This may be because of a spelling error or a name change. To do so, follow the steps below:
Click next to the user's name.
Make the change.
Click .
 Click on image to zoom
Disable And Enable a User
A disabled account prevents a user from signing in to the system. Users are automatically disabled if they have not signed in to the system after 60 days. An administrator may also disable an account if necessary. Use Disable to differentiate between a user's actions and an administrator's actions. A good example is when an employee is no longer employed, but the administrator wants to keep the username to access audit logs. A message will appear below the Disabled toggle stating why a user is disabled.
Disable a User
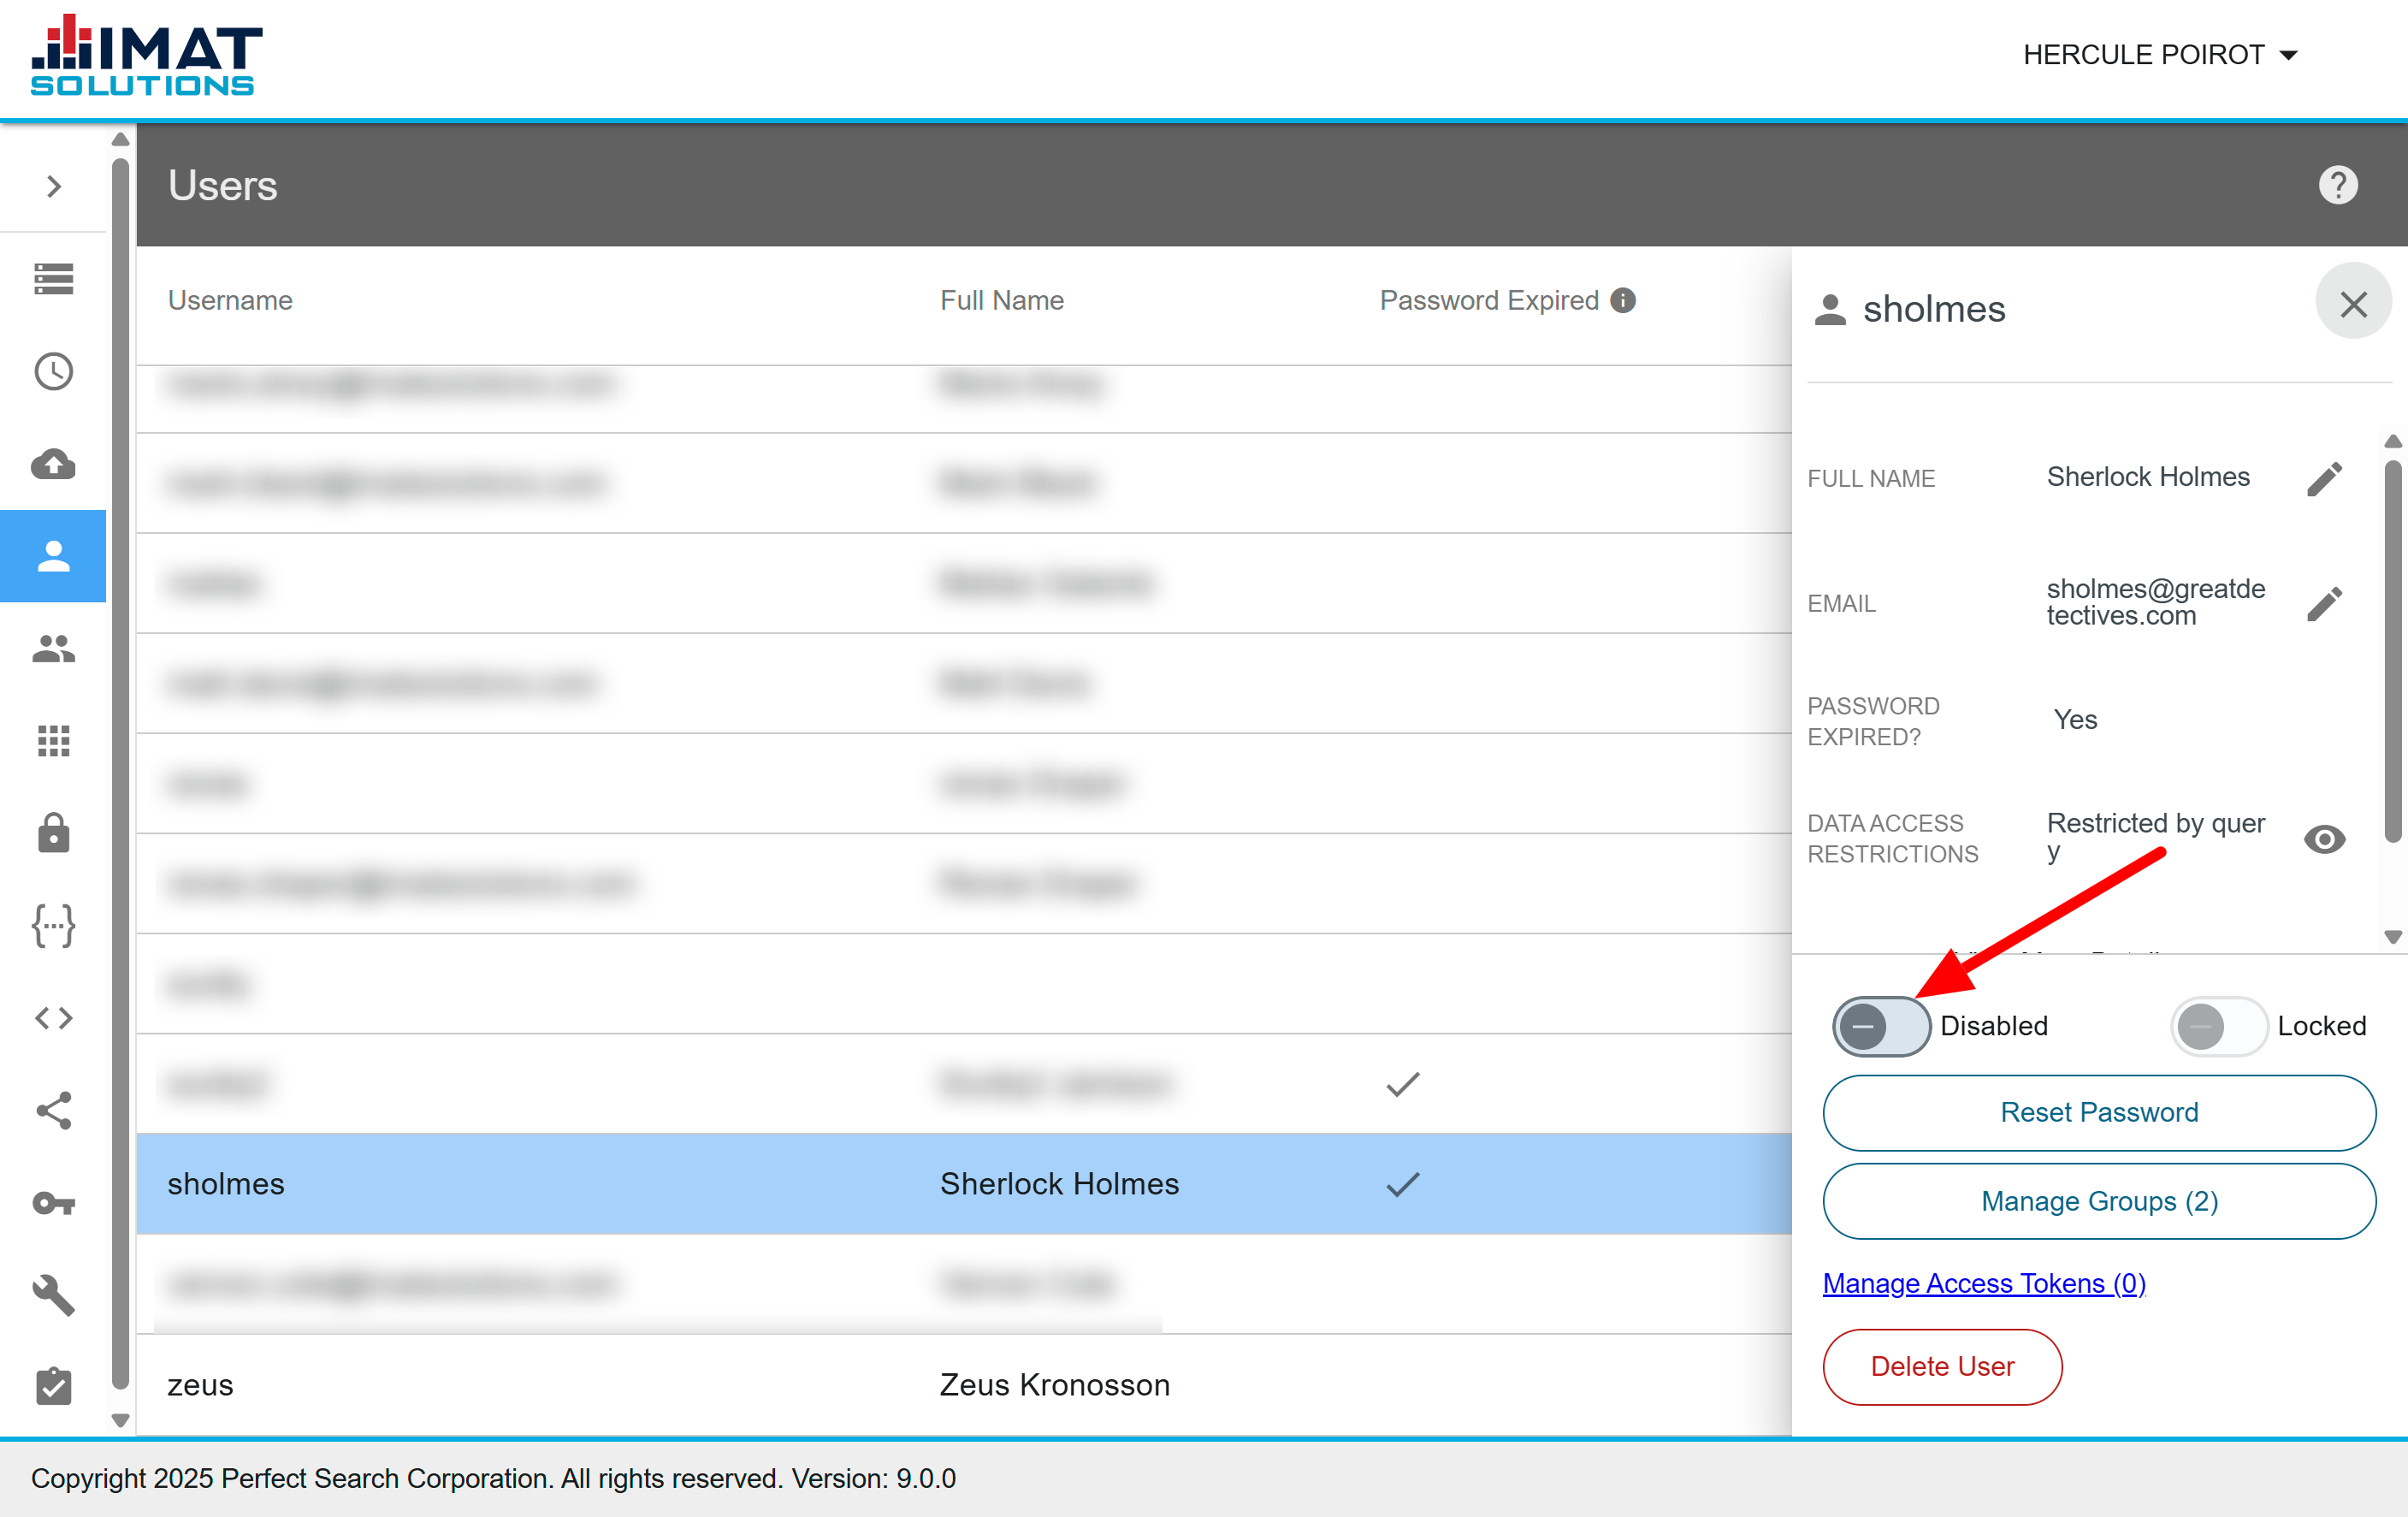
To disable a user, follow the steps below:
In the navigation menu, click Users.
Locate and click the user.
Click Disabled in the pane on the right. The toggle changes from faded to dark.
The Disabled column now contains a check next to the user.
Enable a User
To enable a user, follow the steps below:
In the navigation menu, click Users.
Locate and click on the user.
Click Disabled in the right pane. The toggle changes from dark to faded.
Note:
Enabling a user automatically unlocks the user.

Click on image to zoom
Unlock a User
A locked account prevents a user from signing in to the system and from resetting his or her password. An account becomes locked when a user incorrectly keys in the password six times consecutively.
Unlock a User
To unlock a user, follow the steps below:
In the navigation menu, click Users.
Locate and click the user.
Click the Locked toggle in the pane on the right. The toggle changes from dark to faded.
The Locked column no longer contains a check next to the user.
 Click on image to zoom
Set a Temporary Password
There are times when a user needs his or her password reset before signing in to the server. An administrator can create a temporary password for the user for one-time use only. The user will be required to reset the password the next time they sign in. To set a temporary password, follow the steps below:
Click Users in the navigation pane.
Select the user you wish to edit.
Click in the pane on the right.
Enter the New password.
Retype the password in Confirm.
Click .
The Password Expired column contains a check on the Users screen for the following two reasons:
The user hasn’t signed in after an administrator set the password.
The configured amount of time has passed since the user last reset their password.
 Click on image to zoom
Manage Groups
There are times when a specific group of users should have access to the same information. Users can be added to preconfigured default Roles or to customer-created groups. Groups are used in security collections and system sets and can limit the information a specific set of users can view.
Click Users in the navigation pane.
Select the user you wish to edit.
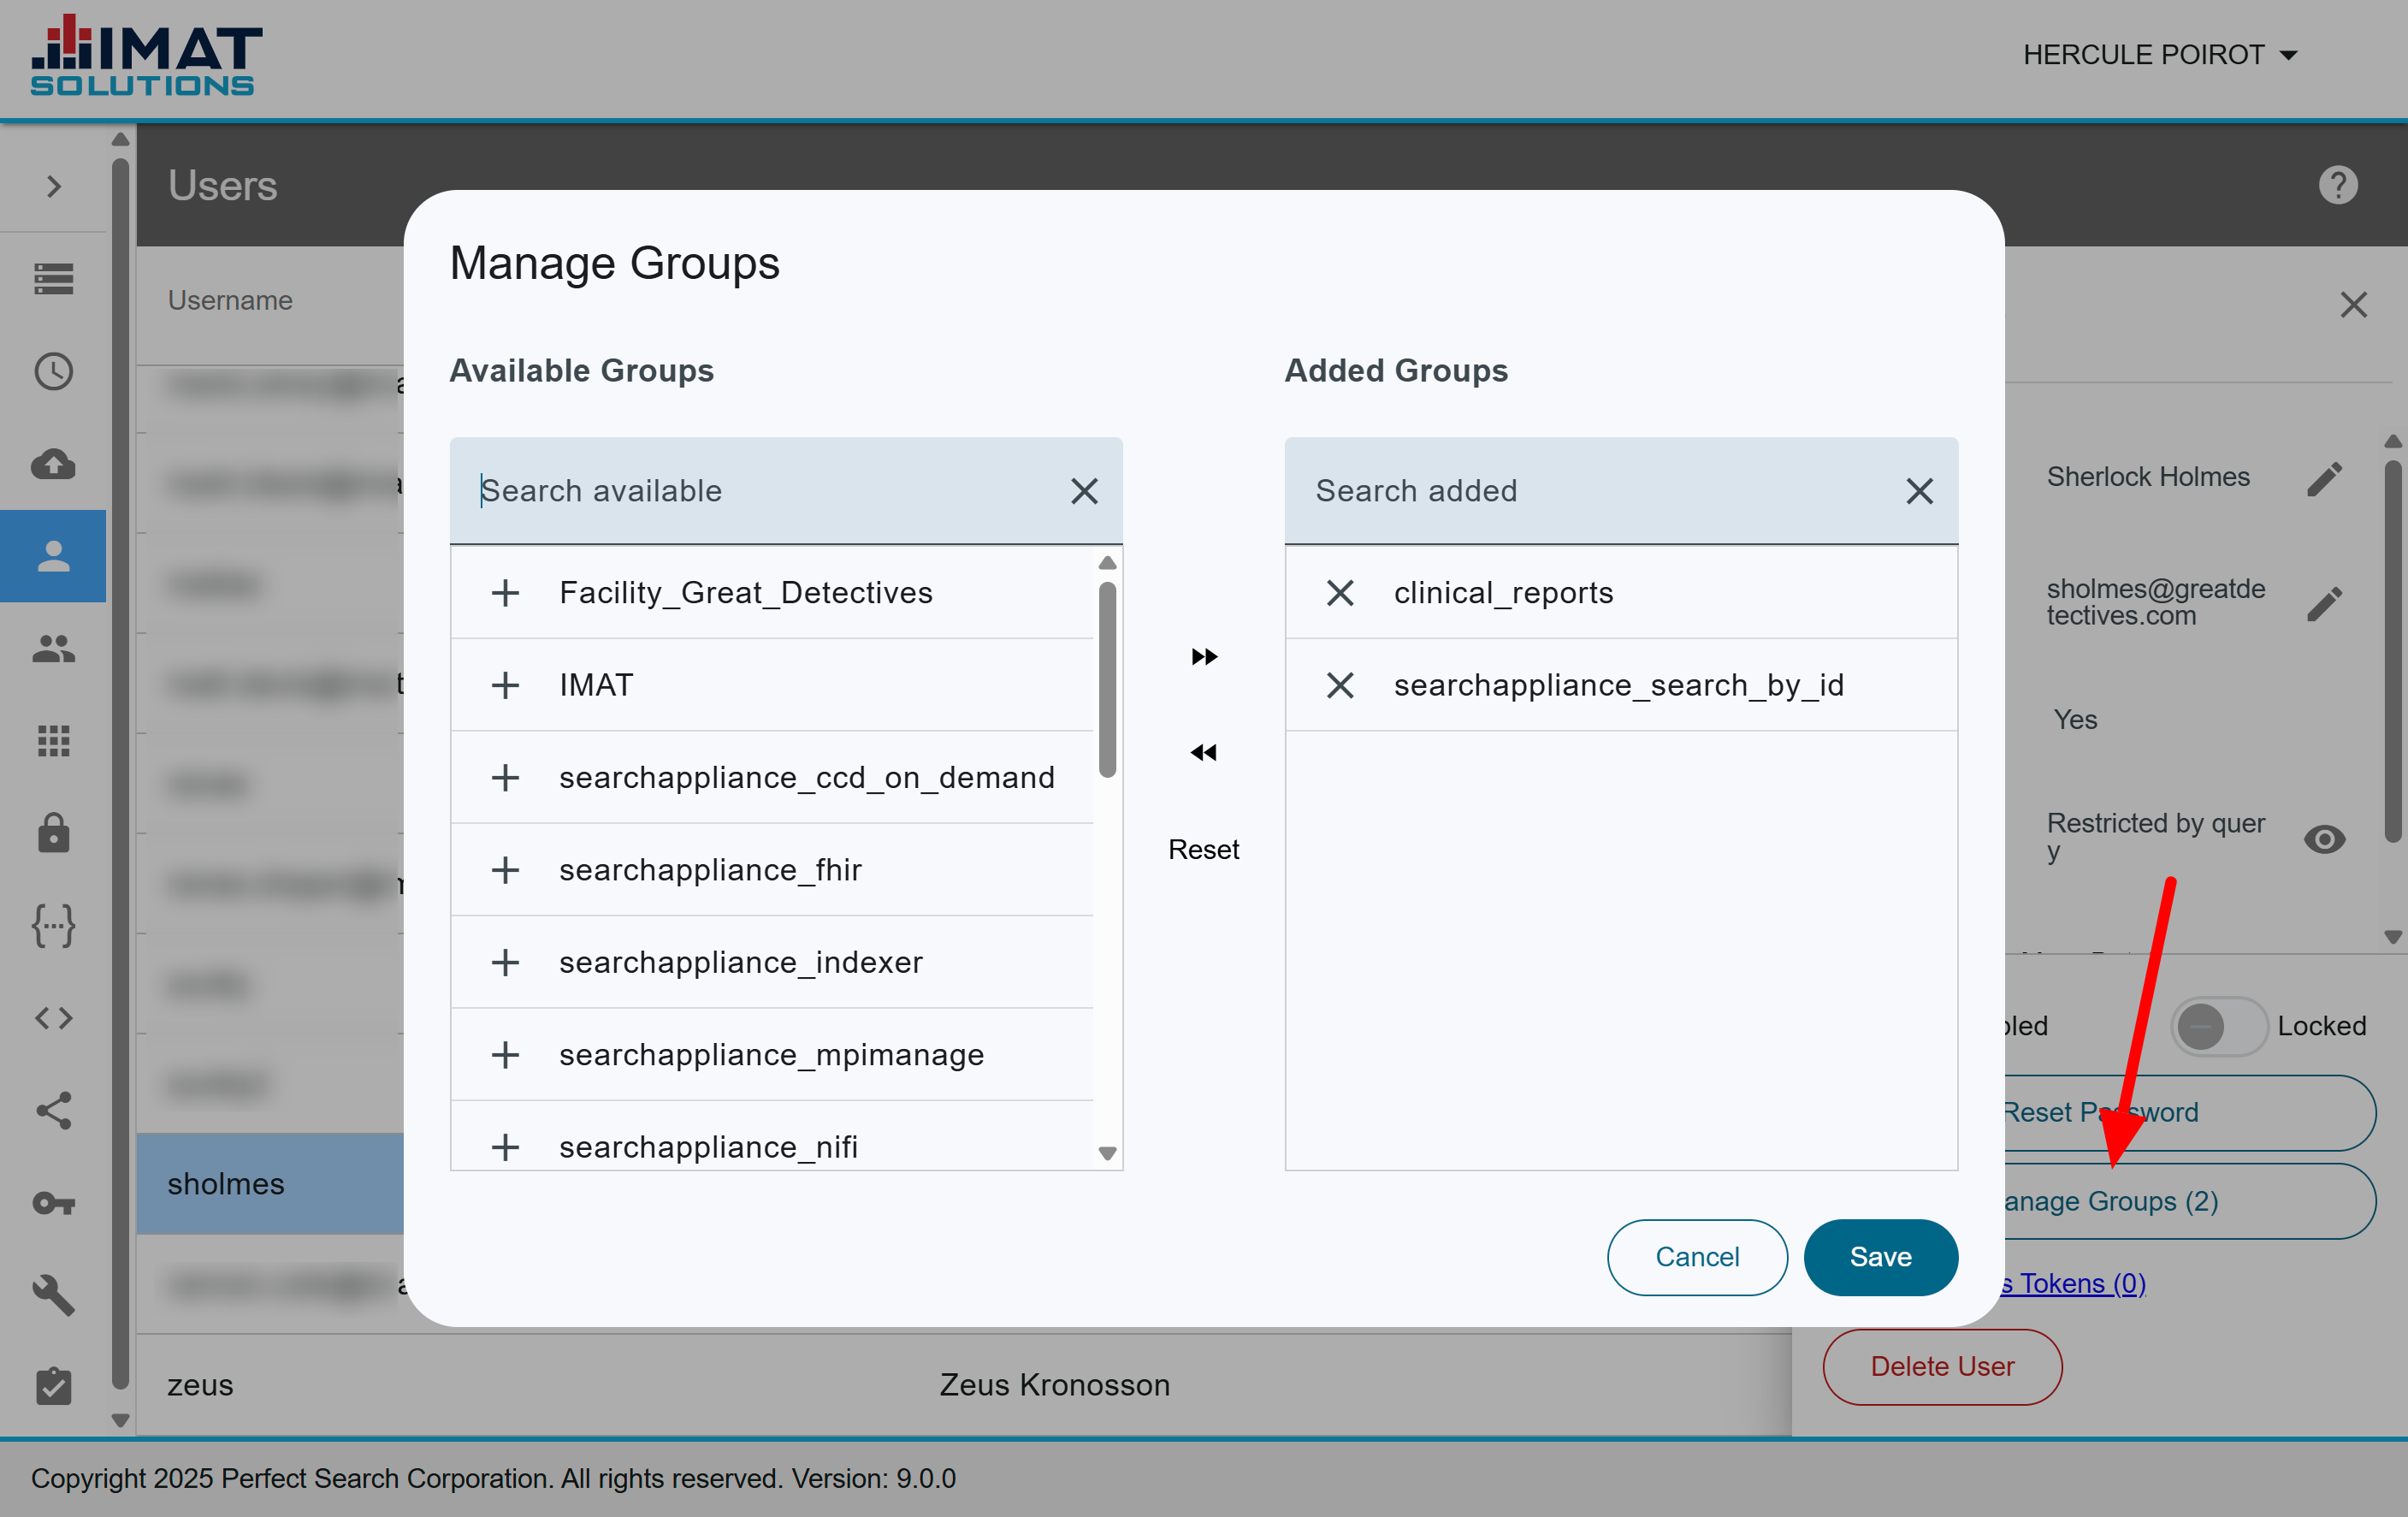
Click .
Move the groups that the user should be assigned to from the left column to the right column:
Click by the group name to move one group to the user.
Click to move all the groups to the user.
Click .
Remove a user from groups by one of the following means:
Click next to the group in the right column.
Click to remove all from the right column to the left.
Click Reset to return all groups to their original position.
 Click on image to zoom.
Create an SSO User
IMAT versions prior to 9.0 do not have this capability.
Single Sign-On (SSO) allows users to sign in to multiple applications with one set of credentials. SSO can be used across websites, applications, and services.
Note that the only difference between a normal user and an SSO user is how they sign in to the system.
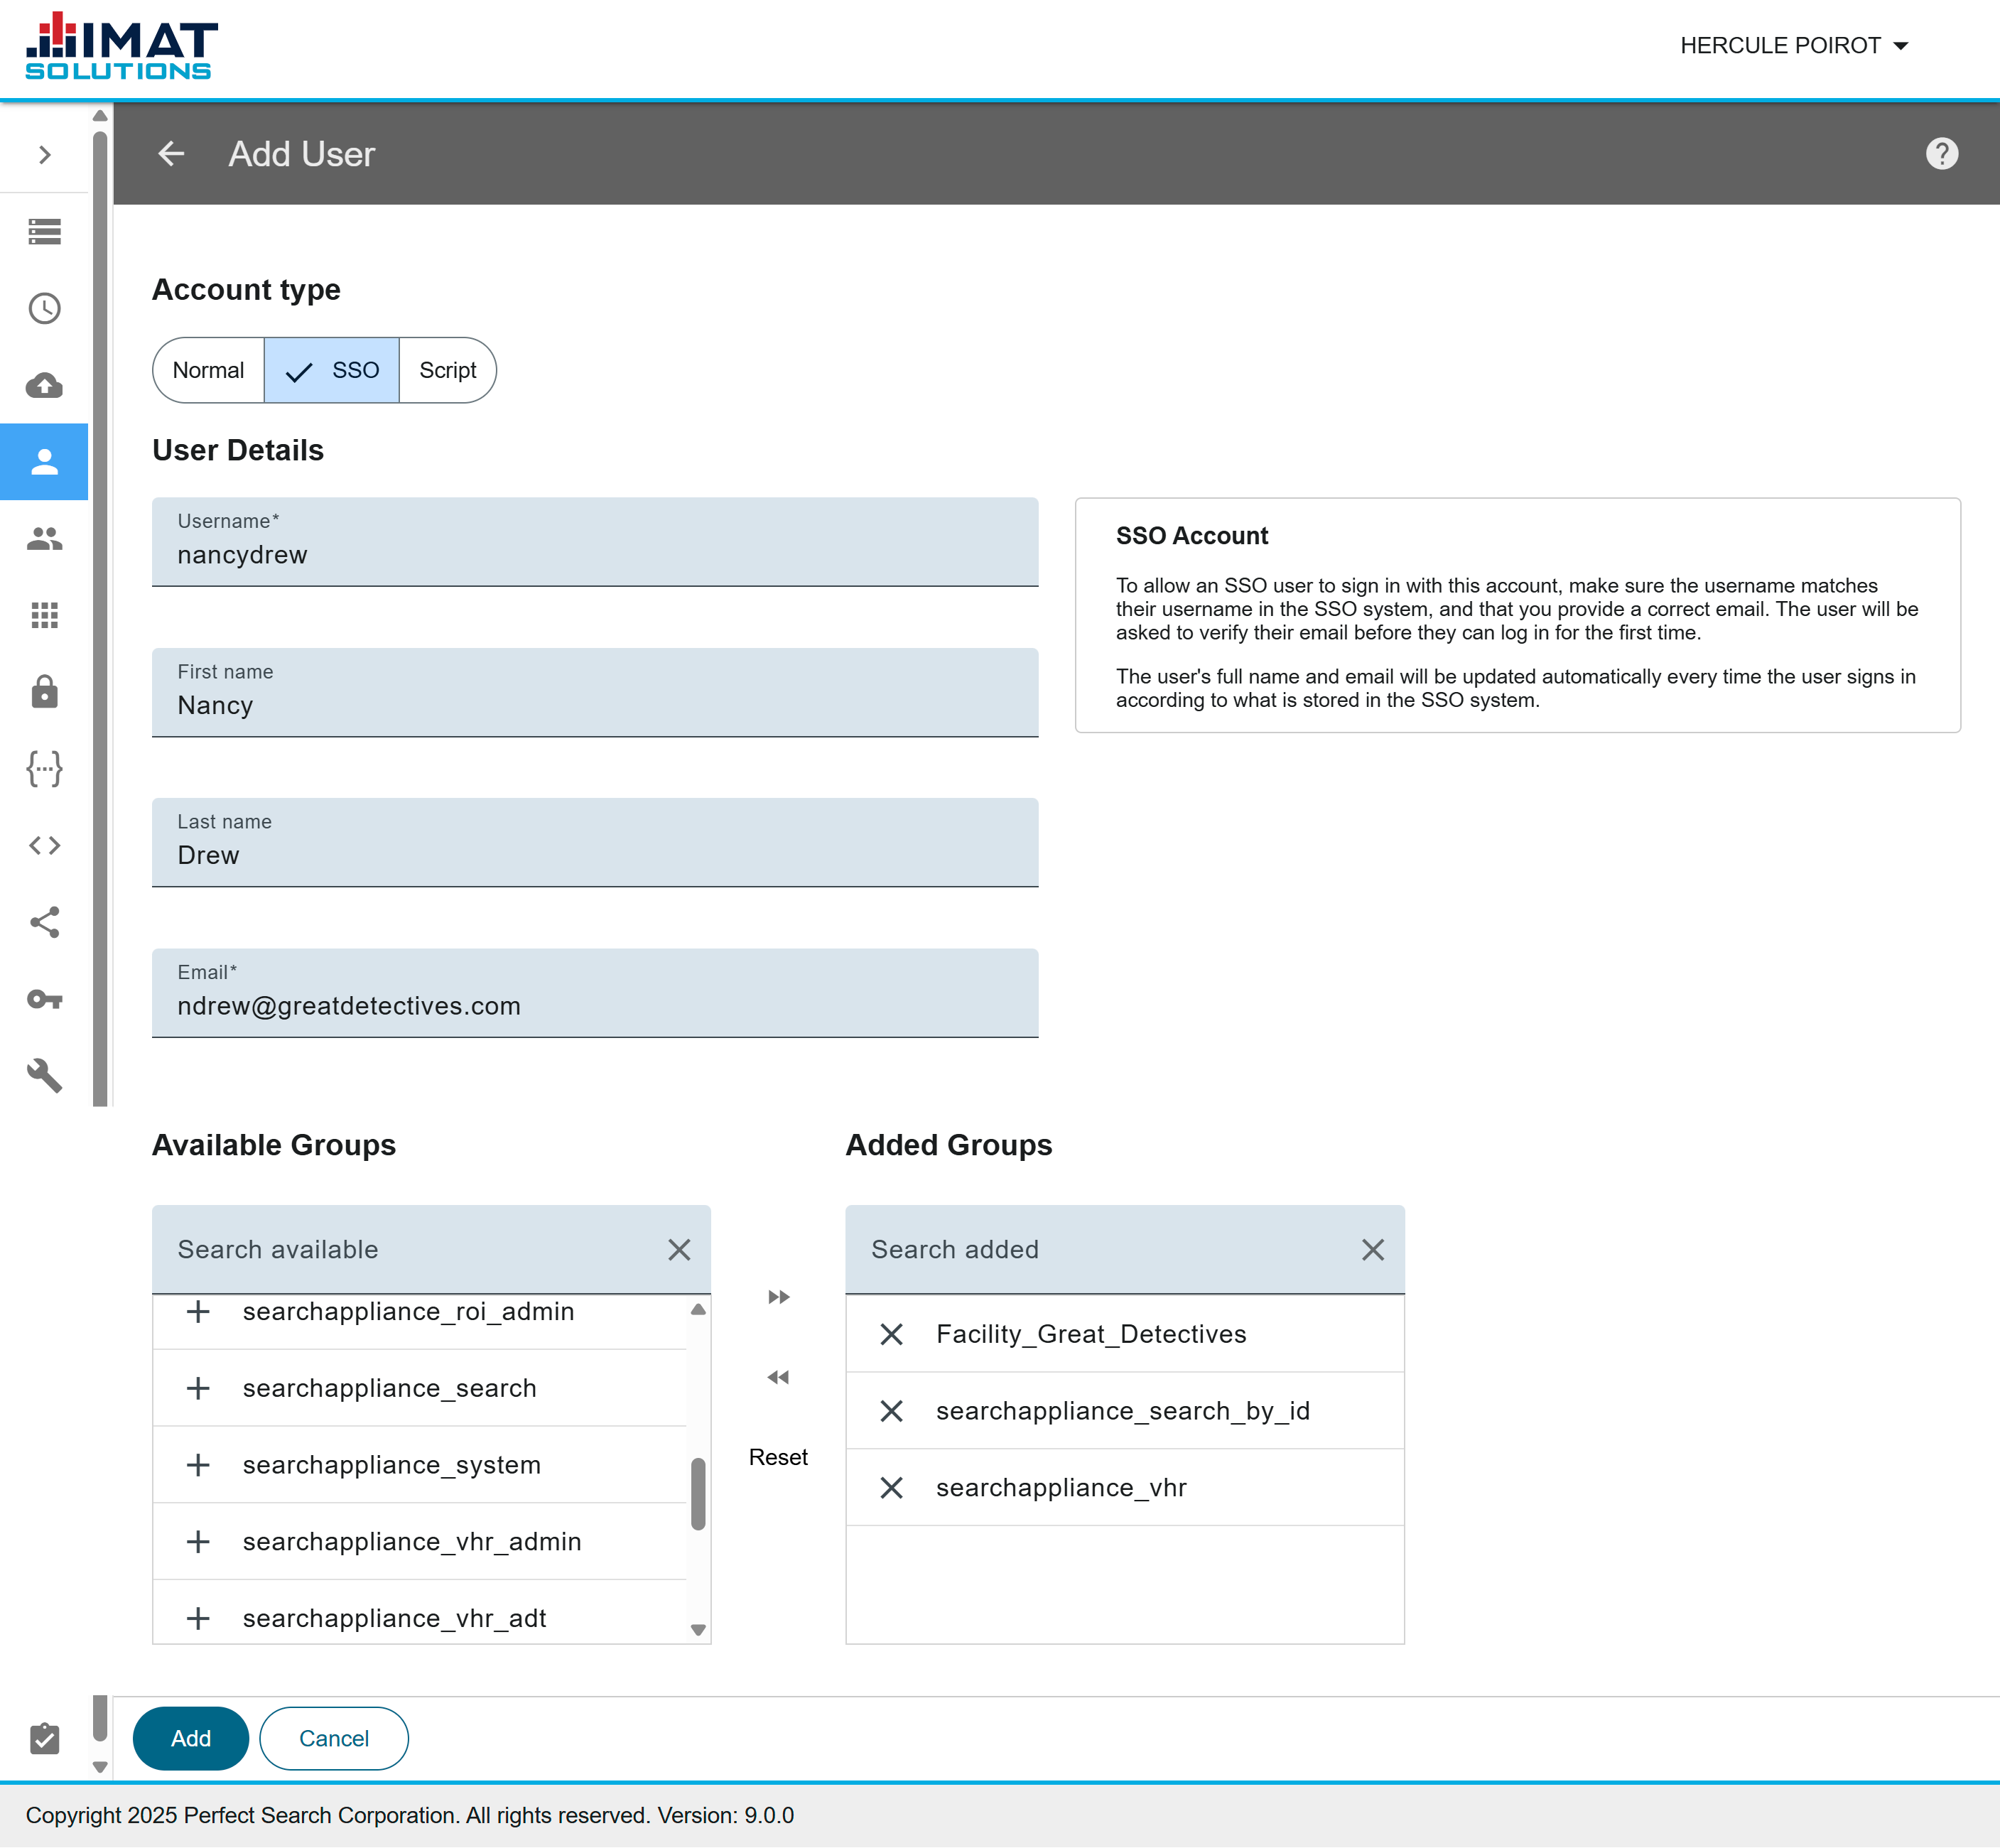
To allow an SSO user to sign in, ensure the username entered matches the one in the SSO system and that you provide the correct email. The user will be asked to verify their email before they can sign in for the first time.
The user's full name and email are automatically updated whenever the user signs in, based on the information stored in the SSO system.
In the navigation pane, click Users.
Click found in the top-right corner of the Users screen. This opens the Add User screen.
Choose SSO as the Account Type.
In the Username field, type the sign-in name for the user. Usernames can contain the following characters:
numbers
letters (uppercase and lowercase)
_ (underscore)
- (hyphen)
. (period)
* (asterisk)
@ (at sign)
Type the First name.
Enter the Last name.
Enter an Email address.
In the Available Groups area, click on the groups to add the user to. The list of groups the user is added to is found in Added Groups. Different IMAT applications require different access roles, but all users must have either the searchappliance_search or the searchappliance_search_by_id role for search-related applications. See Search Appliance Roles for more information.
Click .
A notification appears confirming that the user has been added.
Clicking returns you to the list of users without saving the changes.
 Click on image to zoom
Edit an SSO User
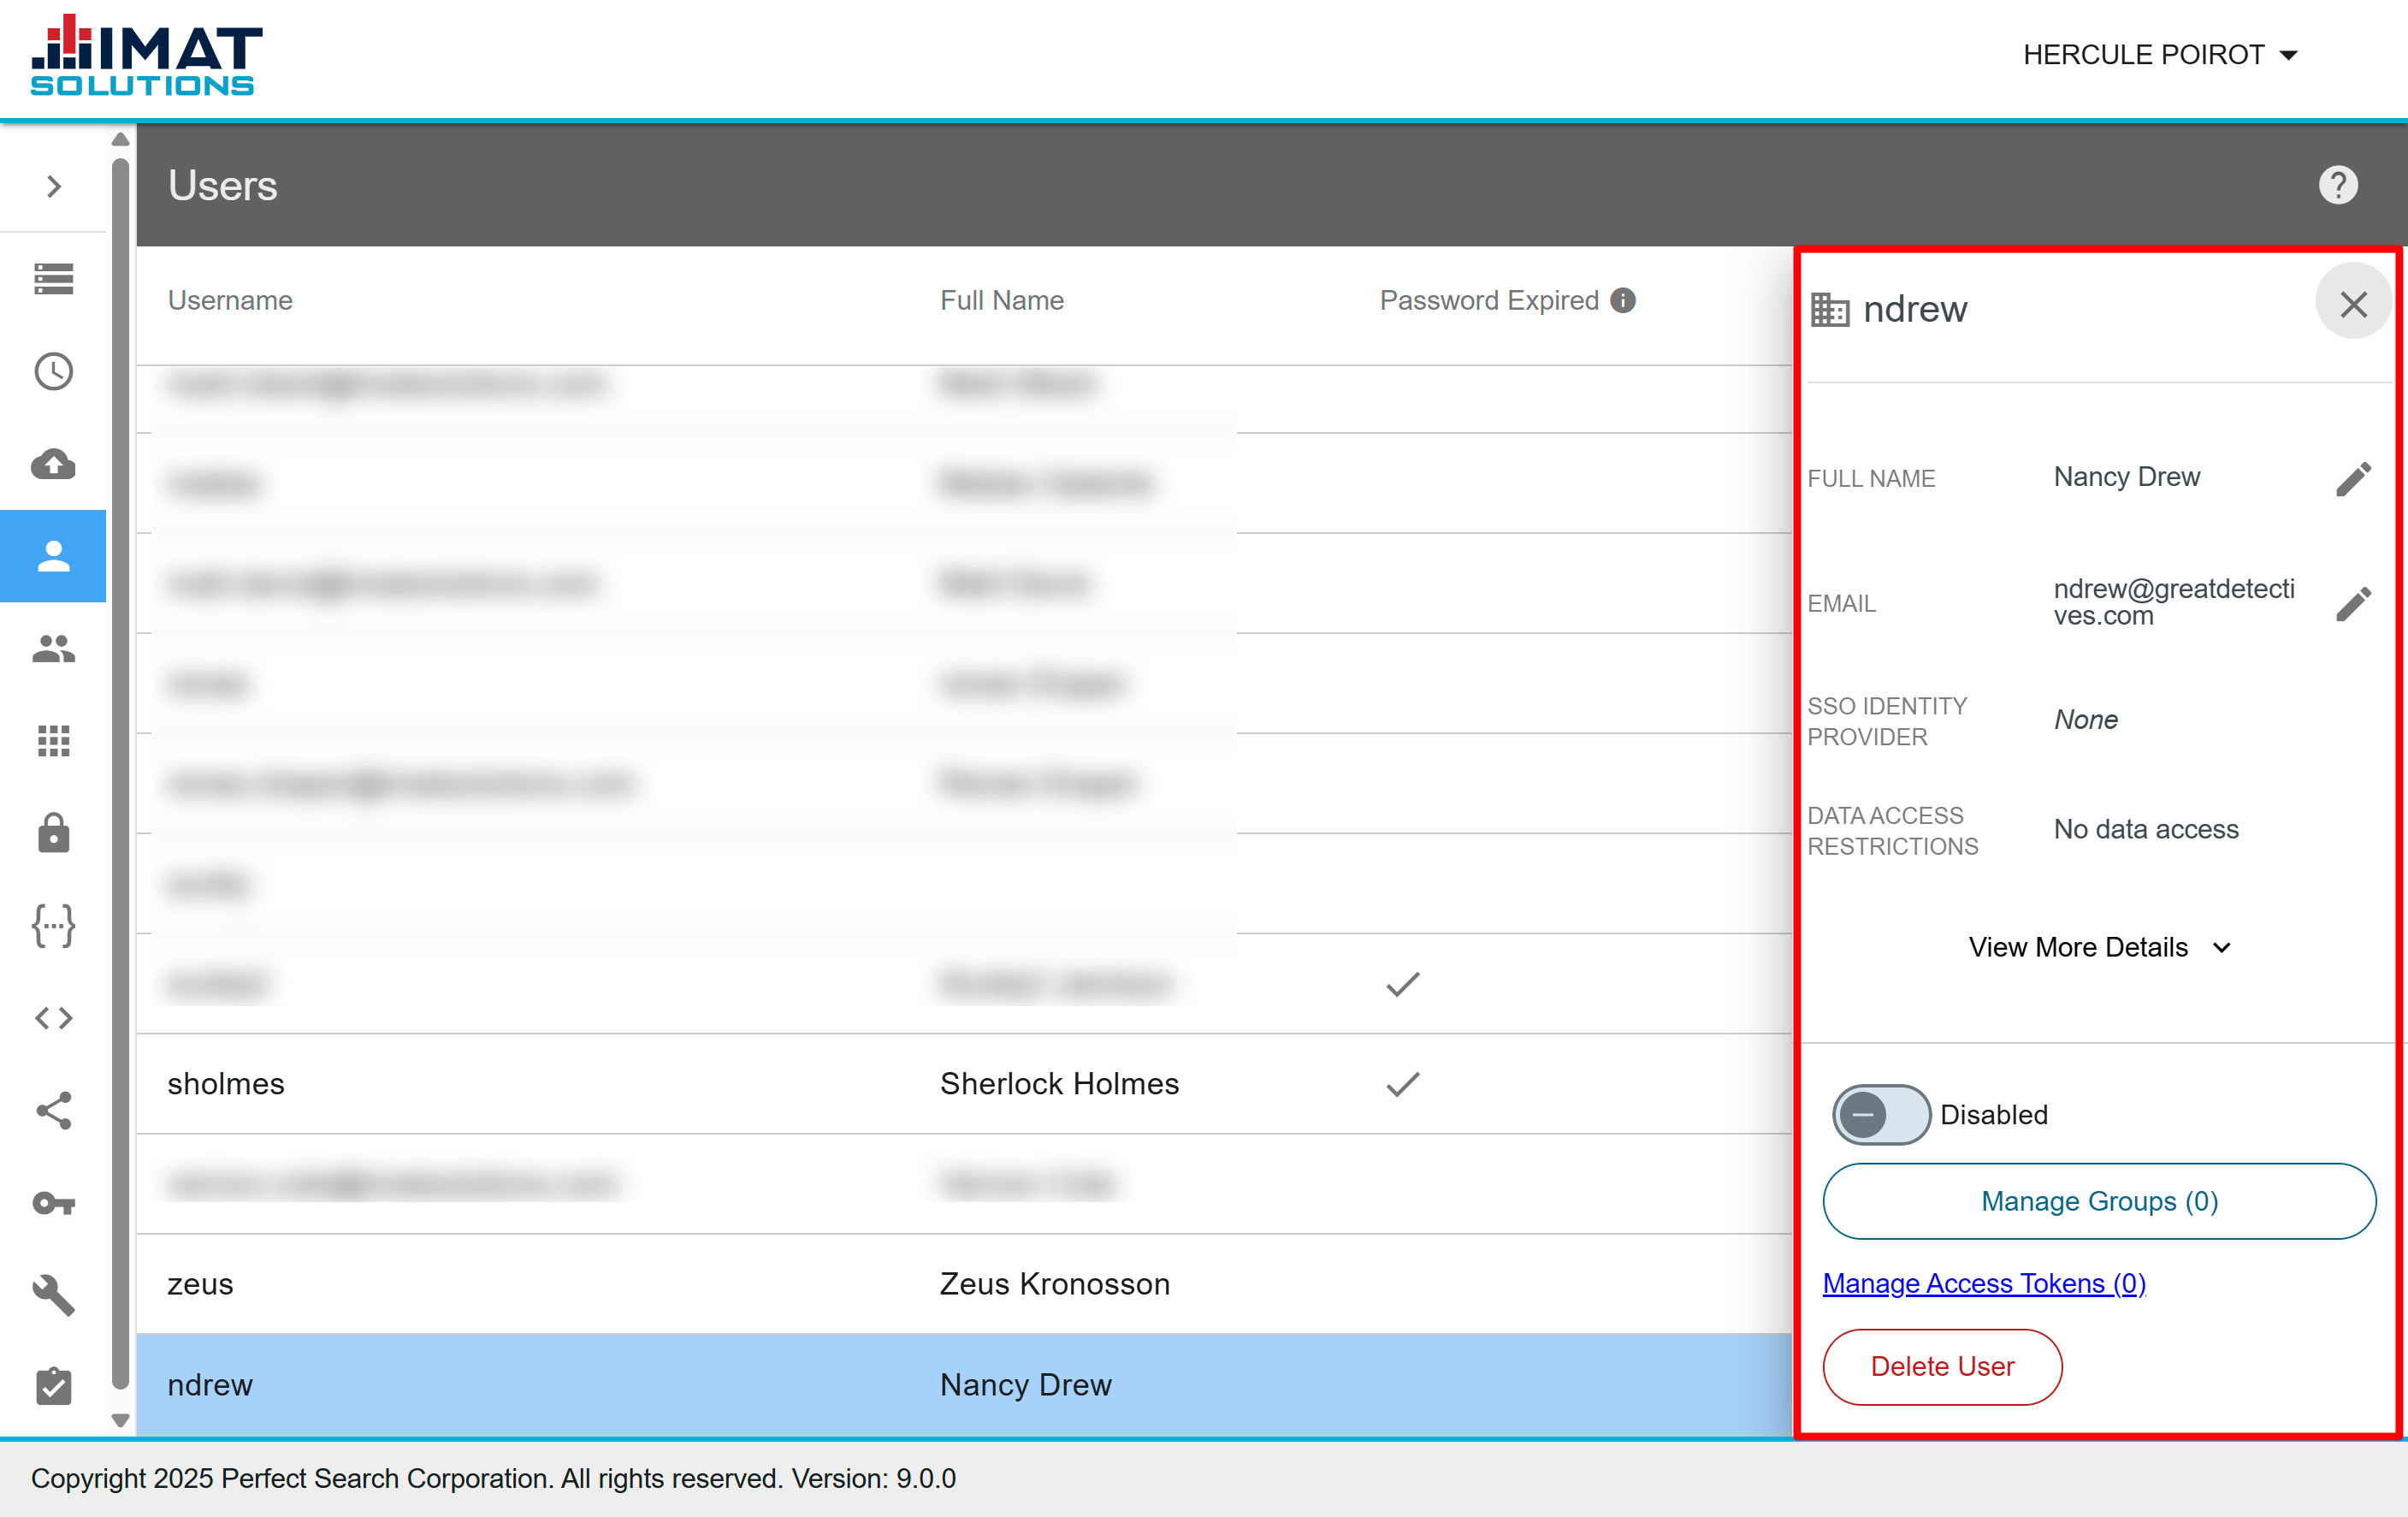
SSO users are easily identifiable by the domain icon, , next to their usernames. You may edit the following items for an SSO user: full name, email, enable or disable an account, manage groups, or delete.
Click next to the Full Name or Email fields to edit.
 Click on image to zoom
Create a Script User
IMAT versions before 9.0 do not have this capability.
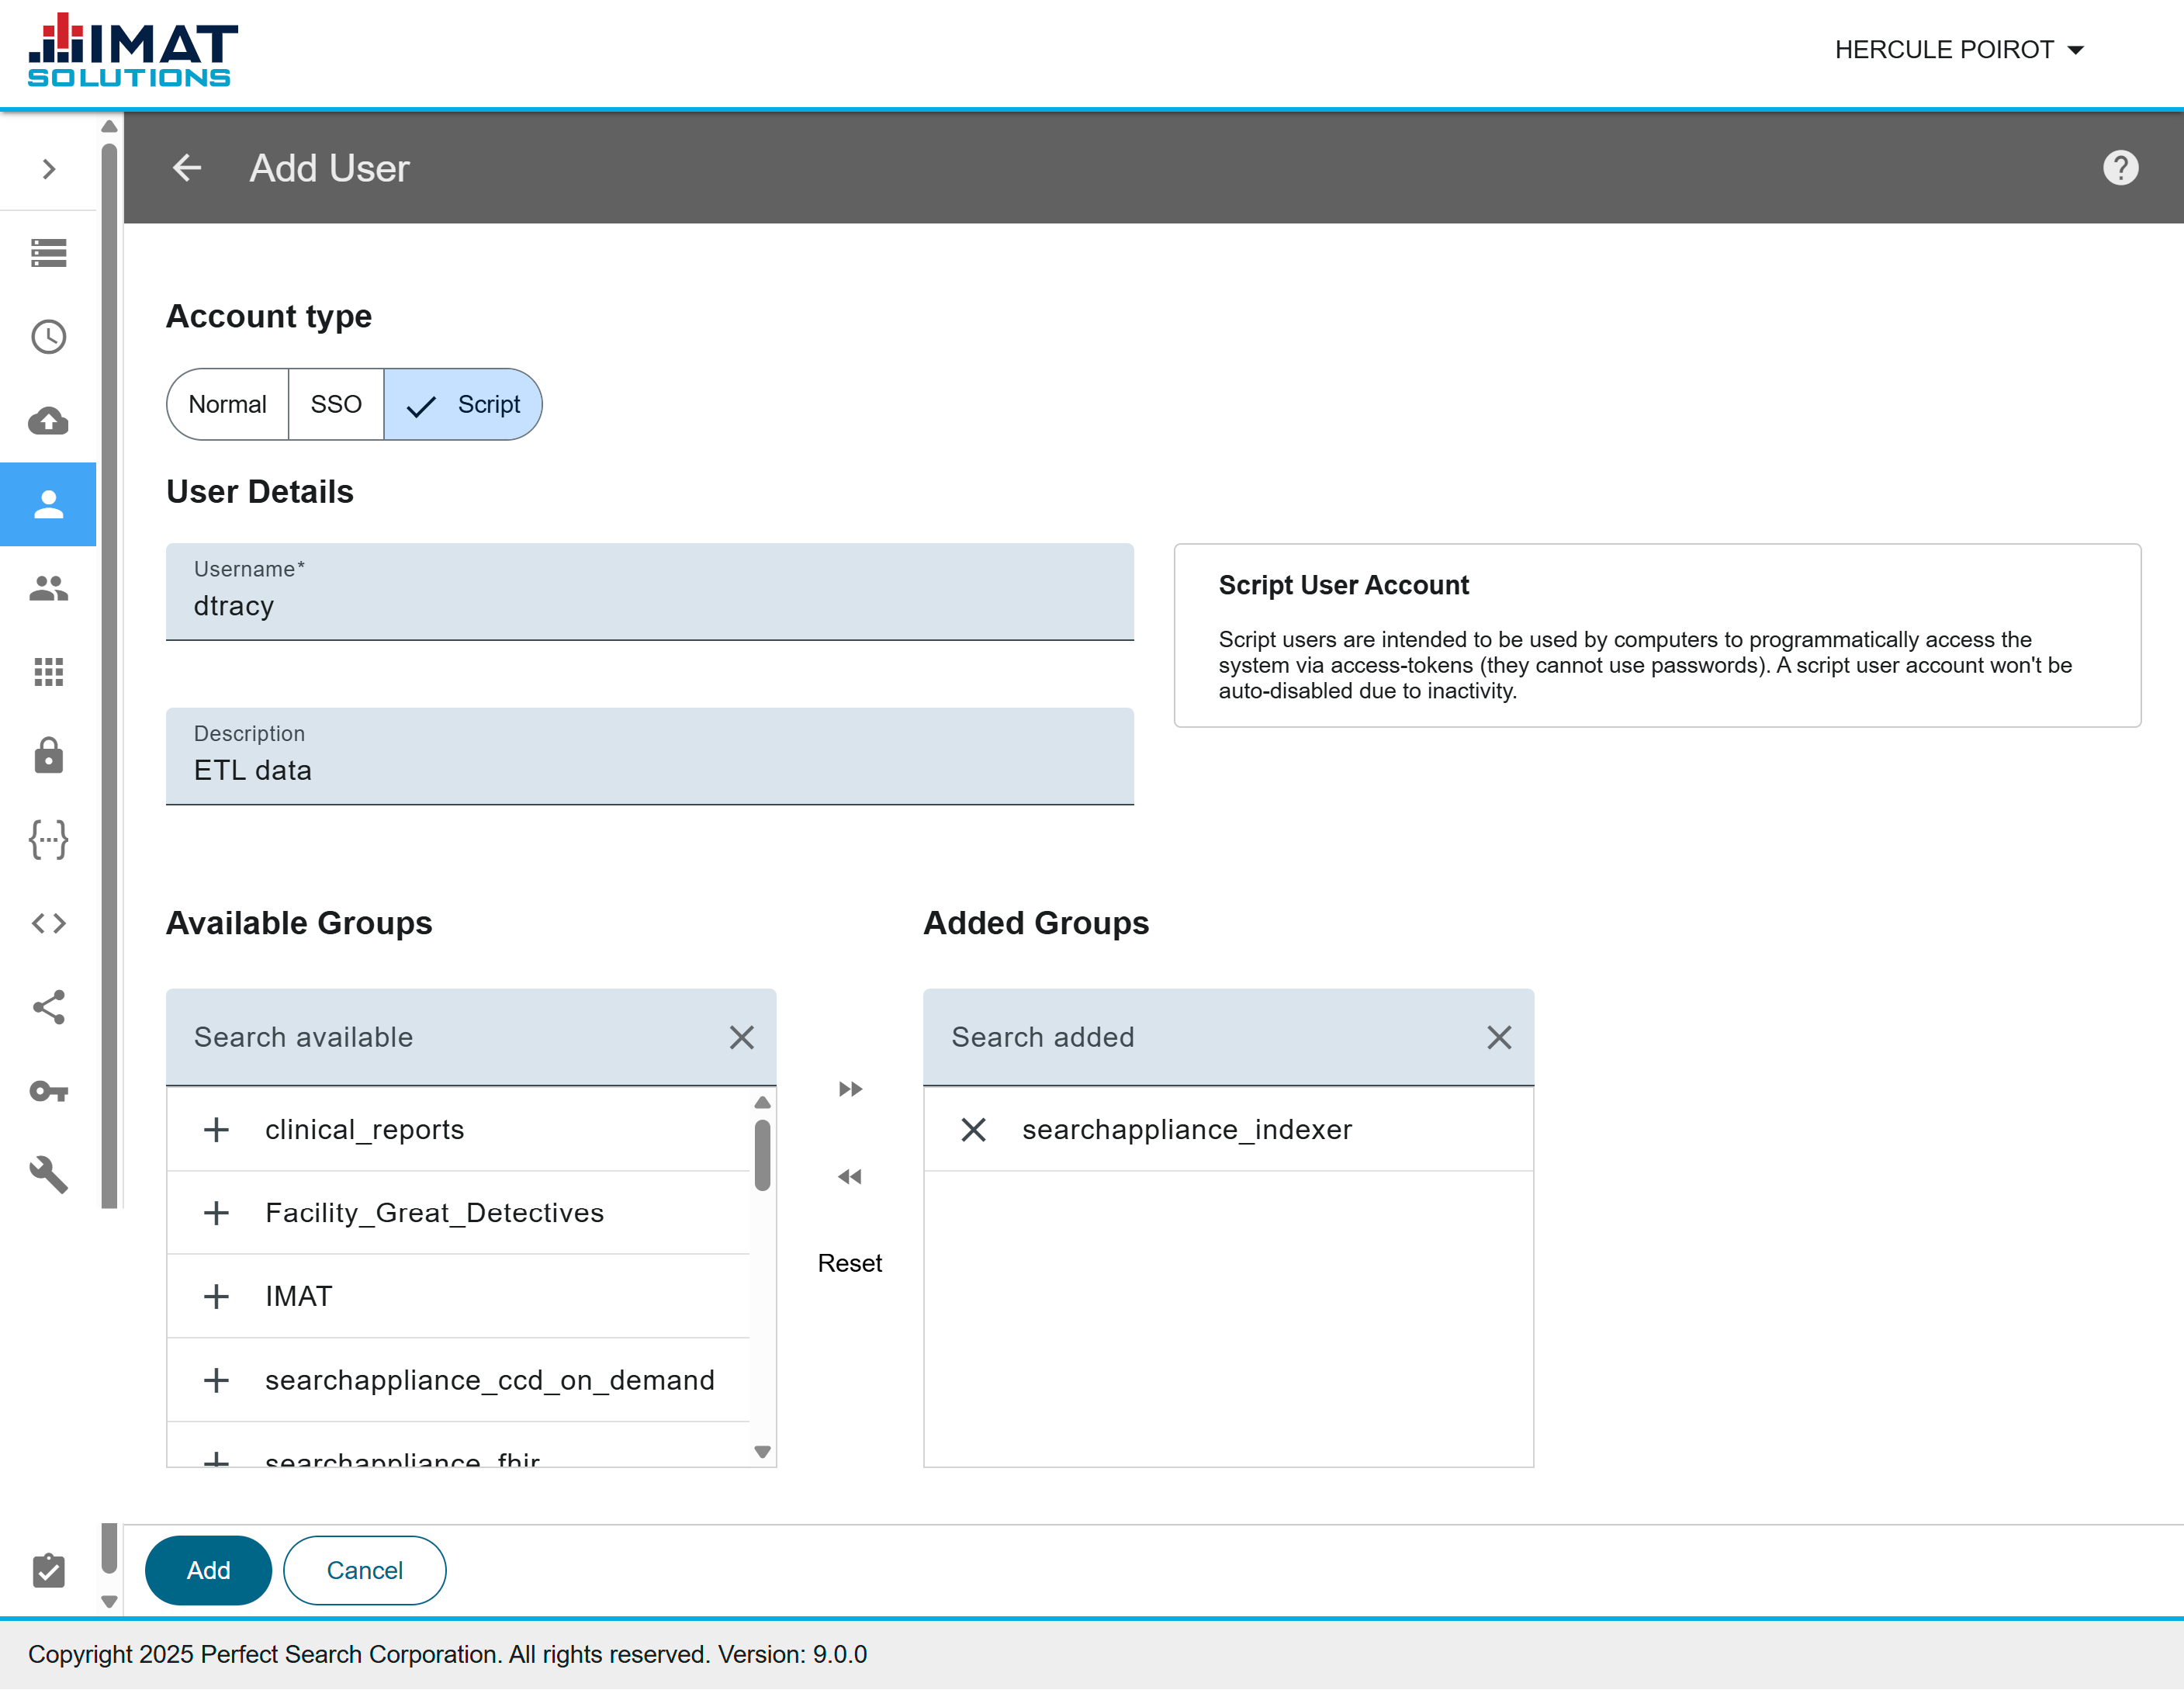
Script users are intended for users to access the system programmatically with access tokens instead of passwords. A script user account won't automatically lock due to inactivity because it only interacts with IMAT's APIs.
One use case is for health exchange/CCD on-demand, where the third-party partner is given an account with an associated access token. It isn't used for end-user sign-in, but rather for API requests to trigger between the systems.
Another example is if extra processing needs to happen around set generation beyond the default behavior. A script is written to handle the extra needs and uses a token to query IMAT APIs as needed.
Create a script user with the following steps:
In the navigation pane, click Users.
Click found in the top-right corner of the Users screen. This opens the Add User screen.
Choose Script from the options provided.
In the Username field, type the sign-in name for the user. Usernames can contain the following characters:
numbers
letters (uppercase and lowercase)
_ (underscore)
- (hyphen)
. (period)
* (asterisk)
@ (at sign)
Enter a Description. The description should be added to help you remember why the user needs the account.
Add an Available Group. Different IMAT applications require different access roles, but all users must have either the searchappliance_search or the searchappliance_search_by_id role for search-related applications. See Search Appliance Roles for more information.
Click .
 Click on image to zoom.
Edit a Script User
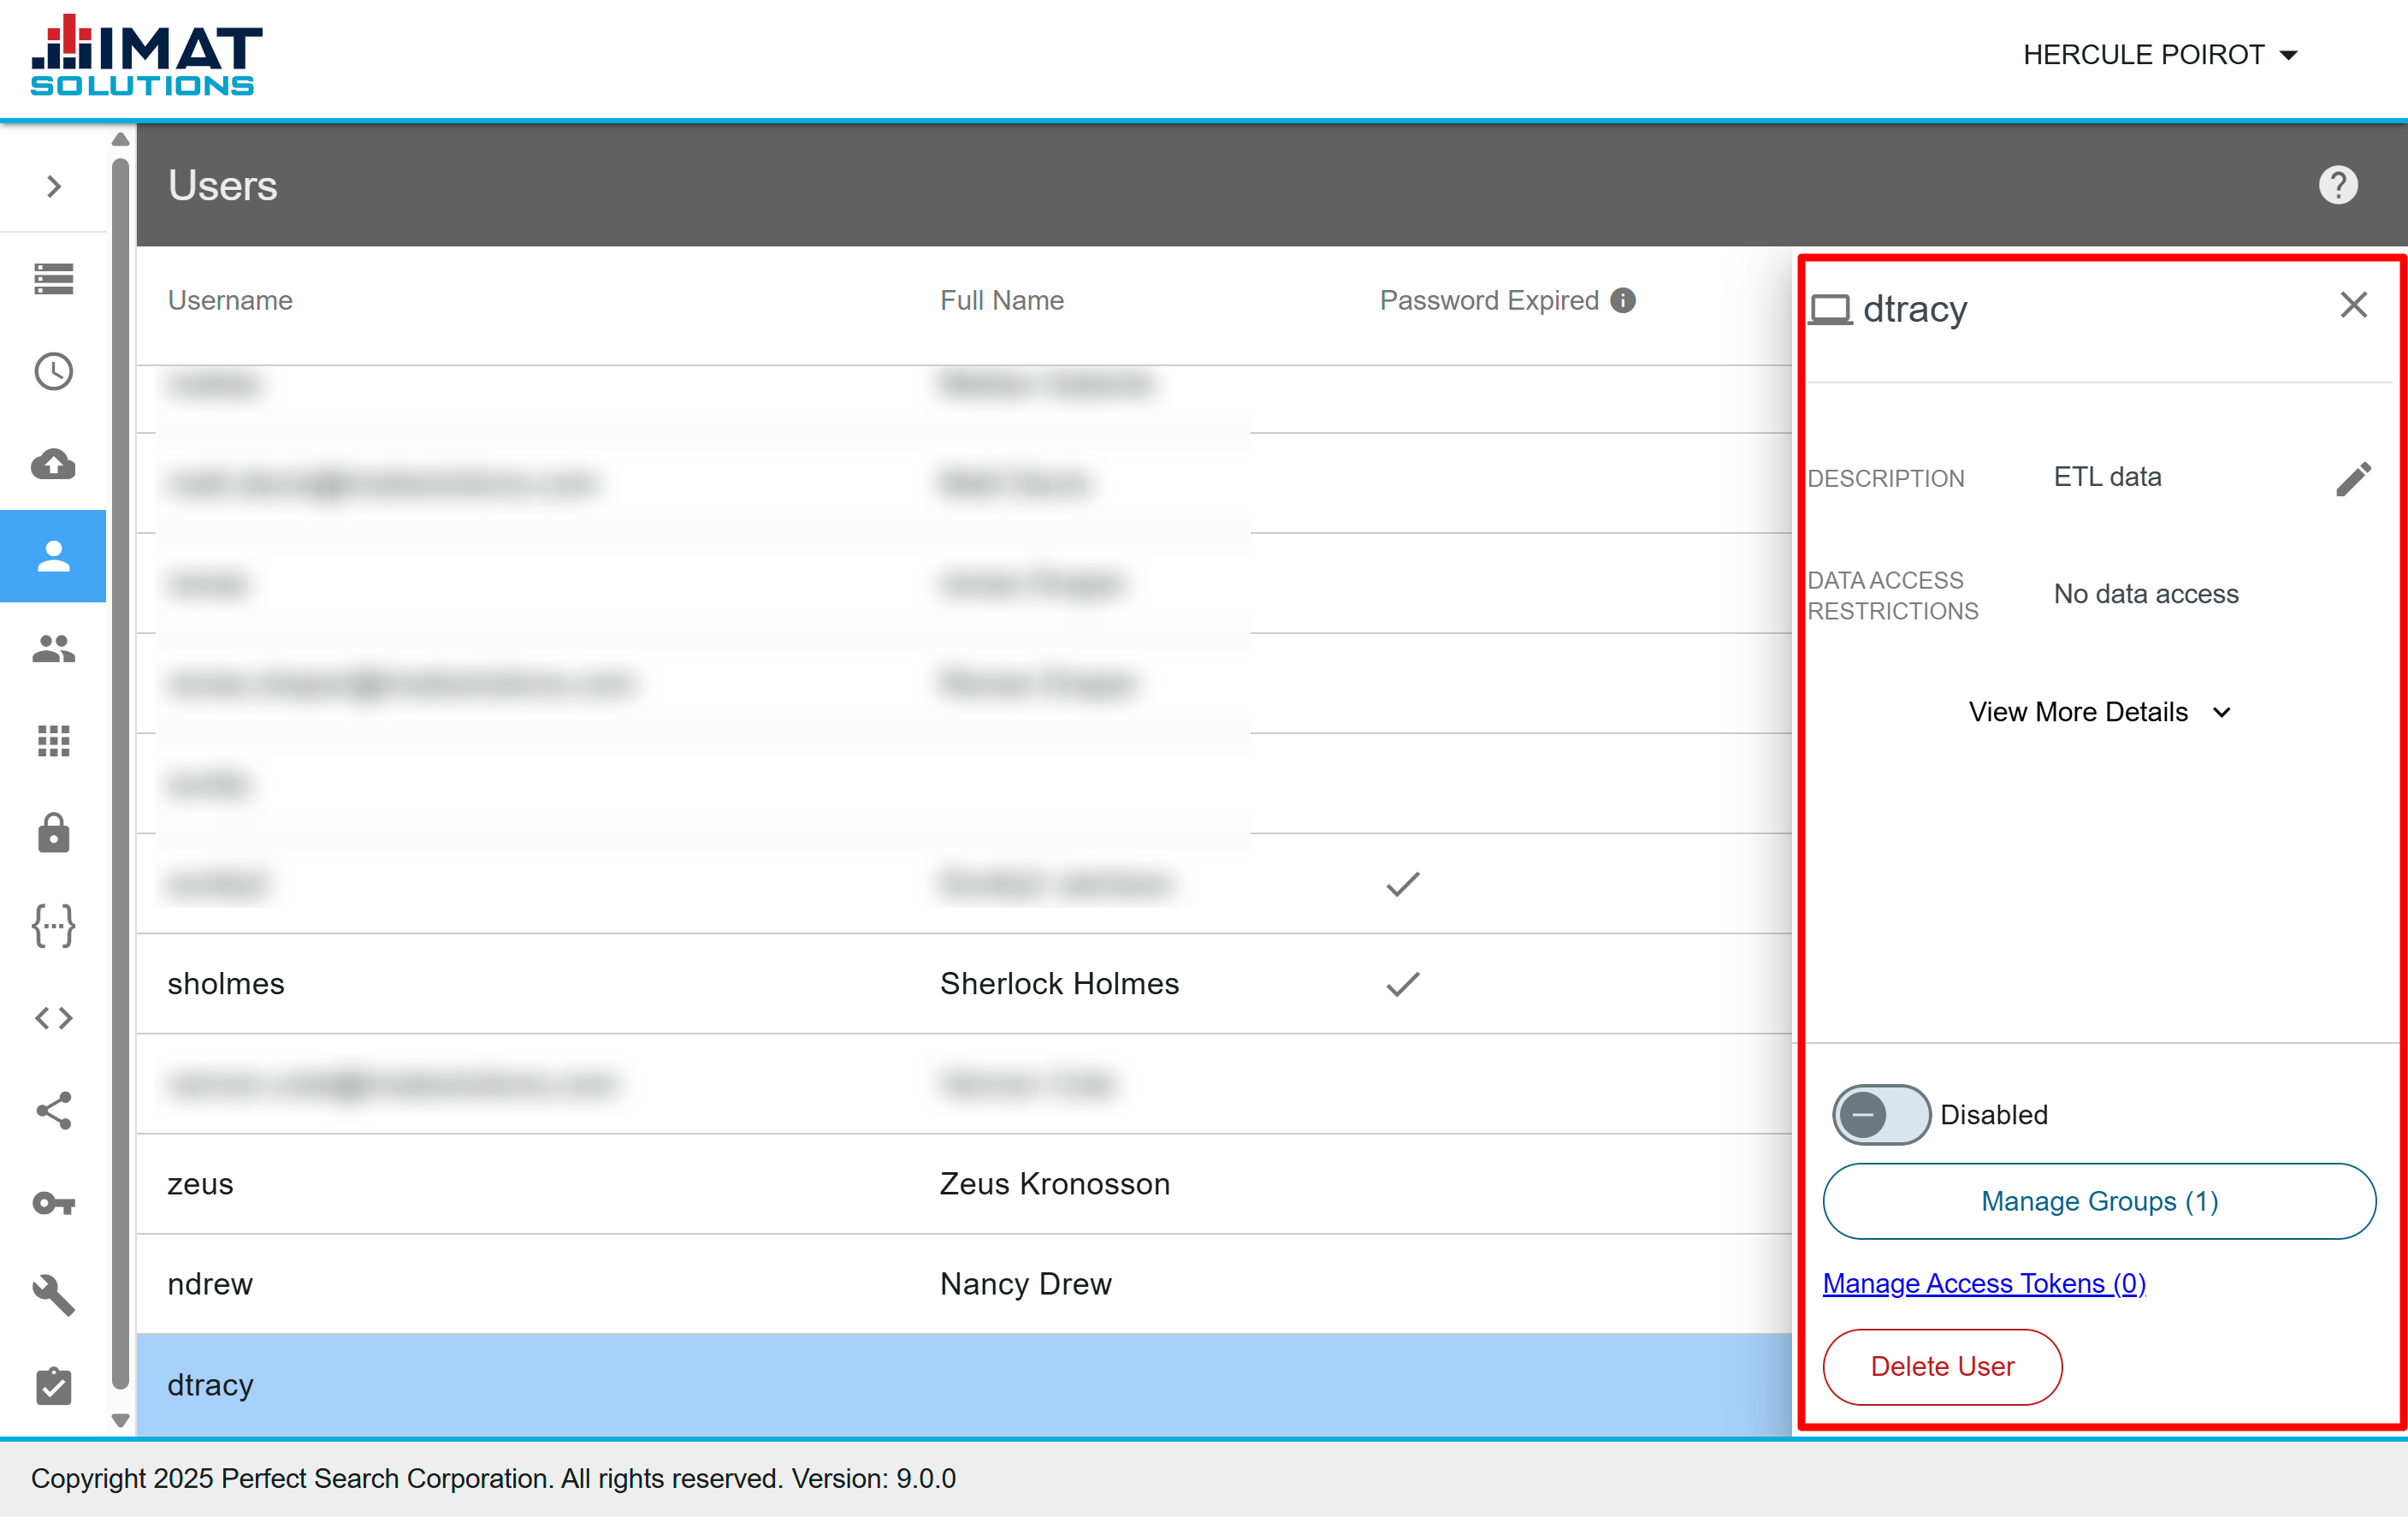
Script users are easily identifiable by the computer icon, , next to their usernames. You may edit the following items for a script user: description, enable or disable an account, manage groups, manage Access Tokens, or delete.
To edit the description, click and retype the description before clicking Update Description.
Add Users by CSV
It is possible to add multiple users at one time using CSV data.
Customizing individual groups per user is not possible with this feature, so create a batch of users that should be included in the same group or groups.
From the Admin: Users screen, click .
Select Add via CSV.
Choose the Account Type: Normal users or SSO users.
Click .
Select the CSV file to upload. A message will appear stating there are no errors in the data. If an error is found, a table appears with the rows of data and the identified error. Fix the errors in the file and click again.
Click when there are no errors in the file.
Choose any applicable groups. Groups cannot be created from this screen, so they must be created beforehand. Click .
Review the data, then click .
The status column indicates if the user was successfully uploaded. The most common reasons for failure are a duplicated username or a password does not meet the minimum requirements.
Click after reviewing the results.
 Click on the image to zoom
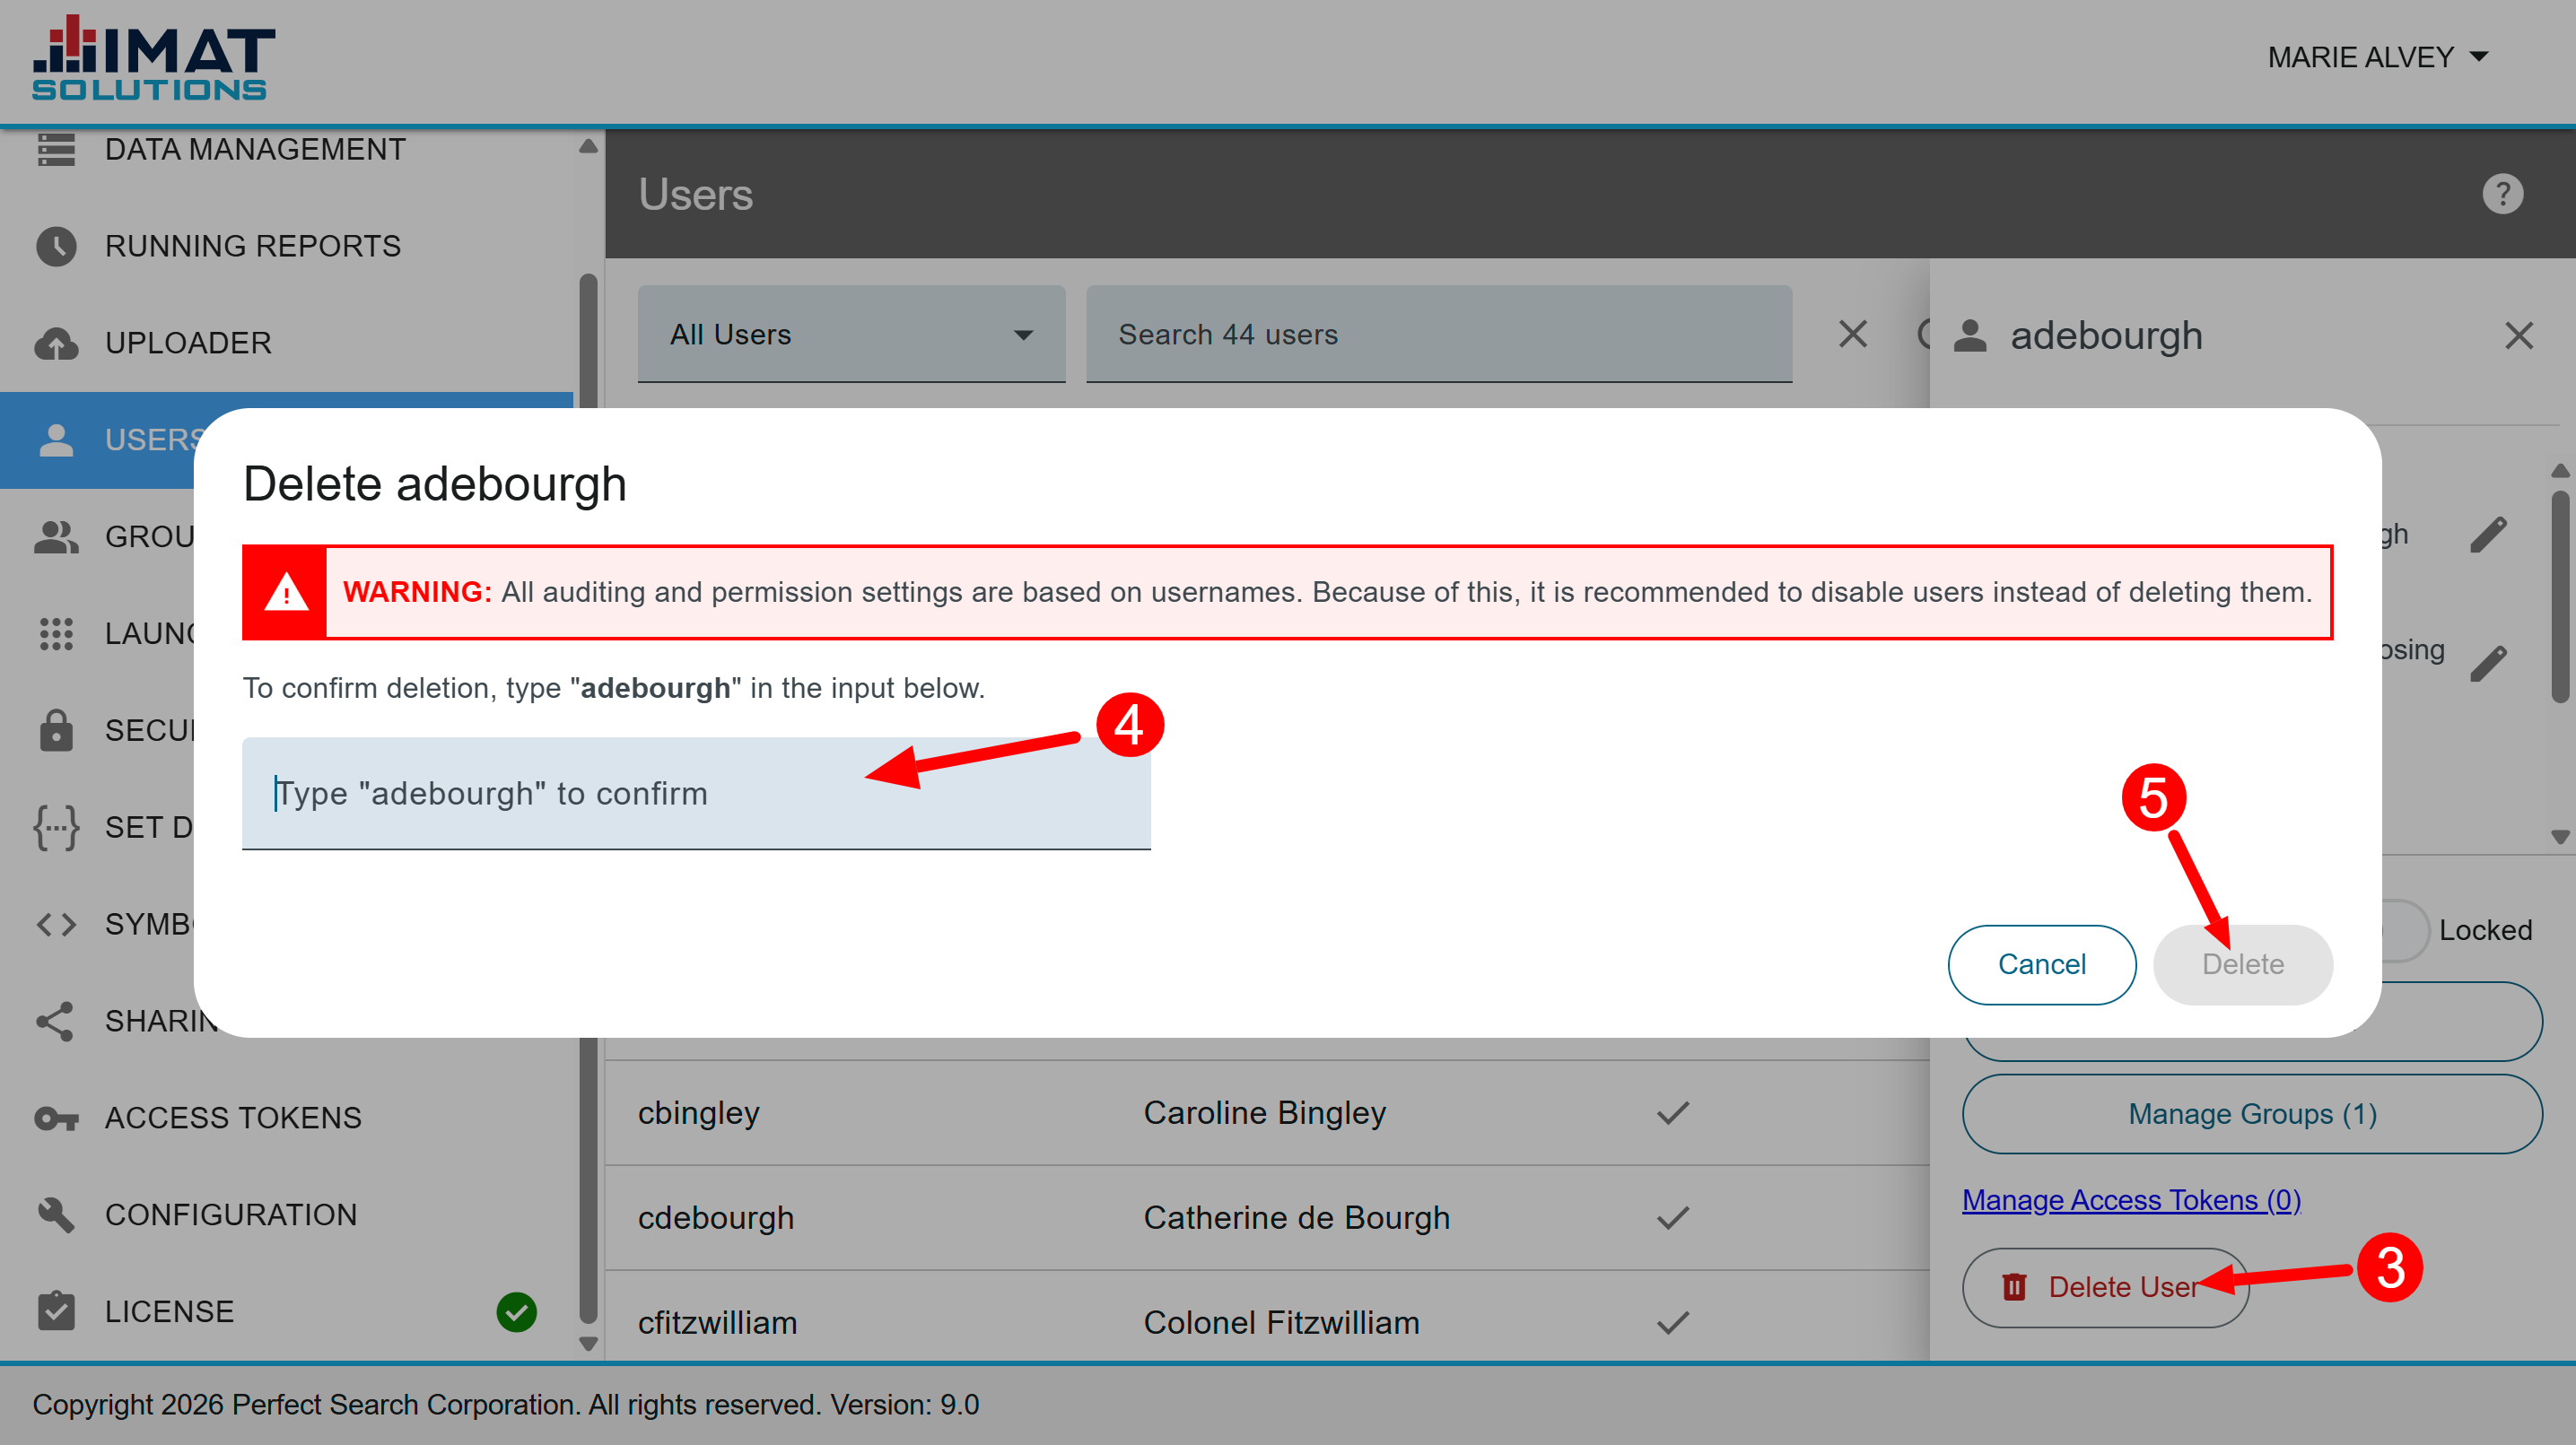
Delete a User
We recommend that you disable rather than delete users if they’ve signed in to and used their account. Deleting a user removes all auditing information and can affect other aspects like access tokens, sharing, etc. However, if you have determined that deleting a user will have no negative effects, you may delete a user by following the steps below:
Click Users in the navigation pane.
Locate and click on the user.
Click in the details pane on the right.
Confirm you would like to delete the user by typing the username on the line provided.
Click .
The Delete option may not be available if your organization has disabled it.
Versions 8.x or earlier:
Over 1,000 users will cause the system to become sluggish. This may include taking several attempts to create new users or a slowdown when the system needs to create lists of users (such as the drop-downs in other Admin screens).
 Click on image to zoom
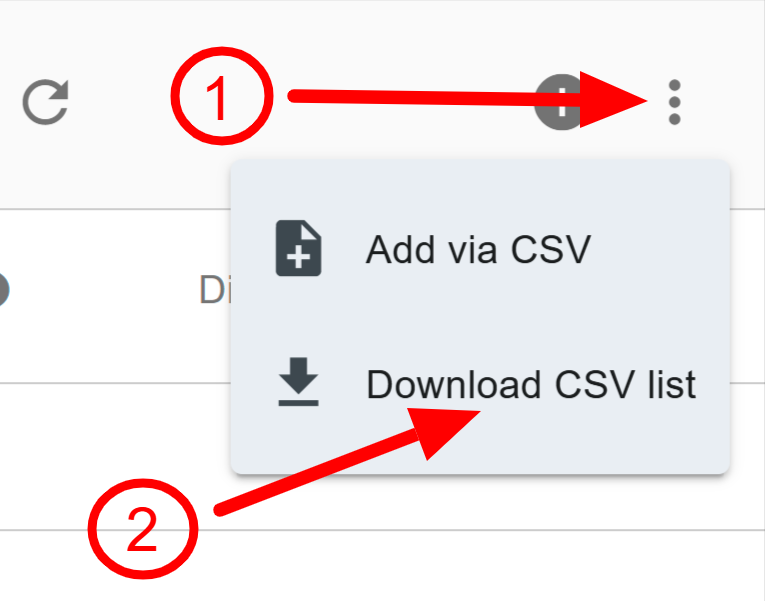
Download a List of Users
It is possible to download the list of users as a CSV file:
Click .
Click Download list as CSV.