The Uploader allows an authorized person to upload CSV, XML, or JSON* files for searching. After the file is uploaded, contact IMAT professional services to help write a report using the uploaded data.
Note that if using a version prior to 9.0, your search server must be preconfigured to accept uploaded files before they can be used.
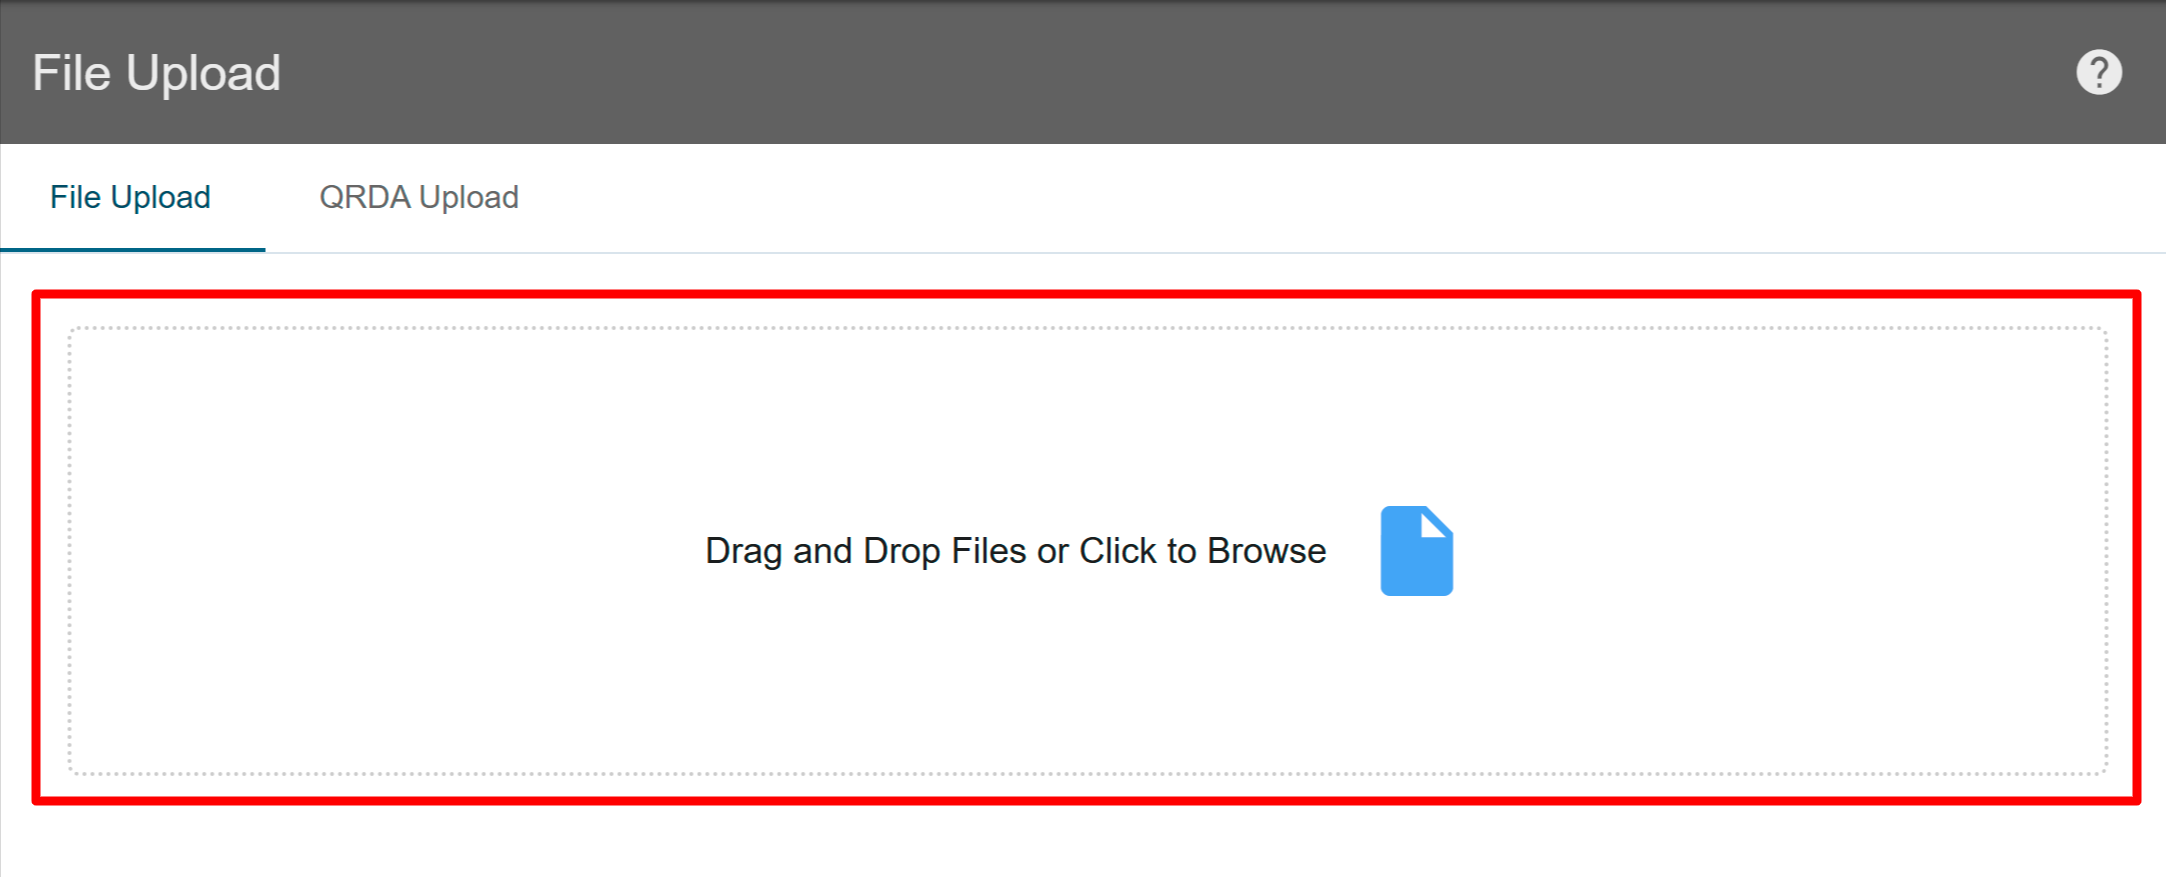
File Upload
 Click on the image to zoom.
Select Files
When selecting files to be uploaded, only CSV, XML, and JSON* files are supported. File sizes are limited to 10 MB or less.
Ensure each file you upload has a unique file name.
Adding files is done in one of two ways:
- Drag and drop the file from a folder or desktop into the upload box of the Uploader.
- Click anywhere in the box and select a file.
Each selected file is added to a queue before it is uploaded to the server.
This applies to Version 9.x.
 Click on the image to zoom.
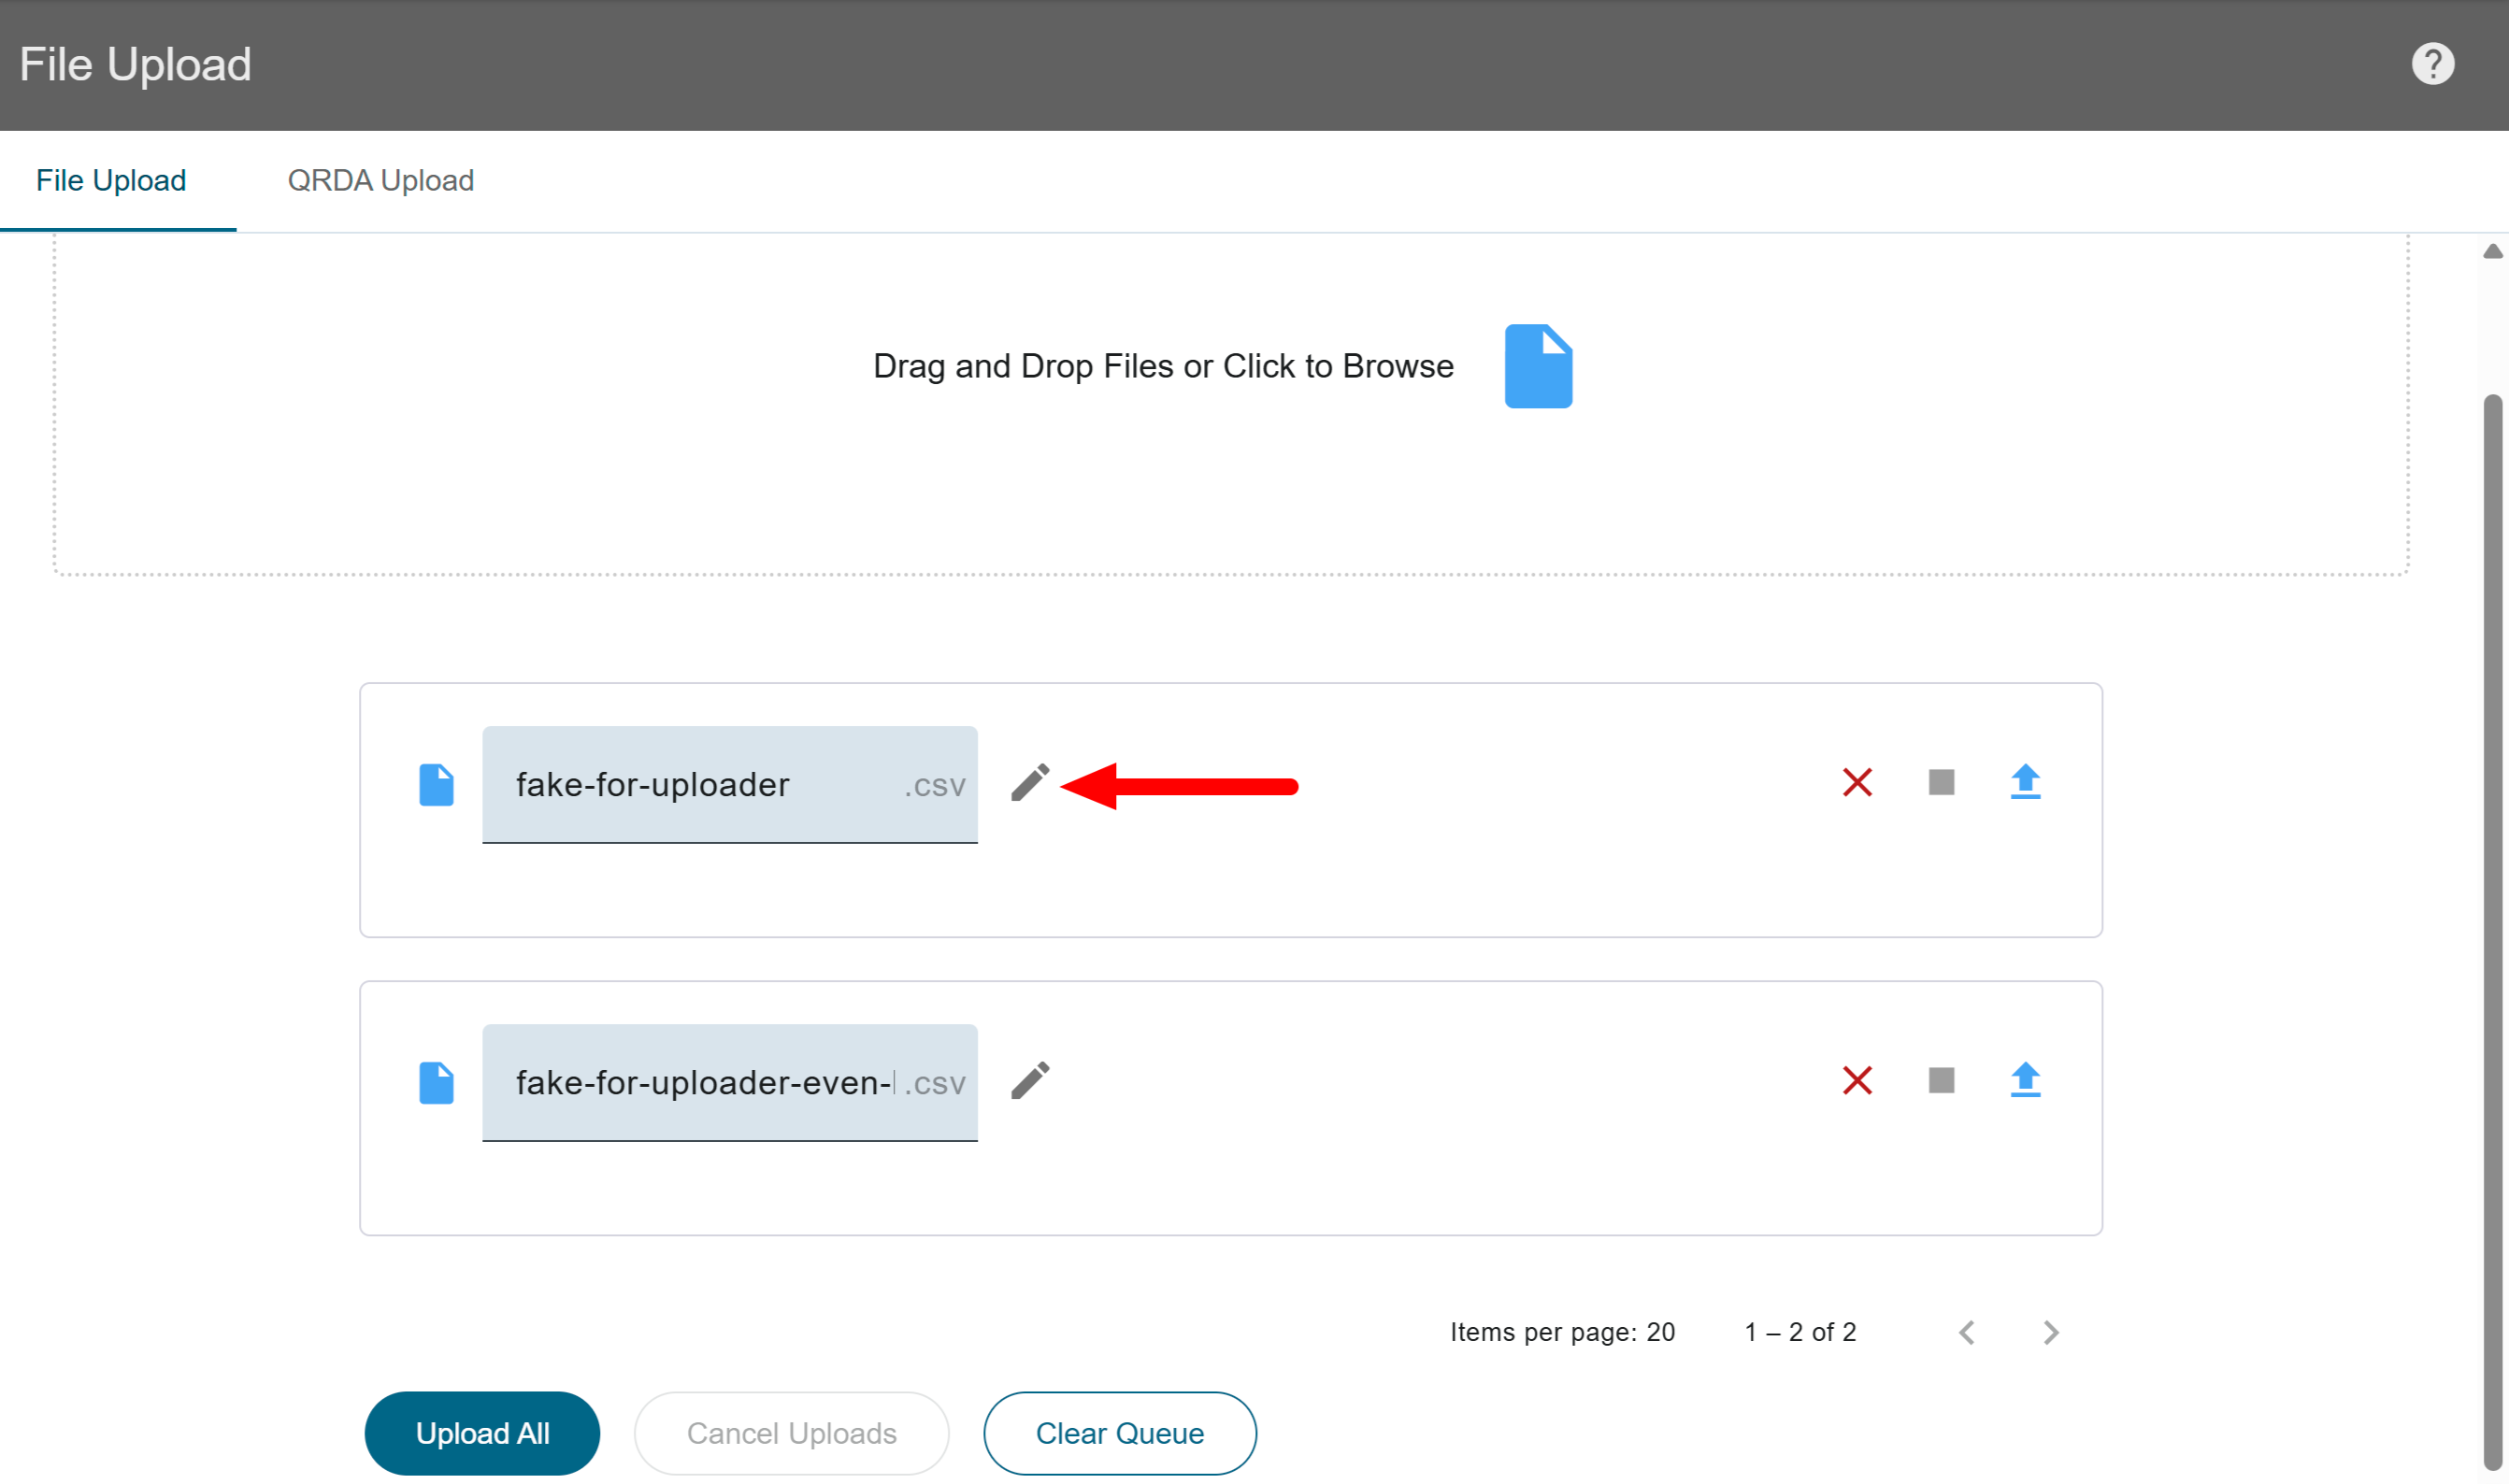
Change File Names
Uploaded files are stored in the SearchServer. The file name is indexed to allow search retrieval. If uploaded files do not have unique names, multiple files with the same name in the same store can exist.
To avoid having multiple files with the same name, do the following:
- Click .
- Change the file name.
- Click anywhere outside of the file name field.
 Click on the image to zoom.
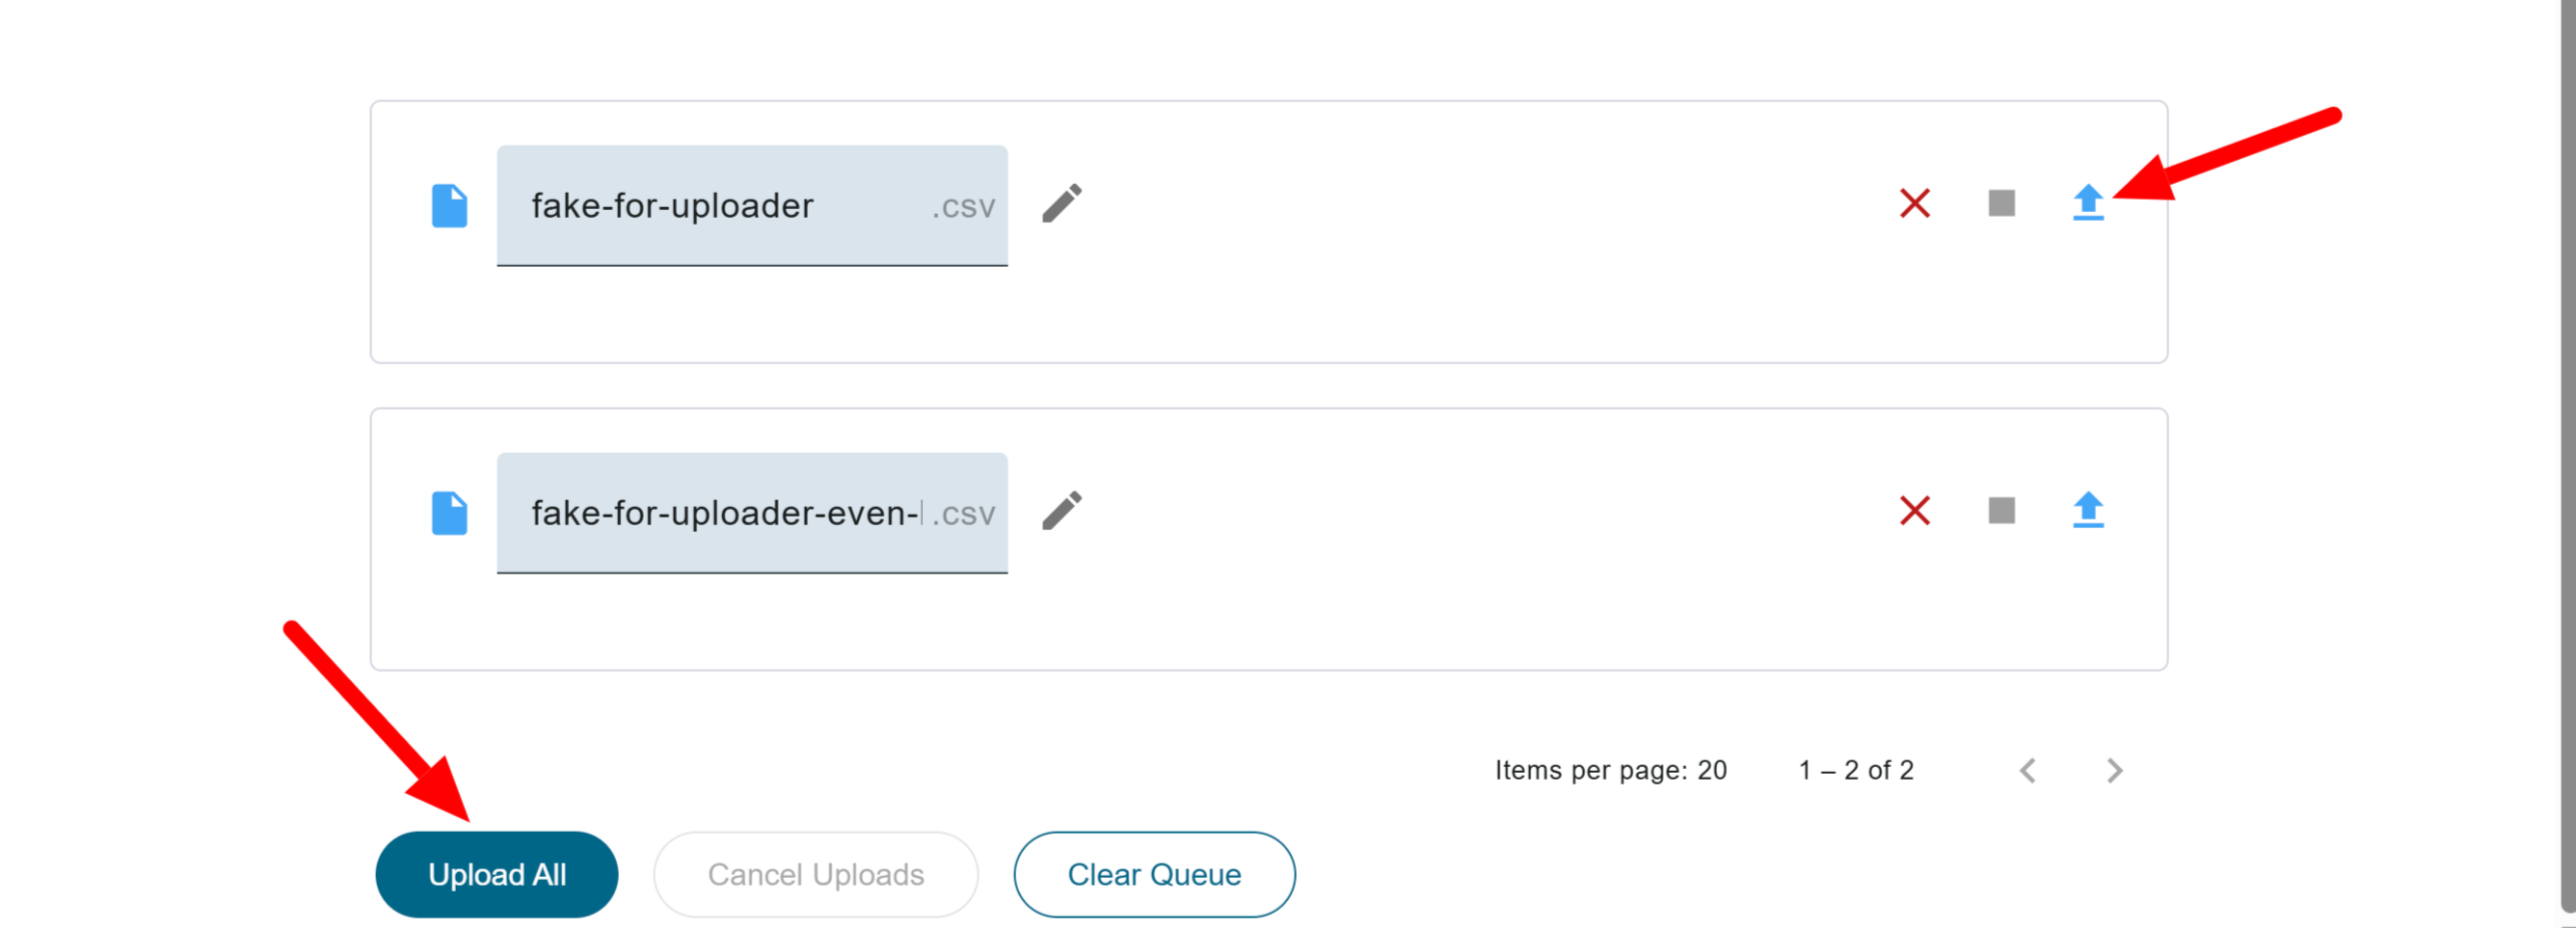
Upload Files
After all the files are selected, upload the files to the server with either of the two methods below:
- Click to upload individual files.
- Click at the bottom of the screen to upload all files simultaneously.
 Click on the image to zoom.
After files are uploaded successfully, a green success check appears to the right of the file.
 Click on the image to zoom.
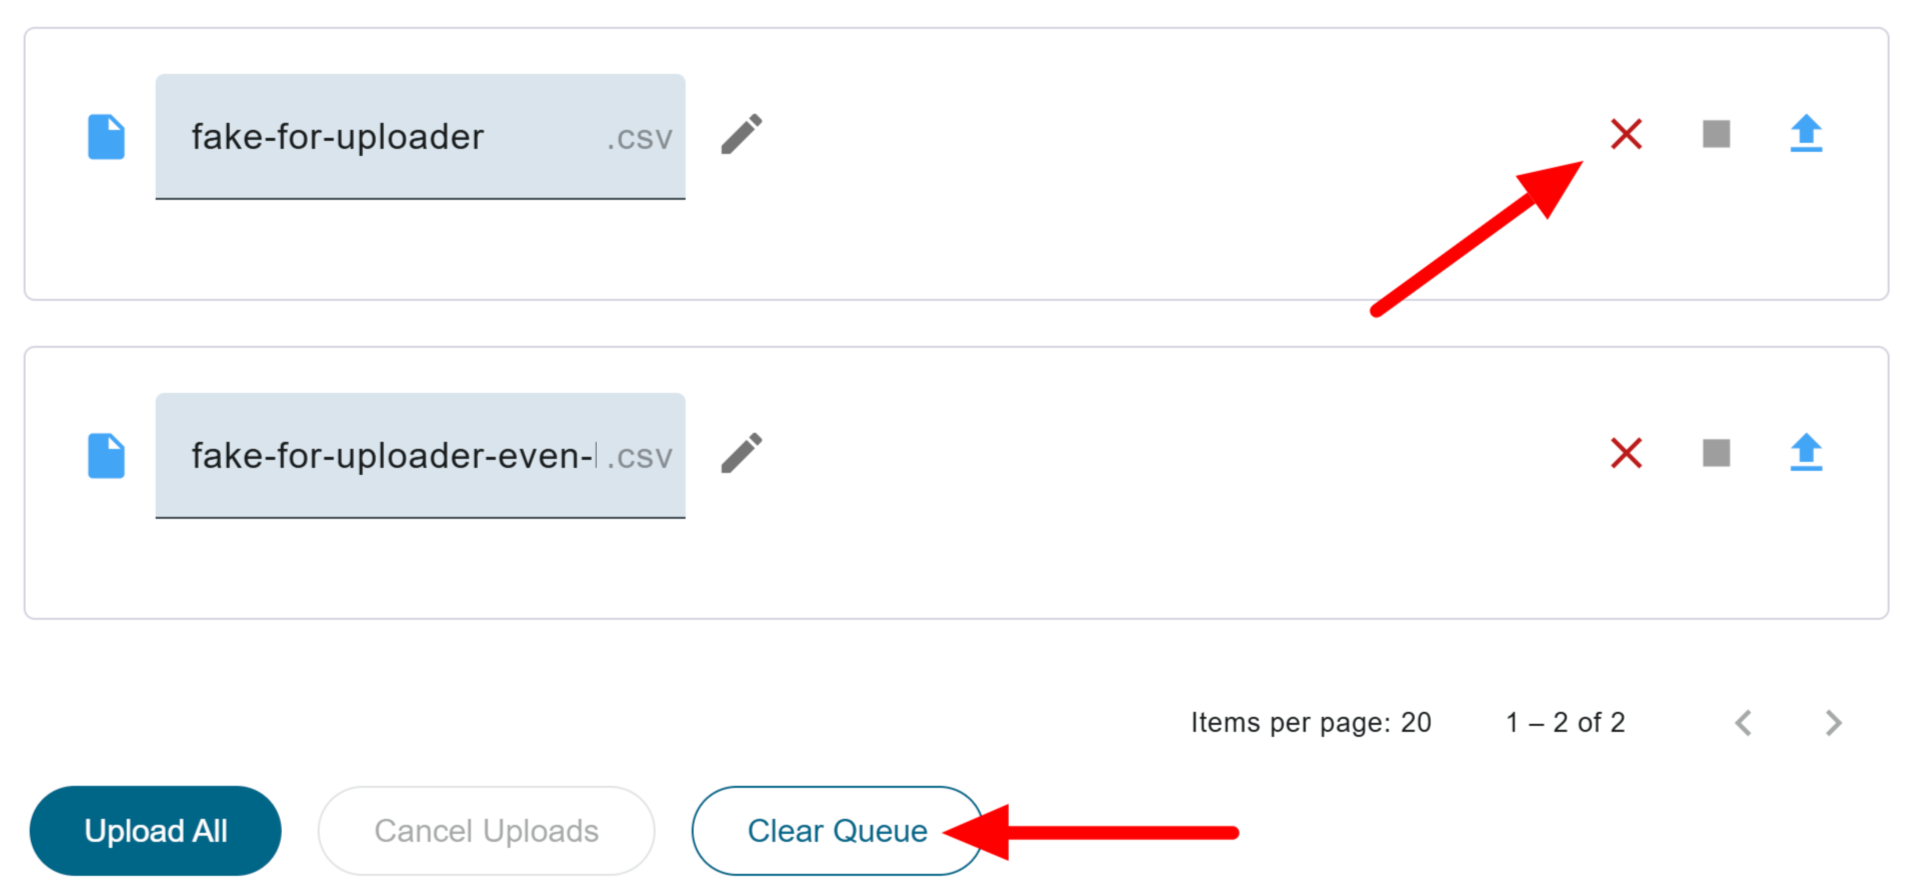
Remove Files
Before the files are uploaded, you may remove files from the upload queue. Choose one of the two options below:
- Click next to the file name.
- Click below the listed files to remove all files simultaneously.
 Click on the image to zoom.
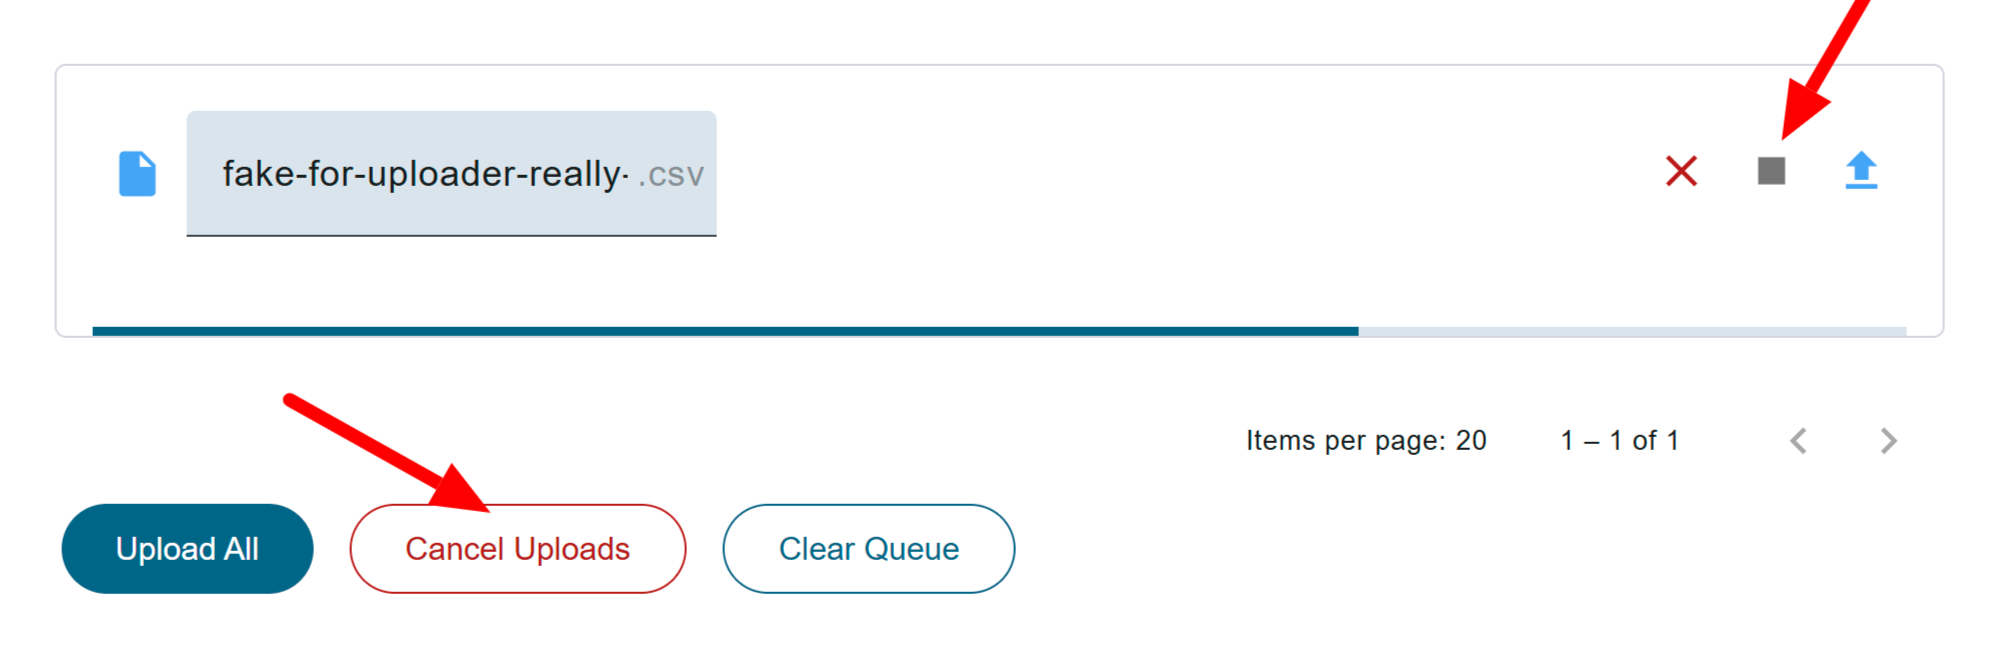
Cancel Uploads
If you have started uploading a file and decide you need to cancel it, use one of the methods below. Smaller files may upload too quickly to cancel the upload.
- Click .
- Click under the listed files to cancel all uploads in progress or the queue.
 Click on the image to zoom.
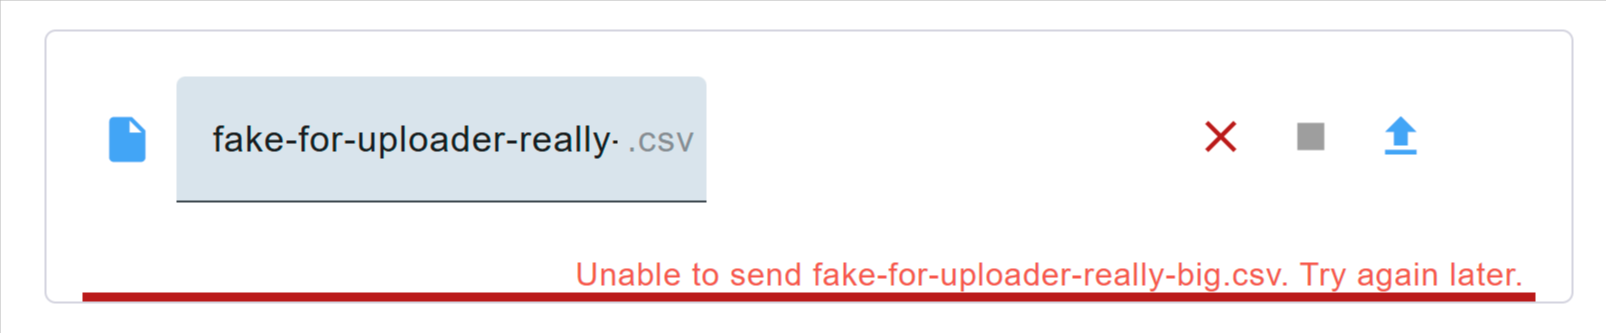
Identify Errors
If an error occurs while uploading a file, a red error message appears below the file that had the error.
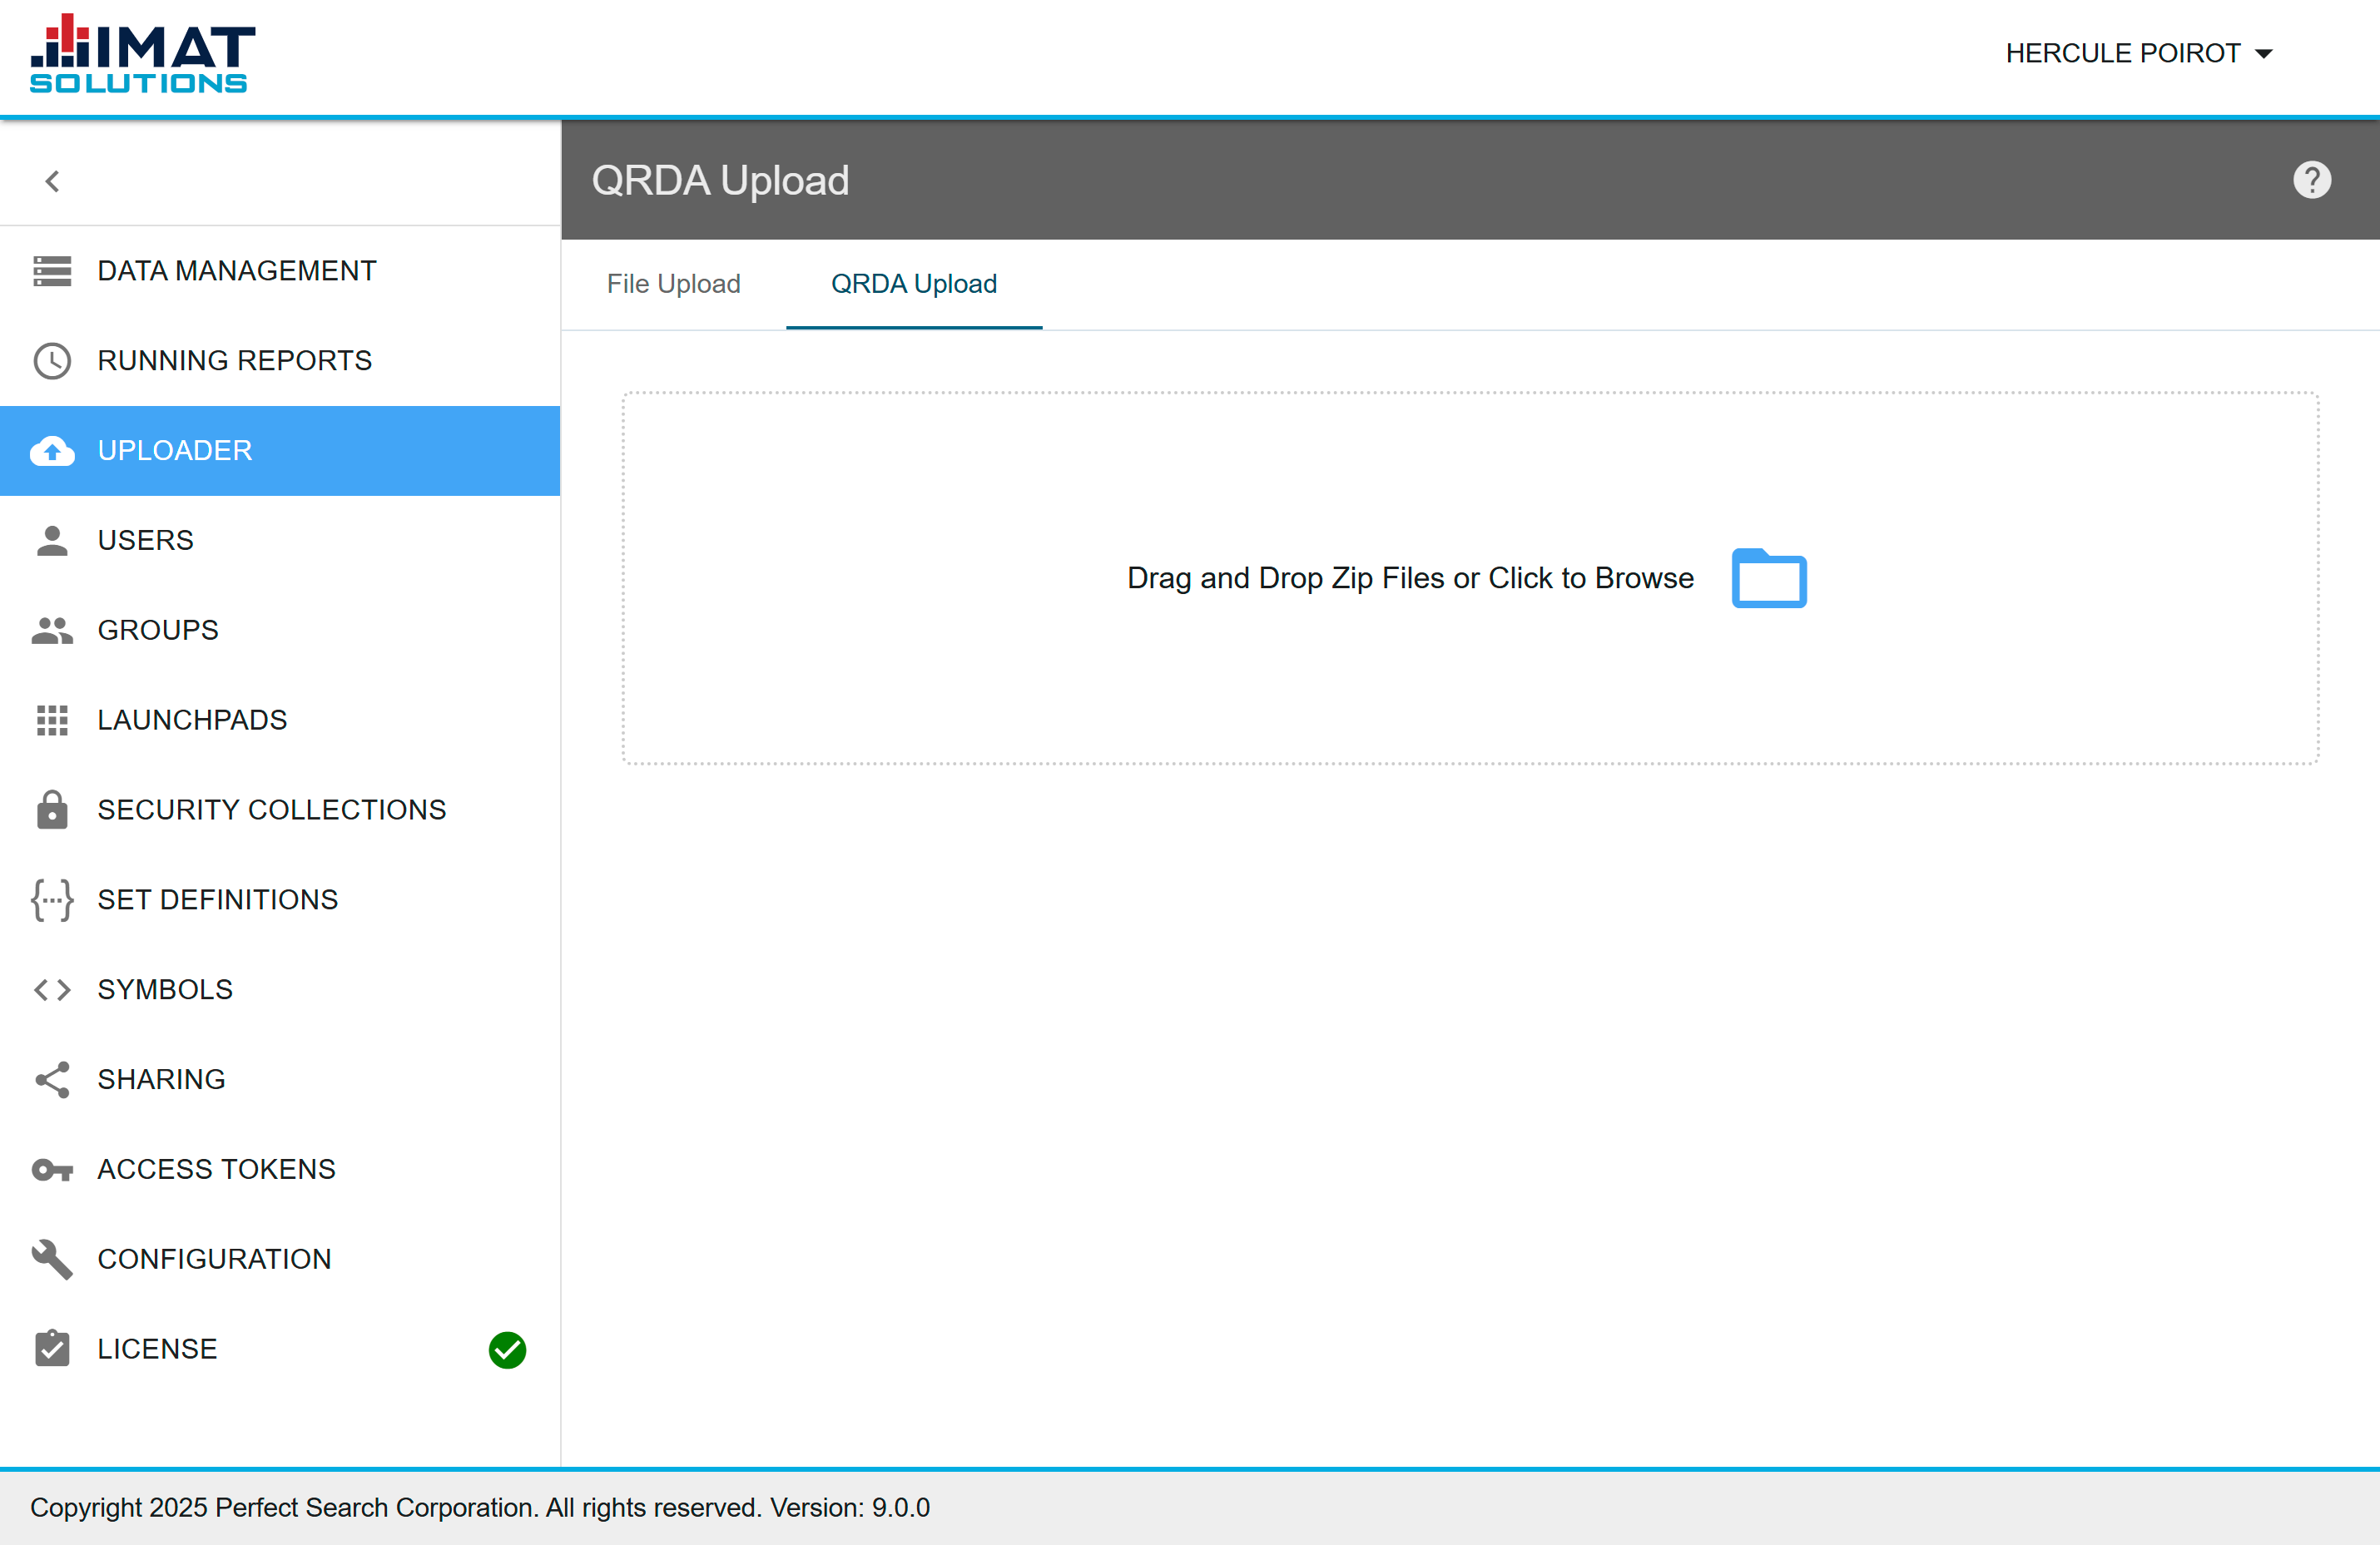
QRDA Upload
It is possible to upload QRDA files into the system. All QRDA files must be zipped and password-protected before they can be uploaded.
Click on the image to zoom.
Select QRDA Files
To upload a QRDA file, use the following steps:
- Click on the QRDA Upload tab.
- Select the file in one of two ways:
- Drag and drop the file into the box.
- Click in the box to select a file to upload.
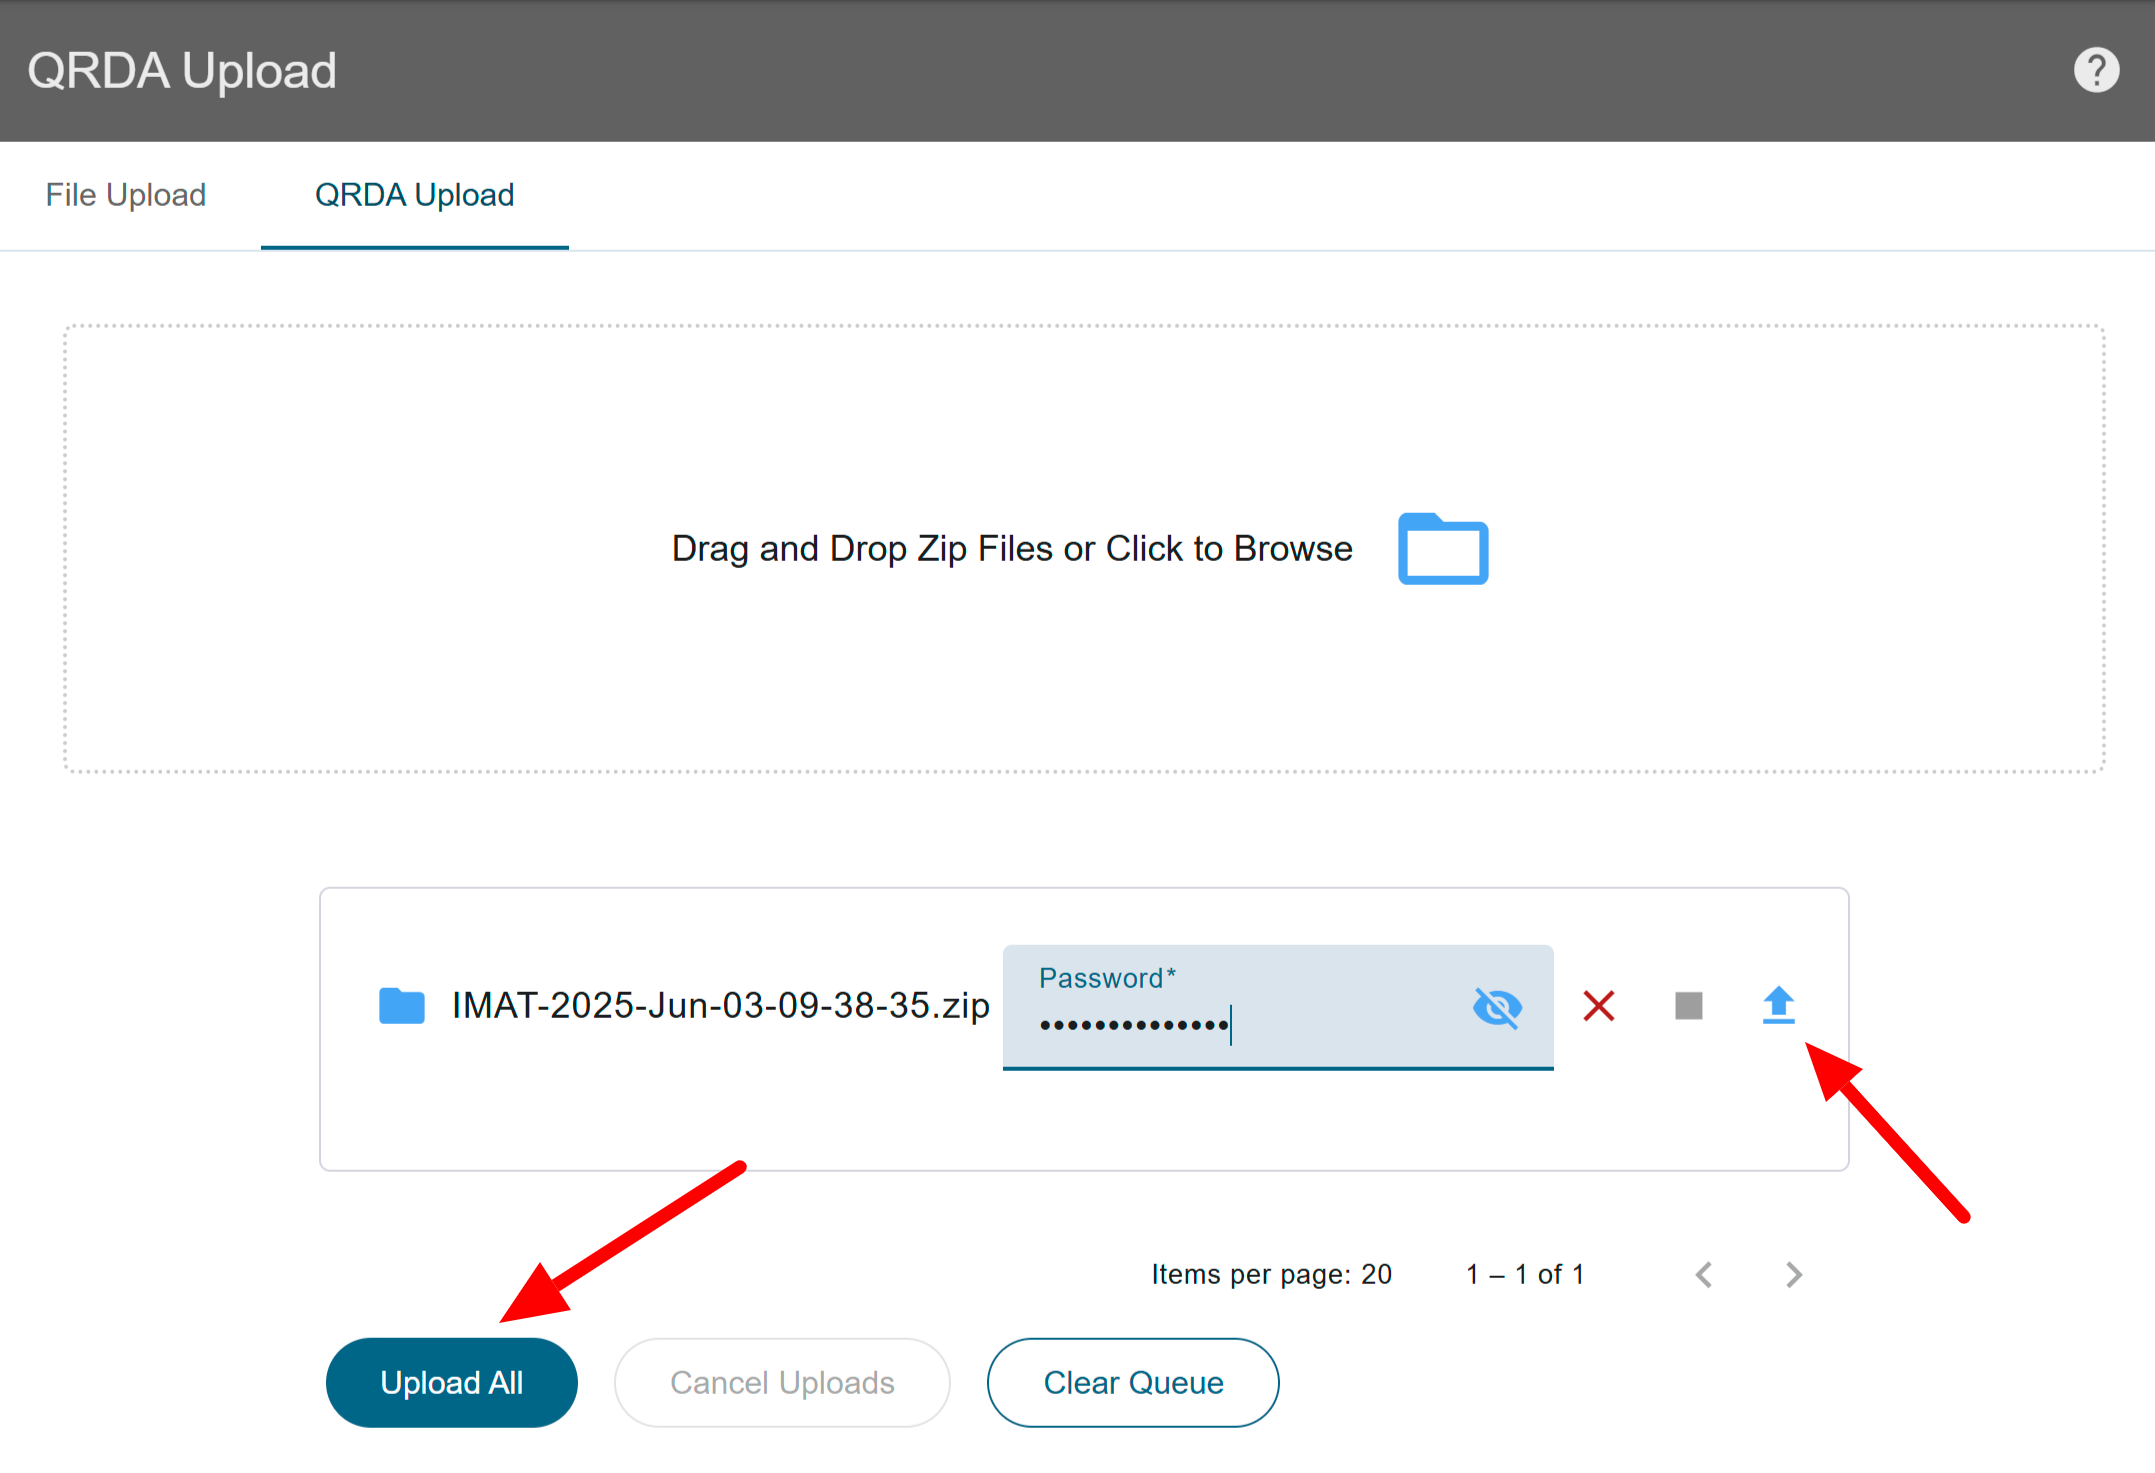
Enter a Password
Enter the password associated with the file in the provided field. The password will not be needed again within the system.
.png) Click on the image to zoom.
Click on the image to zoom.
Remove QRDA Files
Before the files are uploaded, you may remove files from the upload queue. Choose one of the two options below:
- Click next to the file name.
- Click below the listed files to remove all files.
 Click on the image to zoom.
Upload QRDA Files
After the password has been entered, upload the files with either of the two methods below:
- Click to upload individual files.
- Click at the bottom of the screen to upload all files simultaneously.
Click on the image to zoom.
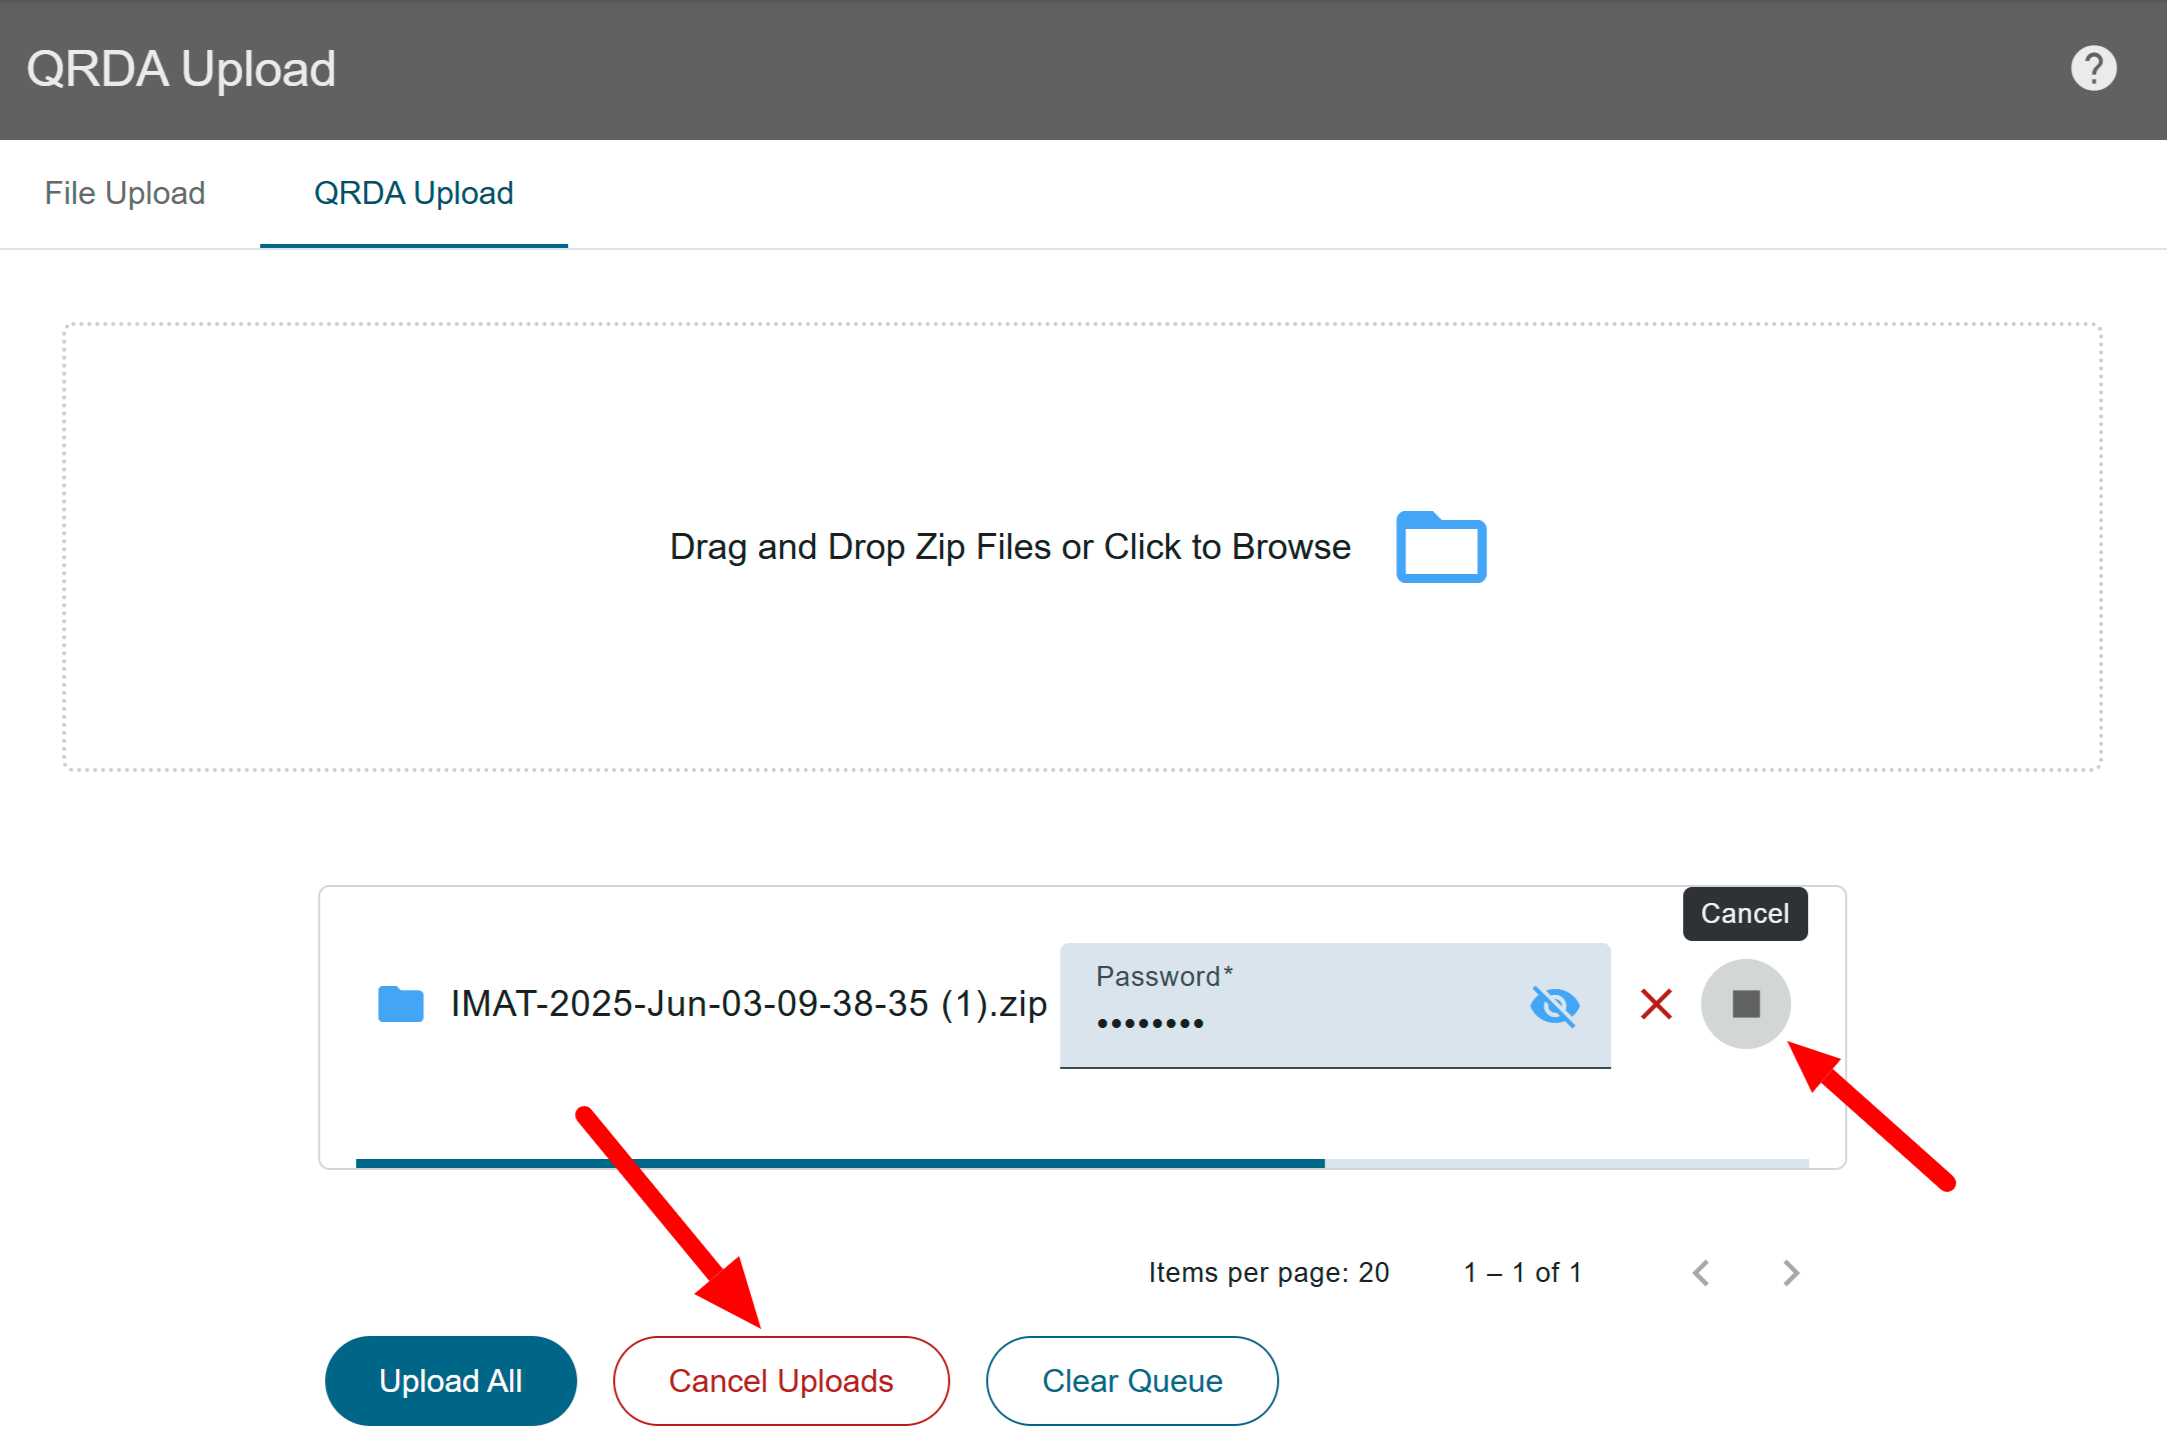
Cancel QRDA Uploads
If you decide to cancel the file upload while in progress, use one of the methods below:
- Click .
- Click below the listed files.
Use Uploaded Files
Once the files are uploaded successfully, contact IMAT professional services for help writing reports using the uploaded files.
* JSON files are not allowed in versions prior to 9.0.