Limit the information a user has access to by creating security collections of data. Security collections are query-based and allow the inclusion or exclusion of selected records in search results for groups. Often, collections use sets for these purposes. After a collection is created, the users in that group do not have access to any additional information unless additional permissions are granted.
Security collections are additive. This means that if a user is part of a collection and then added to another, the user has access to information from both, even if one of them is more restrictive than the other.
Create or Verify Prerequisites
Some preliminary steps are needed to create collections:
- Verify or create all users necessary for the collection. Verify users are not assigned to additional groups that give them greater access than desired.
- Verify or create the group. Any user who should have limited access must be assigned to a group; however, the group may consist of one user.
- Create a set definition if needed. Remember that the data within sets is unchanging and must be updated to include new records.
Create a Security Collection
- In the navigation pane, click Security Collections.
- Click .
- Type the Name of the collection. Spaces are not supported and cannot be used in collection names. Use camel case or underscores to help distinguish words if needed: GreatDetectives or great_detectives.
- Type the Description of the collection.
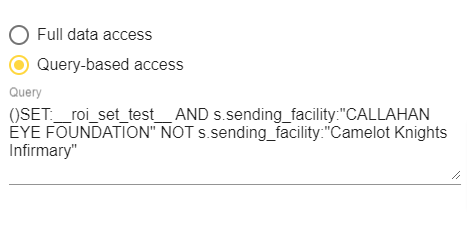
- Choose the Access Type:
- Full data access gives users access to all data on the server.
- Query-based access grants users access only to the data found within the query entered. Queries and reports executed in IMAT apps use data limited to the query entered here to get results. See Enter the Query for more information.
- Assign the collection to the desired group or groups.
- Click by the group name to add an individual group.
- Click to add all groups at once.
- Click to remove all groups at once.
- Click
Clicking returns you to the list of collections without saving the changes.
.png) Click on image to zoom
Click on image to zoomEdit a Security Collection
After clicking on the desired collection, click on the section you'd like to edit when the details panel on the right opens.
- Locate and click the collection.
- Edit the Description by clicking .
- Edit the Data Access by clicking . See Enter the Query for more information.
- Reassign the collection to the desired group or groups by clicking . Move the groups to the proper columns:
- Click by the group name to add an individual group.
- Click to add all groups at once.
- Click by the group name to remove an individual group.
- Click to remove all groups at once.
- Click Reset to return all groups to their original position.
- Click .
 Click on image to zoom
Enter the Query
Write a query to determine what data is accessible to the users. Use Boolean syntax to write the query that contains all necessary terms. IMAT suggests first writing and running the query in the single query builder to verify that you are getting the expected results and that the query is written correctly. After you are satisfied that it is correct, copy the query to Security Collections.
Some common query examples are found below for set definitions and facilities.
These are examples of collections using NREF collections with or without sets:
- ()s.sending_facility:"Camelot Physicians"
- ()SET:__myset__
These are examples for collections using PatientIDN collections. Note that the use of FILTER is required with PatientIDN.
- ()FILTER(PatientIDN:SET:__myset__)
- ()s.sending_facility:"123 Pediatrics" FILTER(PatientIDN:SET:__ABC_Pediatrics__)
You may choose to enter NOT as part of the query to exclude specific data:
- ()SET:__myset__ NOT (SET:__mySubset__)
Keep in mind that if you use sets, the information in the set does not change until the set is updated through Set Definitions.
.png) Click on image to zoom
Click on image to zoomView Security Collection Details
The security collection screen displays a table of the collection details: name, description, data access, and the number of groups assigned. A check appears in the Full Access column (hidden by the open details pane in the image to the left) if no query has been entered.
Clicking on a collection opens a panel to the right. This displays the same information with the addition of the query. It also allows access to the edit and delete buttons.
Understand Default Security Collections
The server comes with two preconfigured security collections: public and system. Public is a read-only collection, and its settings are established when setting up the server. In most cases, it should have closed access; if it has full access, then no security is present. The system collection gives all searchappliance_system users access to all data.
 Click on image to zoom
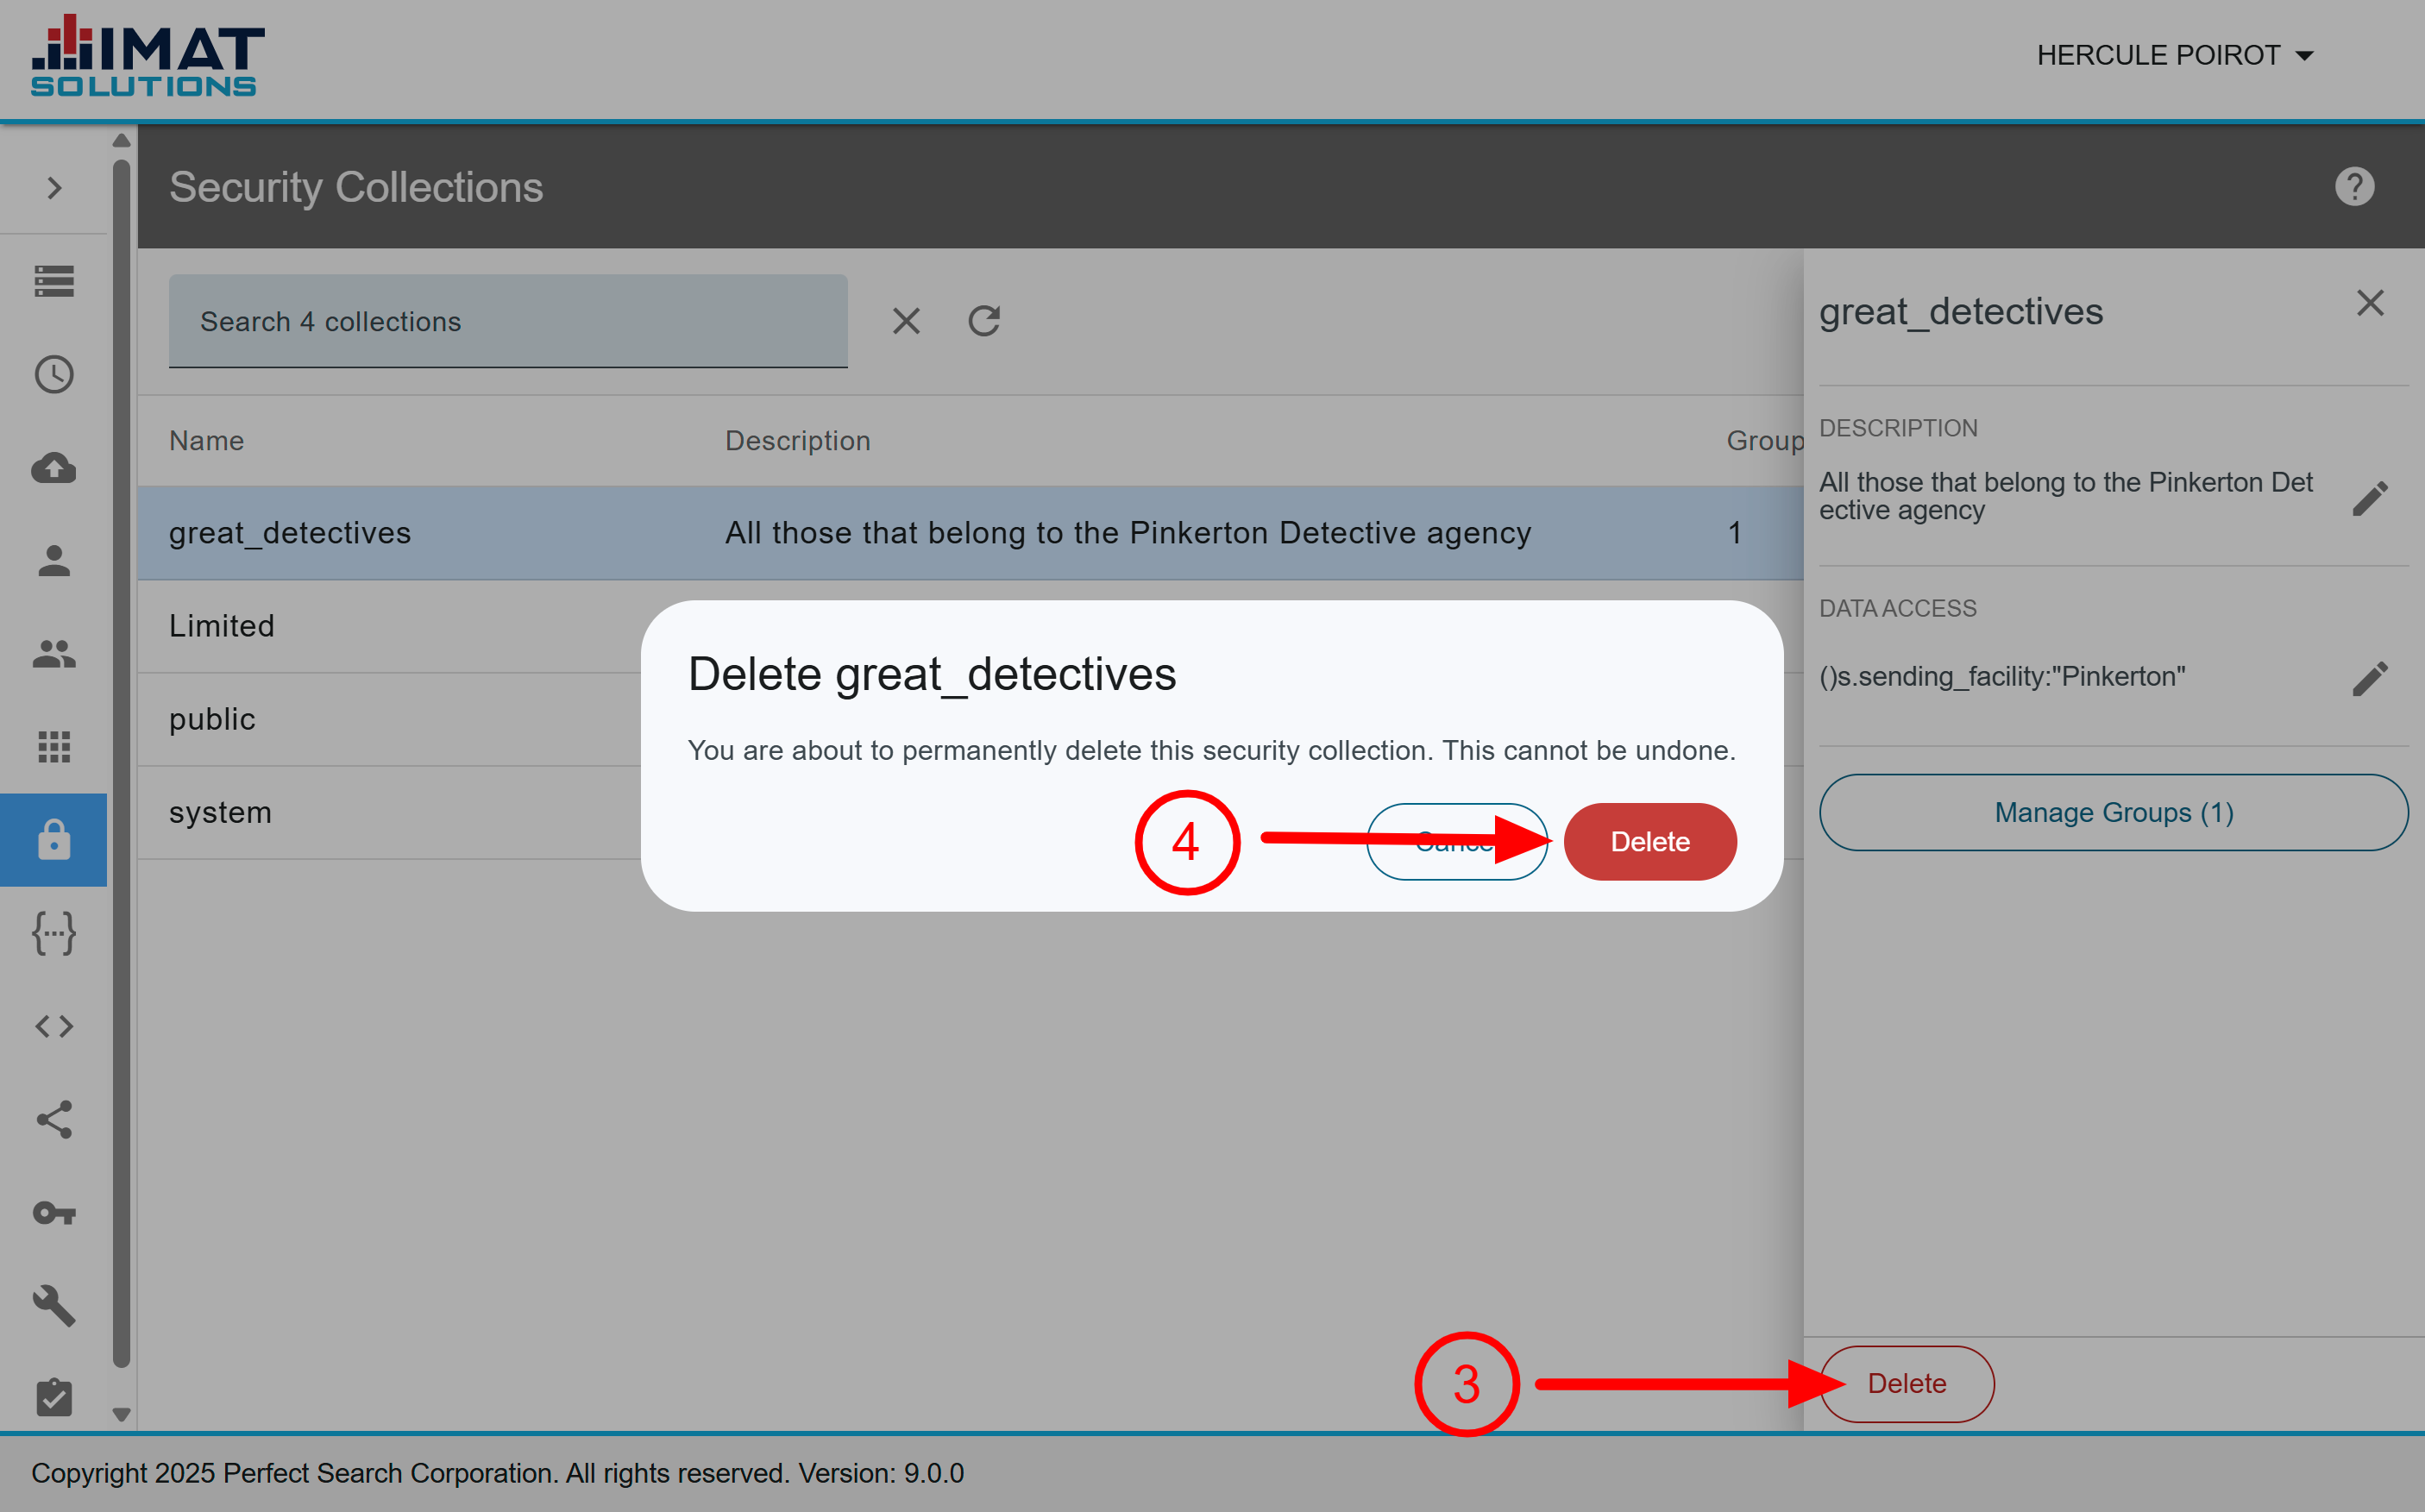
Delete a Security Collection
- In the navigation pane, click Security Collections.
- Locate and click the collection.
- Click .
- Click to confirm that you want to delete the collection.