Sharing allows query, report, or dashboards to be shared between groups and individuals. Once shared, reports and queries appear in the user's Saved list found on the reports screens.
Create Queries and Reports
The query or report must be created before it can be shared. Use the Query Builder to complete your report.
 Click on image to zoom
Navigate the Sharing Screen
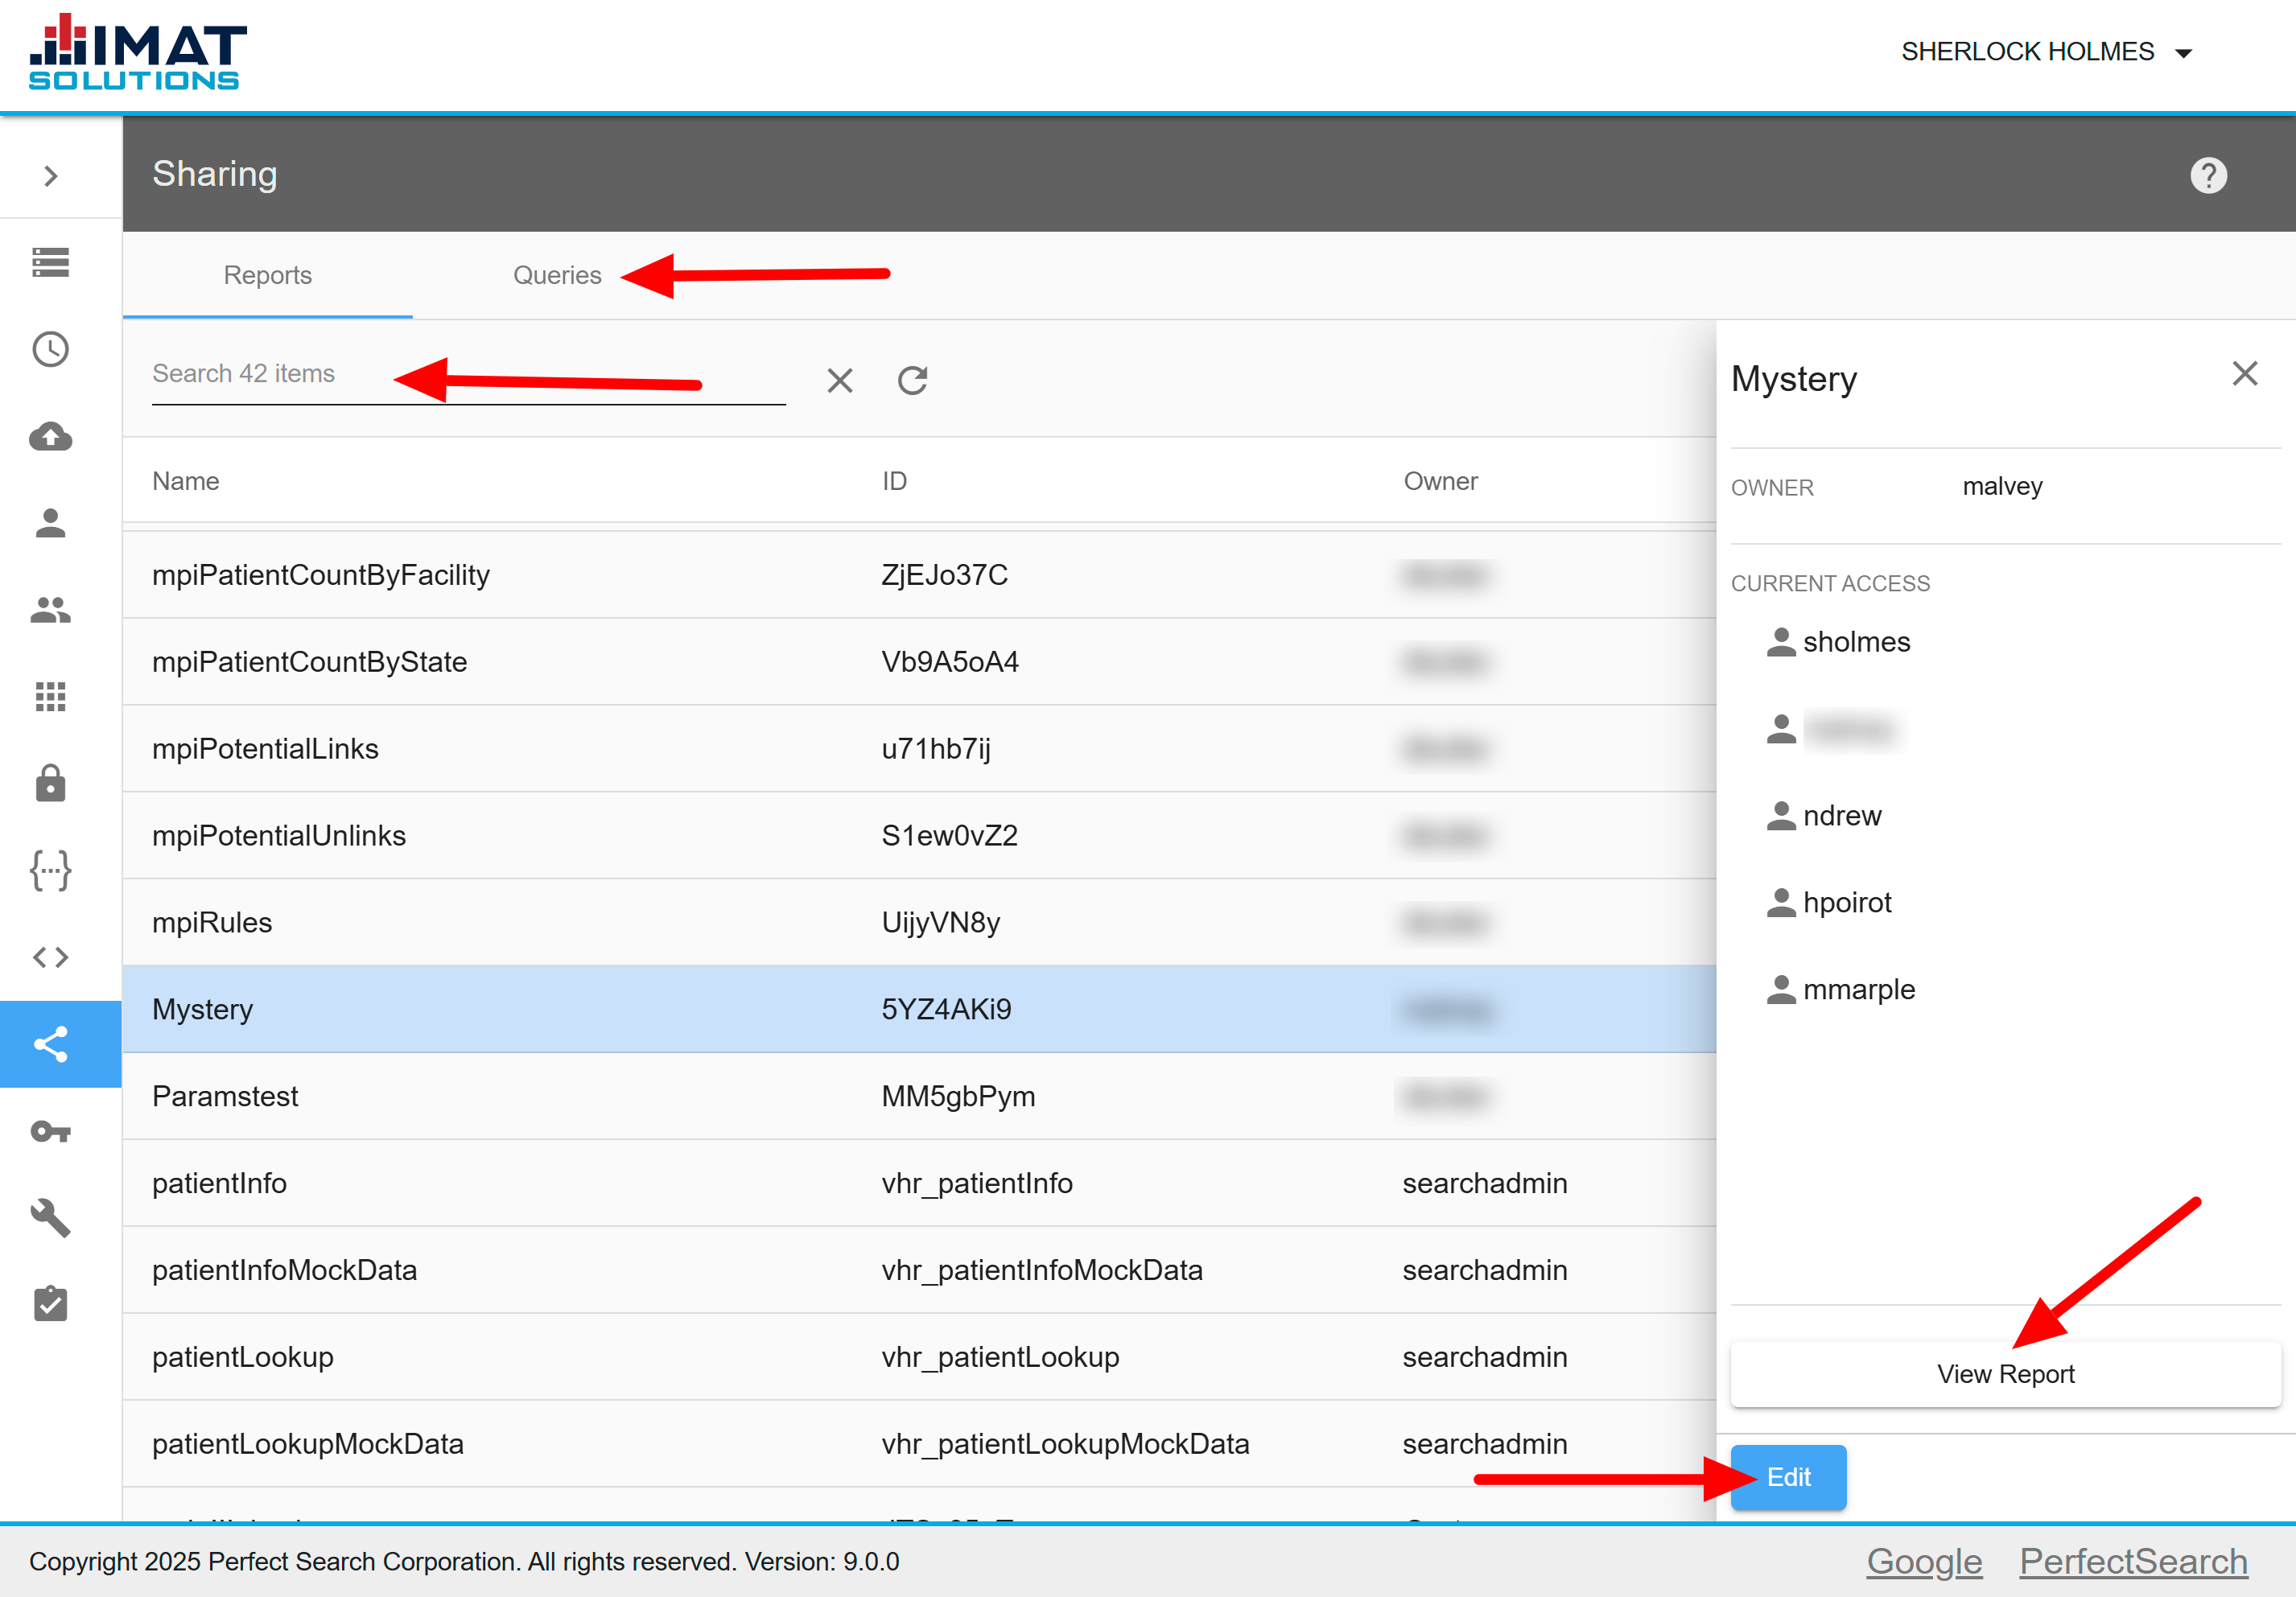
The Sharing screen displays the report name, ID, and the owner. Choose either the Reports tab for compound reports, the Queries tab to view single queries, or the Dashboards tab to view and share the created dashboards.
Search
Use the search feature to locate the correct report or query. The search feature finds the report if the entered letter combination appears anywhere in the report name, owner, or report ID.
View Report
Click to review the report script.
Edit Access
Click to open the edit screen.
Share Reports
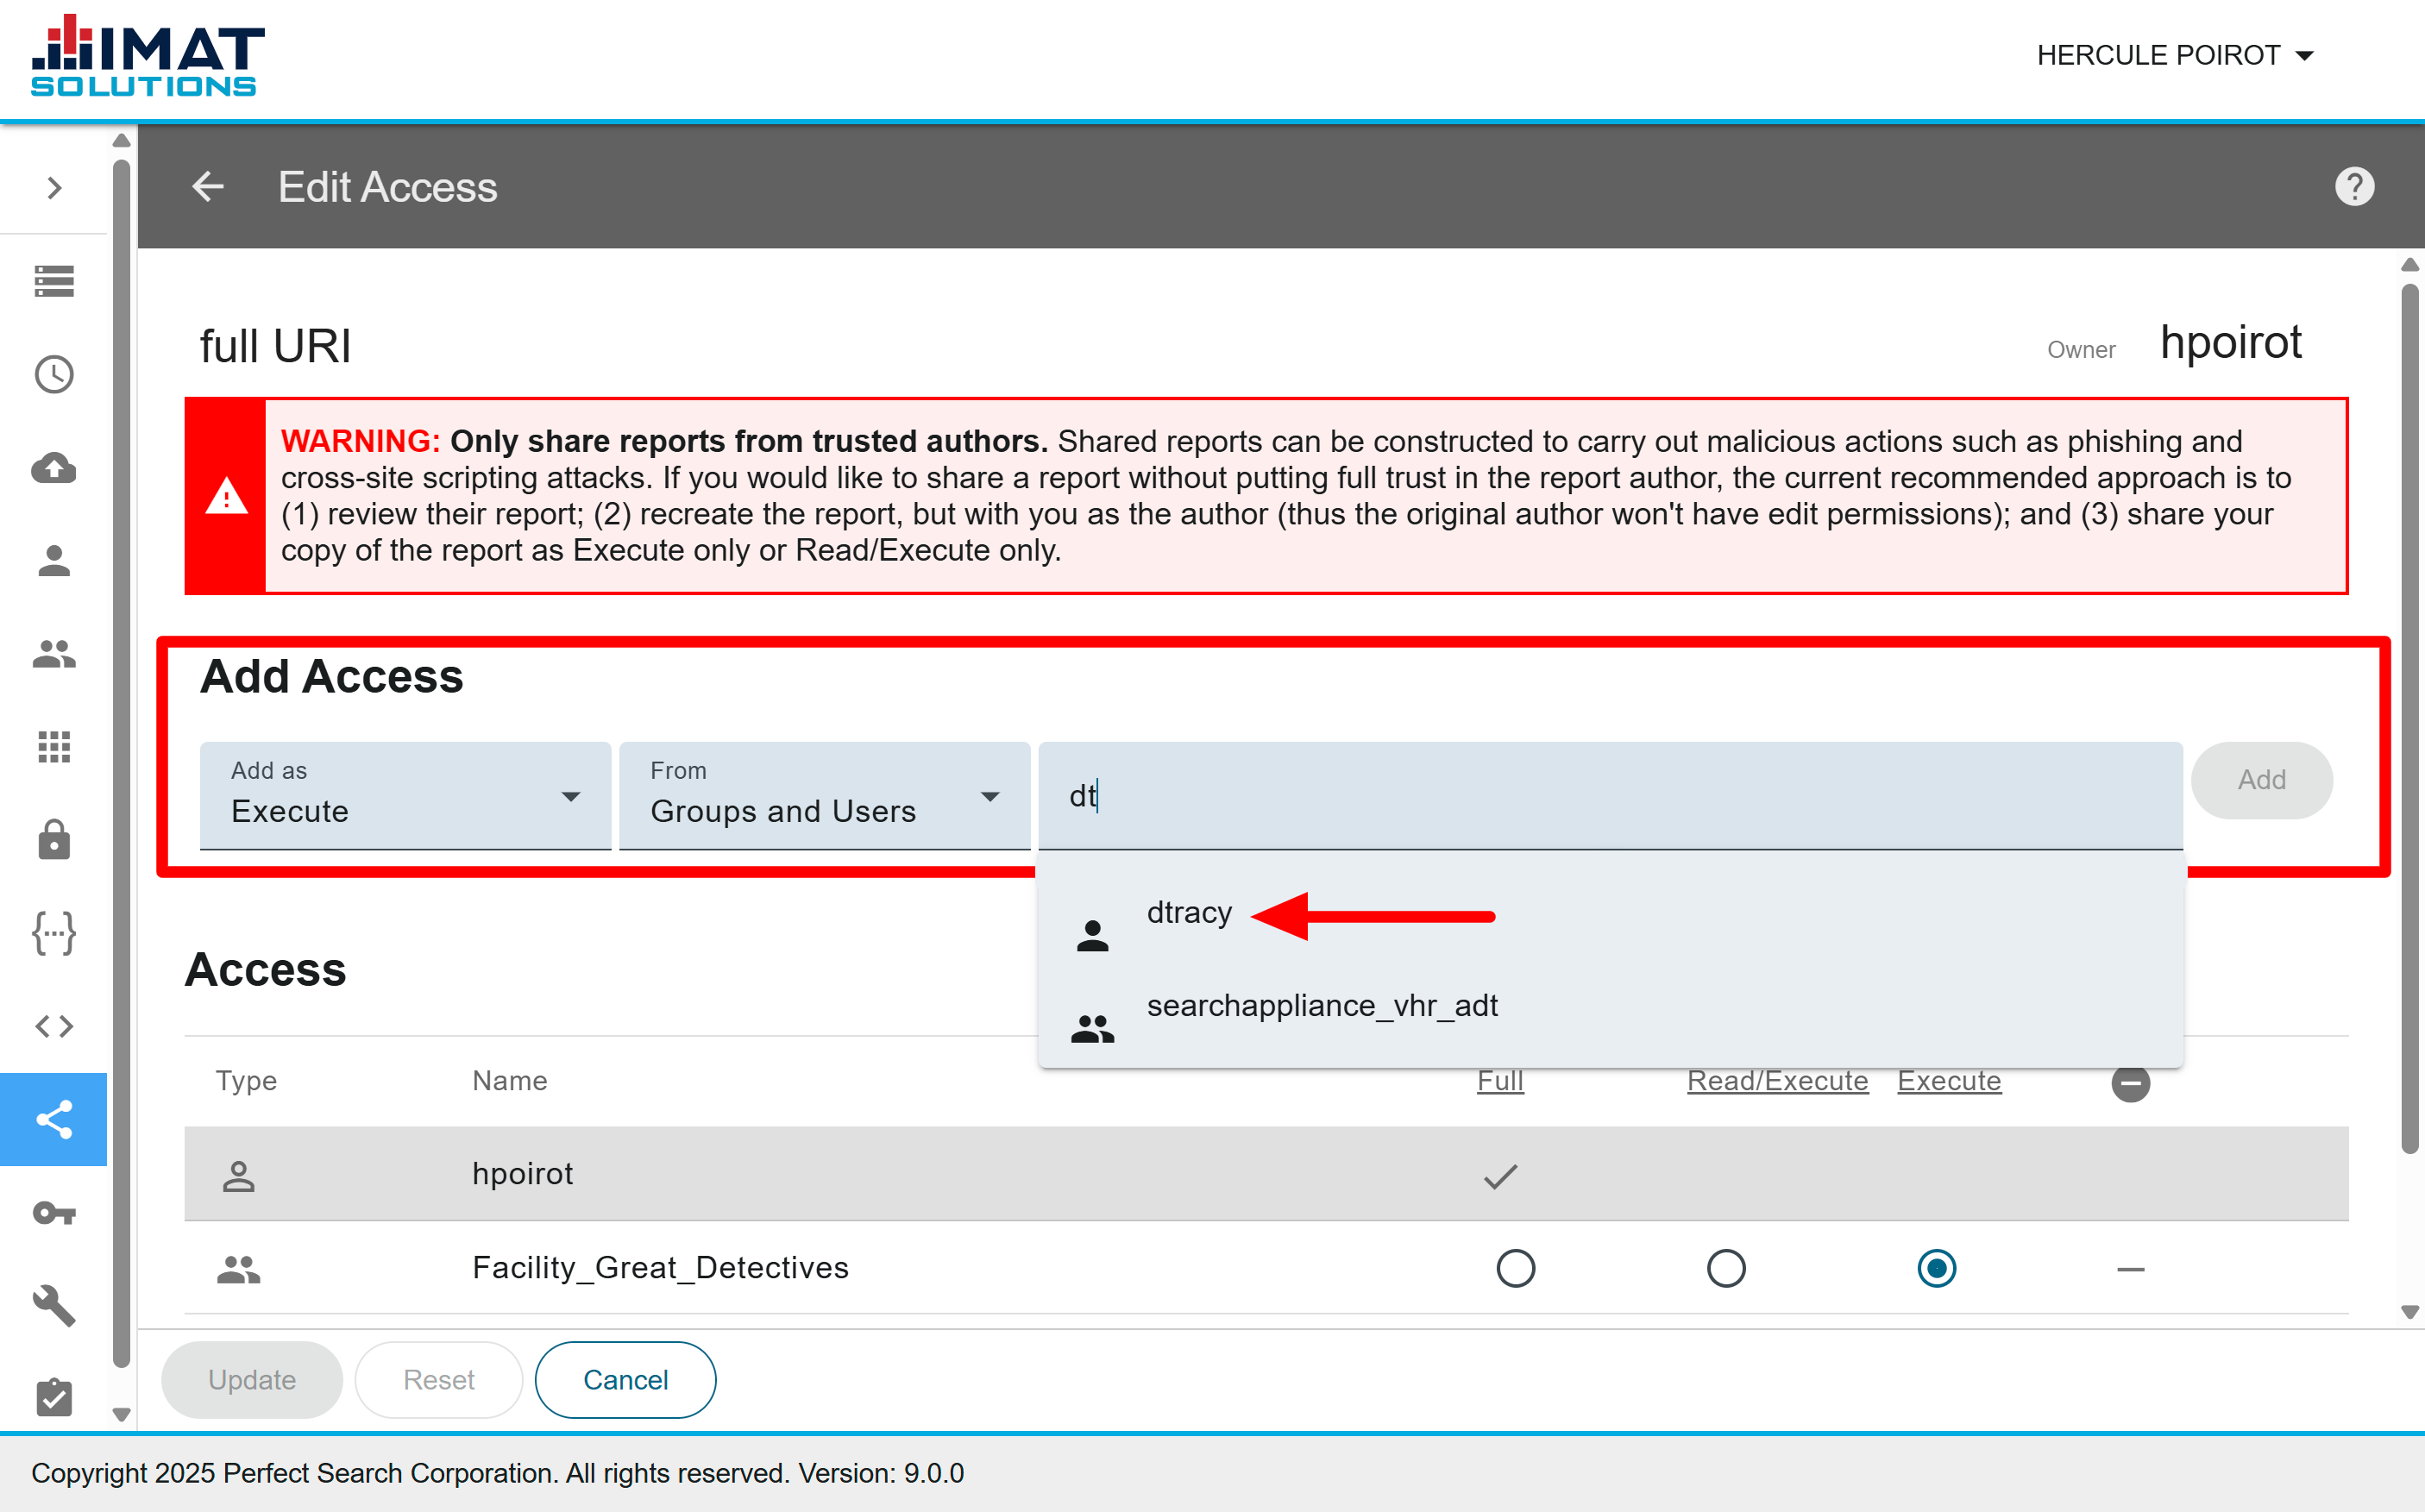
Report sharing allows users to edit the permissions of current users or share the report with new users or groups.
Make sure you trust the report you are sharing. Reports, if written incorrectly, can open the server to malicious actions such as phishing and cross-site scripting attacks. To avoid this, do the following:
- Carefully review the report for such problems.
- Copy the report so you are the owner. This prevents the original writer from modifying the shared report and opening the system to malicious actions.
- Share the report as Execute or Read/Execute only.
 Click on image to zoom
Add Users and Groups
To share a report, follow the steps below:
- In the Admin navigation menu, select Sharing.
- Locate and click on the report, then click .
- In the Add Access section, do the following:
- Select the permissions level under Add as.
- In the From drop-down list, select Groups and Users, Groups only, or Users only.
- Begin typing the user name or group name. A drop-down list appears; you must click on the user or group from the list. Multiple users or groups can be added at the same time if they all have the same permissions.
- Click .
- Click to save the changes and return to the Sharing home screen.
Edit Access
Clicking on the query or report opens a detail panel. The access section displays the users or groups that currently have access to the report. Locate and click on the report you'd like to edit. The owner of the report cannot have his or her permissions changed, but all other users and groups can.
.png) Click on image to zoom
Click on image to zoom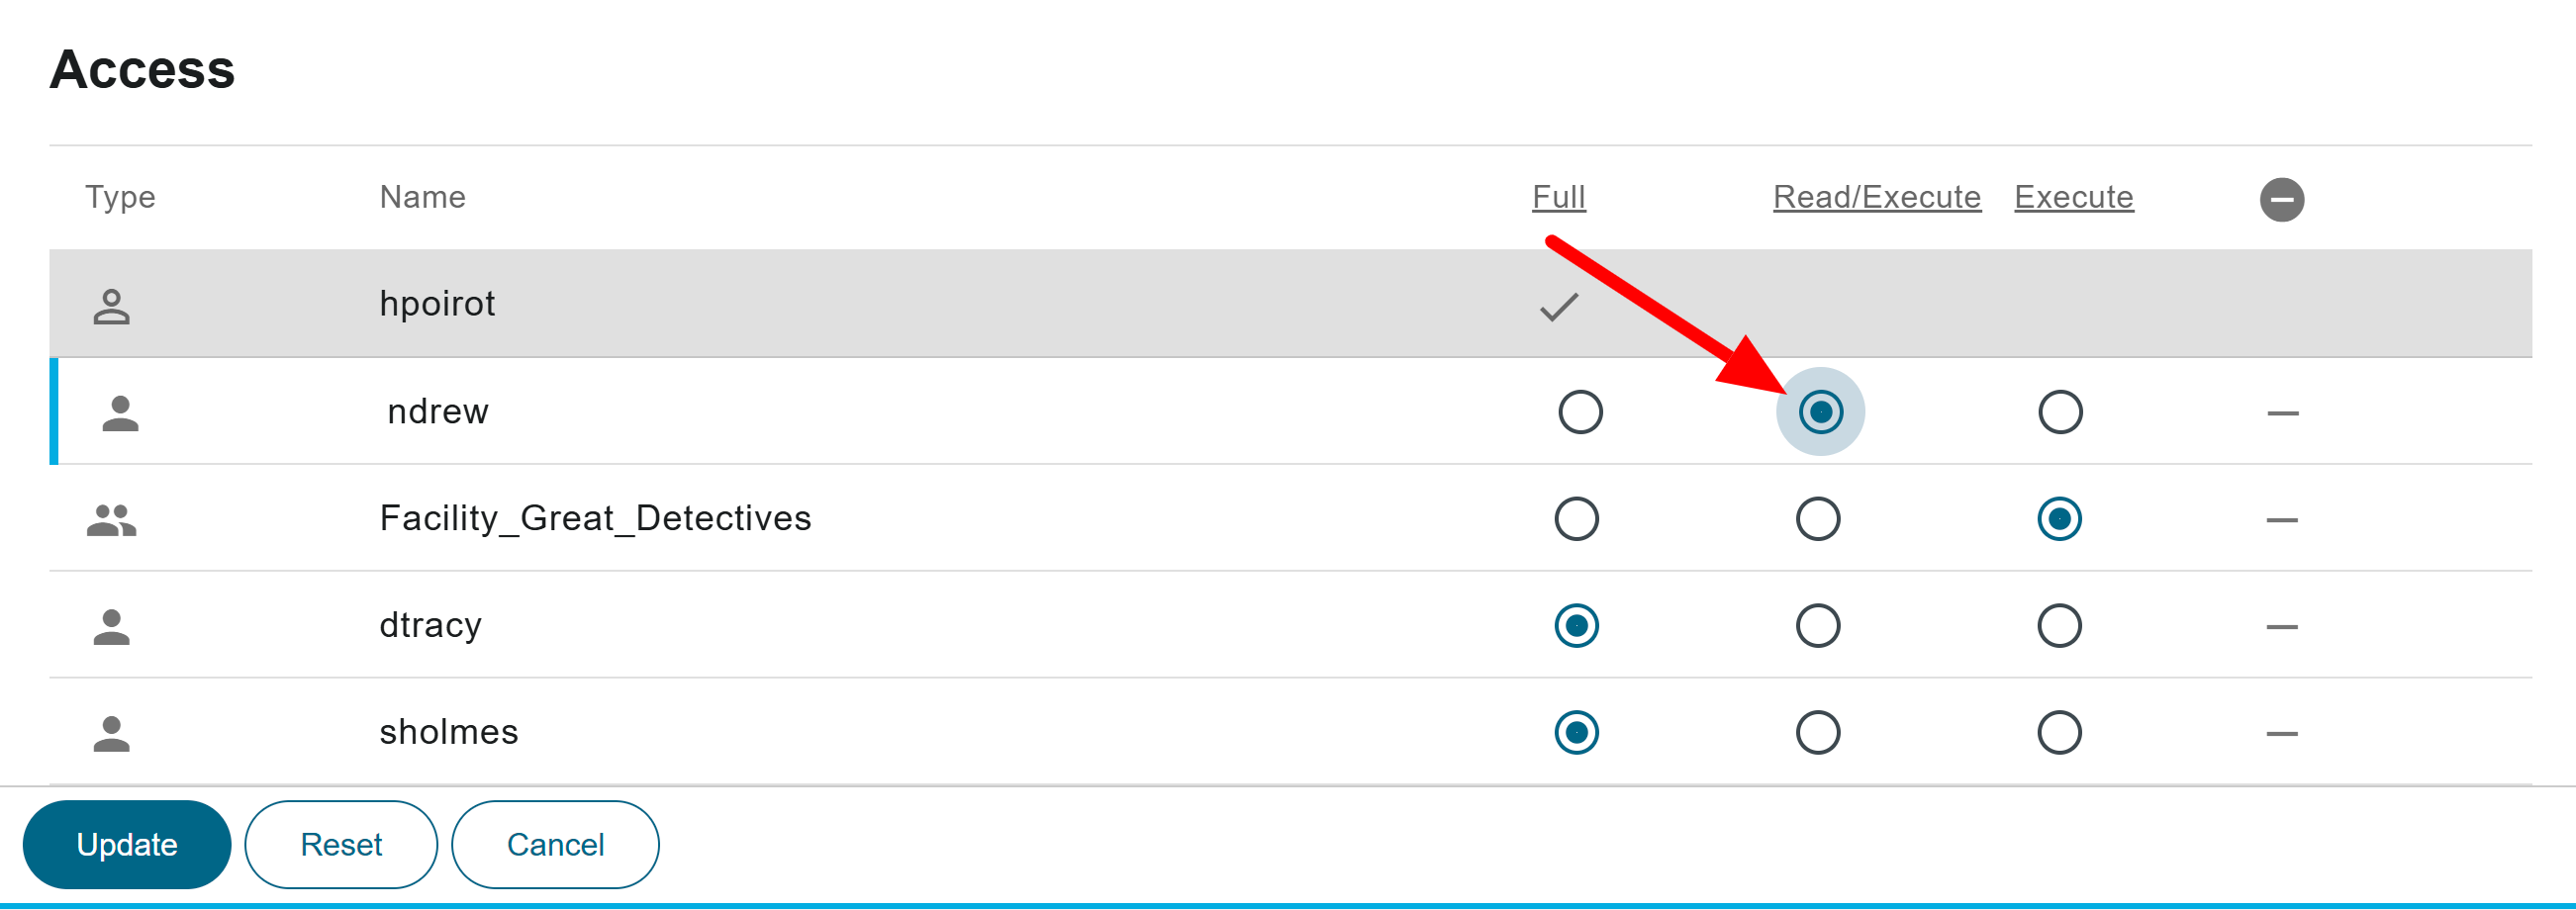 Click on image to zoom
Change Permissions
Clicking Full, Read/Execute, or Execute determines what each user or group can do with the report. Click on the heading of each column to change all users and groups to that permission or click to choose the permissions individually.
- Full allows those with access to edit, read, and execute the report.
- Read/Execute allows those with access to both view and run the report.
- Execute allows the user to run the report only. Select this option if the report is needed in other IMAT tools (such as VHR), but the user should not be able to view or edit the report in Report Builder.
A blue line to the left of the row indicates that the permissions have changed but have not yet been saved.
Click to save the changes and return to the Sharing home screen.
.png) Click on image to zoom
Click on image to zoom Click on image to zoom
 Revoke Access
To revoke access to the report, click next to the name that should no longer have access to the report. The line is highlighted in red, and the user is removed once is clicked.
Clicking restores the user to the original permissions.
Click on image to zoom
Share with Dashboards
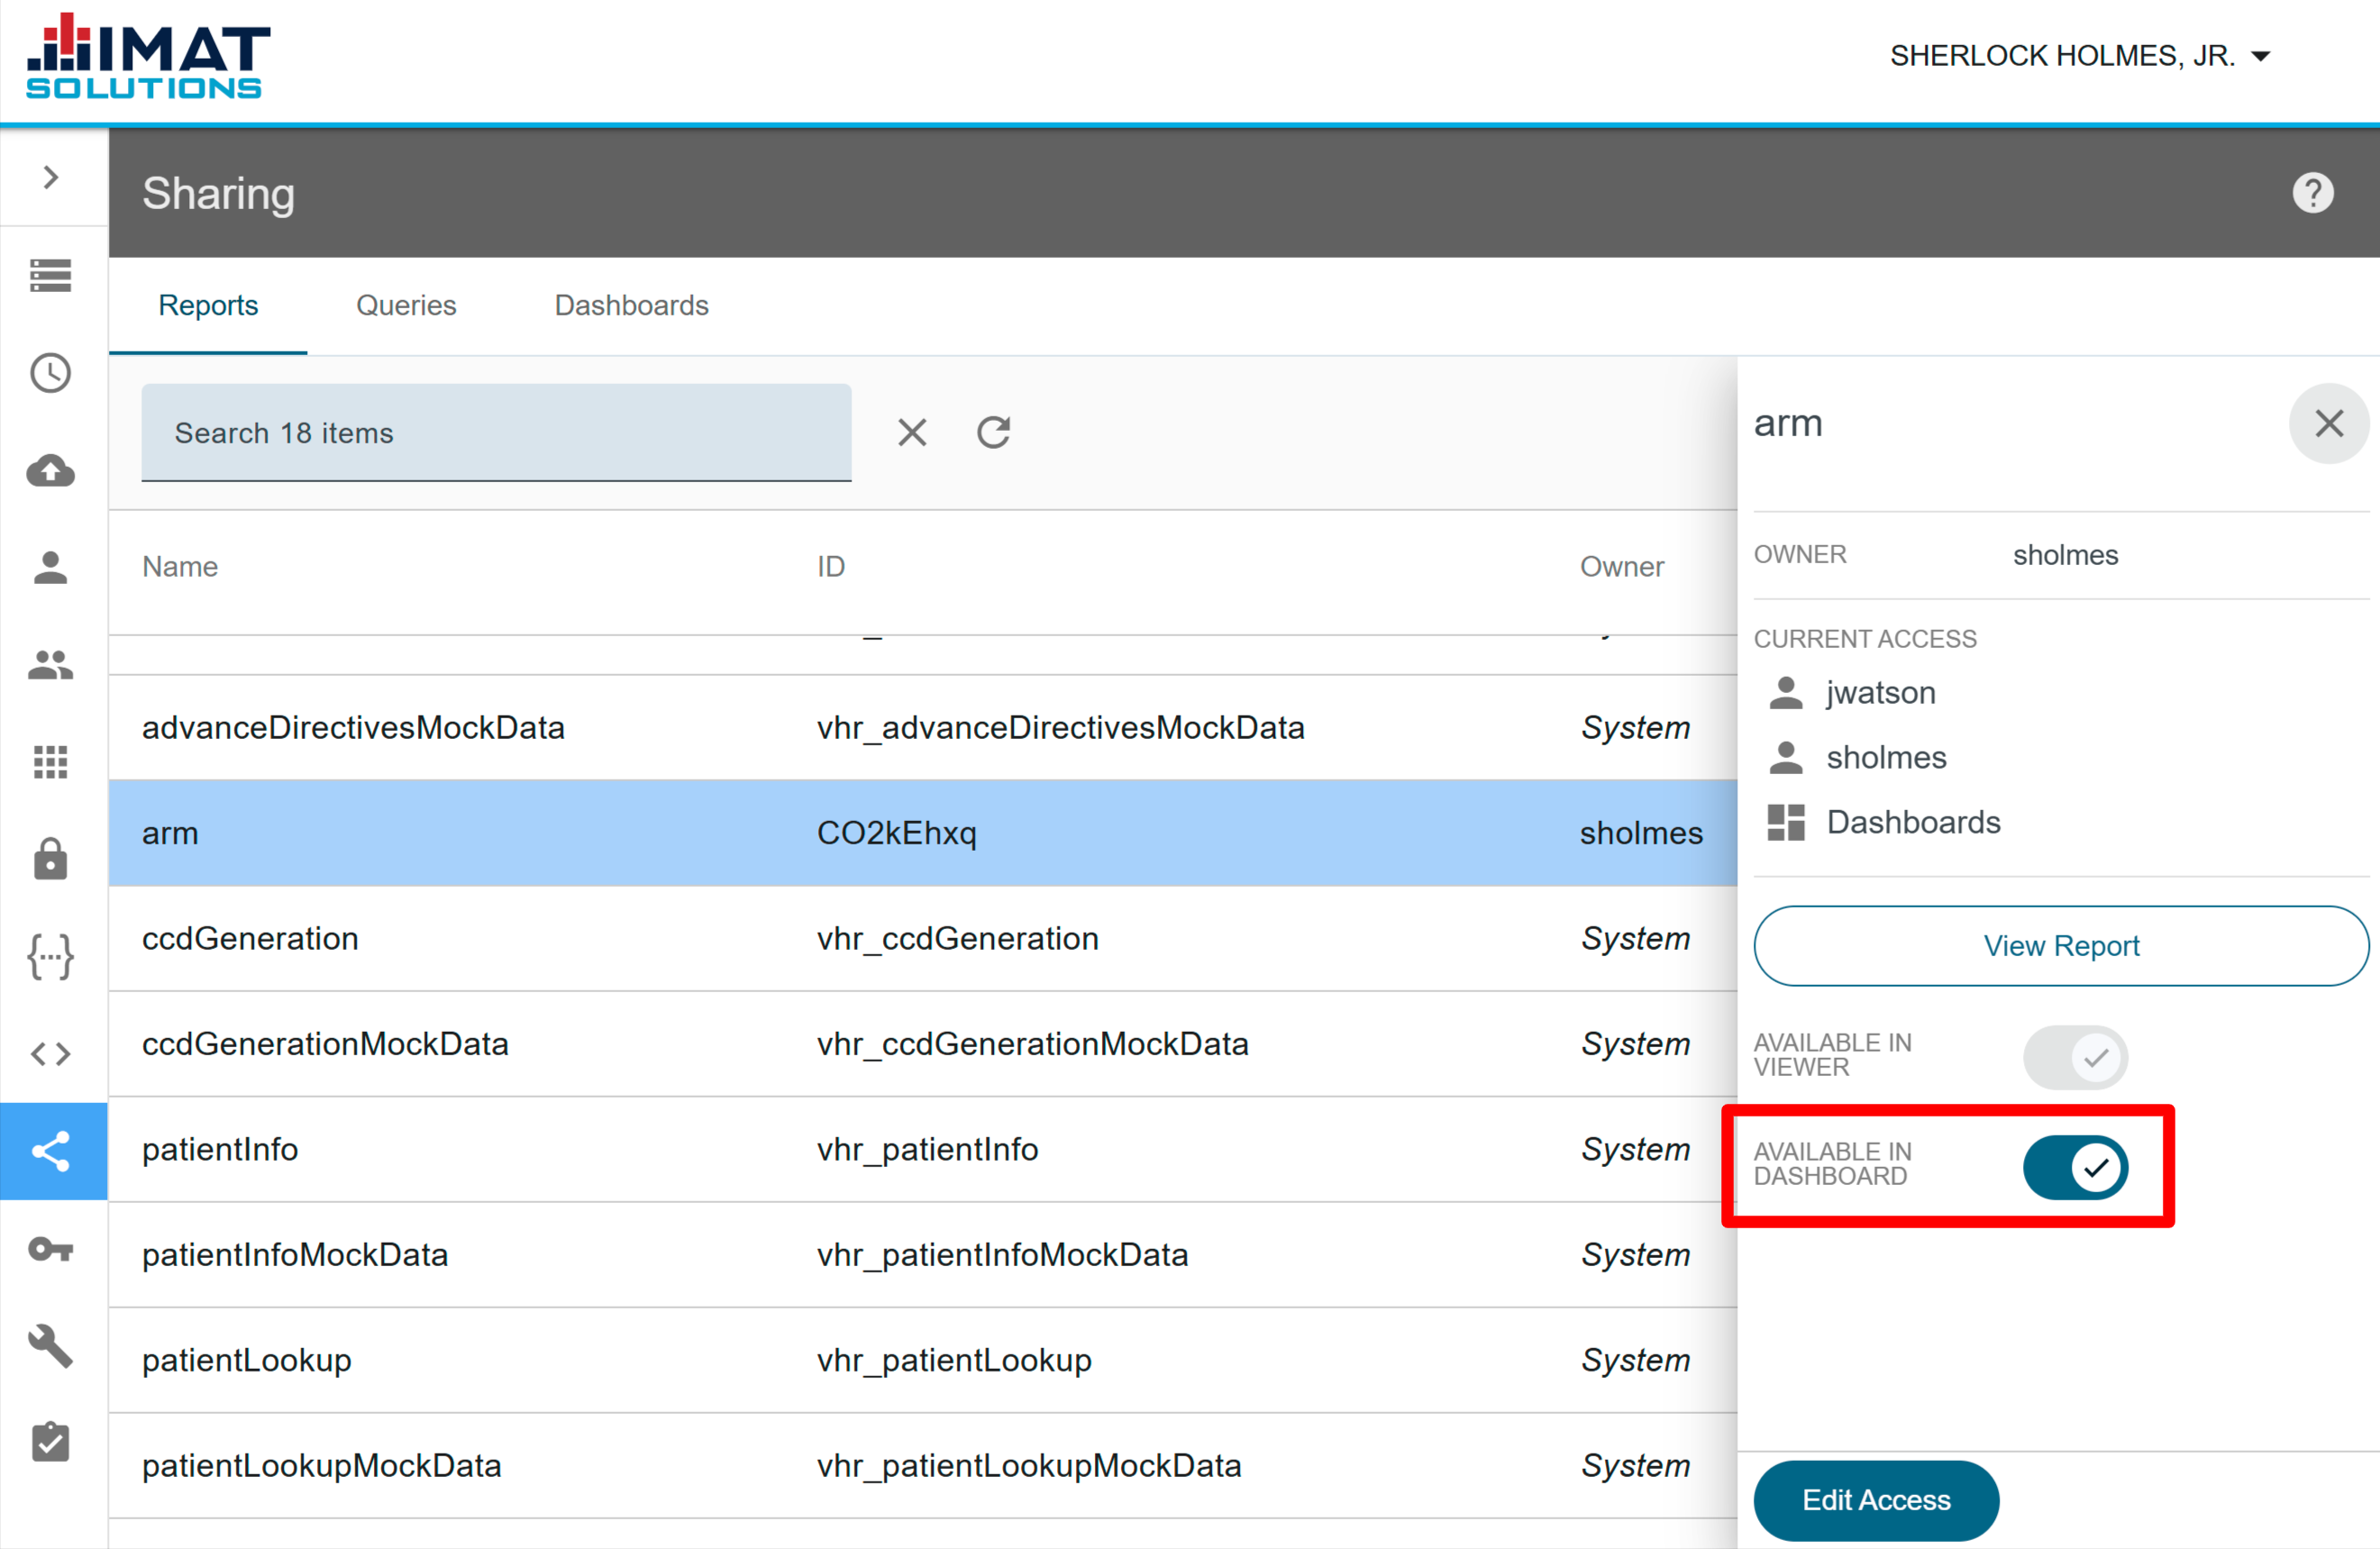
To make a report or query available for a dashboard, you must do the following:
- Share a report with the same recipients who you want to see the dashboard. They will need a minimum of execute permissions.
- Toggle Available in dashboards to on.
When a report is successfully shared with the Dashboards app, you will see Dashboards in the Current Access list.
Share Dashboard
After a dashboard has been created, you can share the dashboard with others.
- Go to the Dashboards tab.
- Click the dashboard you want to share.
- Click .
- In the Add Access section, select the following:
- Add as: Allow the new users to either view or view and edit the dashboard.
- From: Select to choose from groups or users.
- Username/Group name: Select from the dropdown that appears when you click on it. Start typing the name for a shorter list.
- Click .
- Verify your changes in the Access
- Click .
Edit Dashboard Access
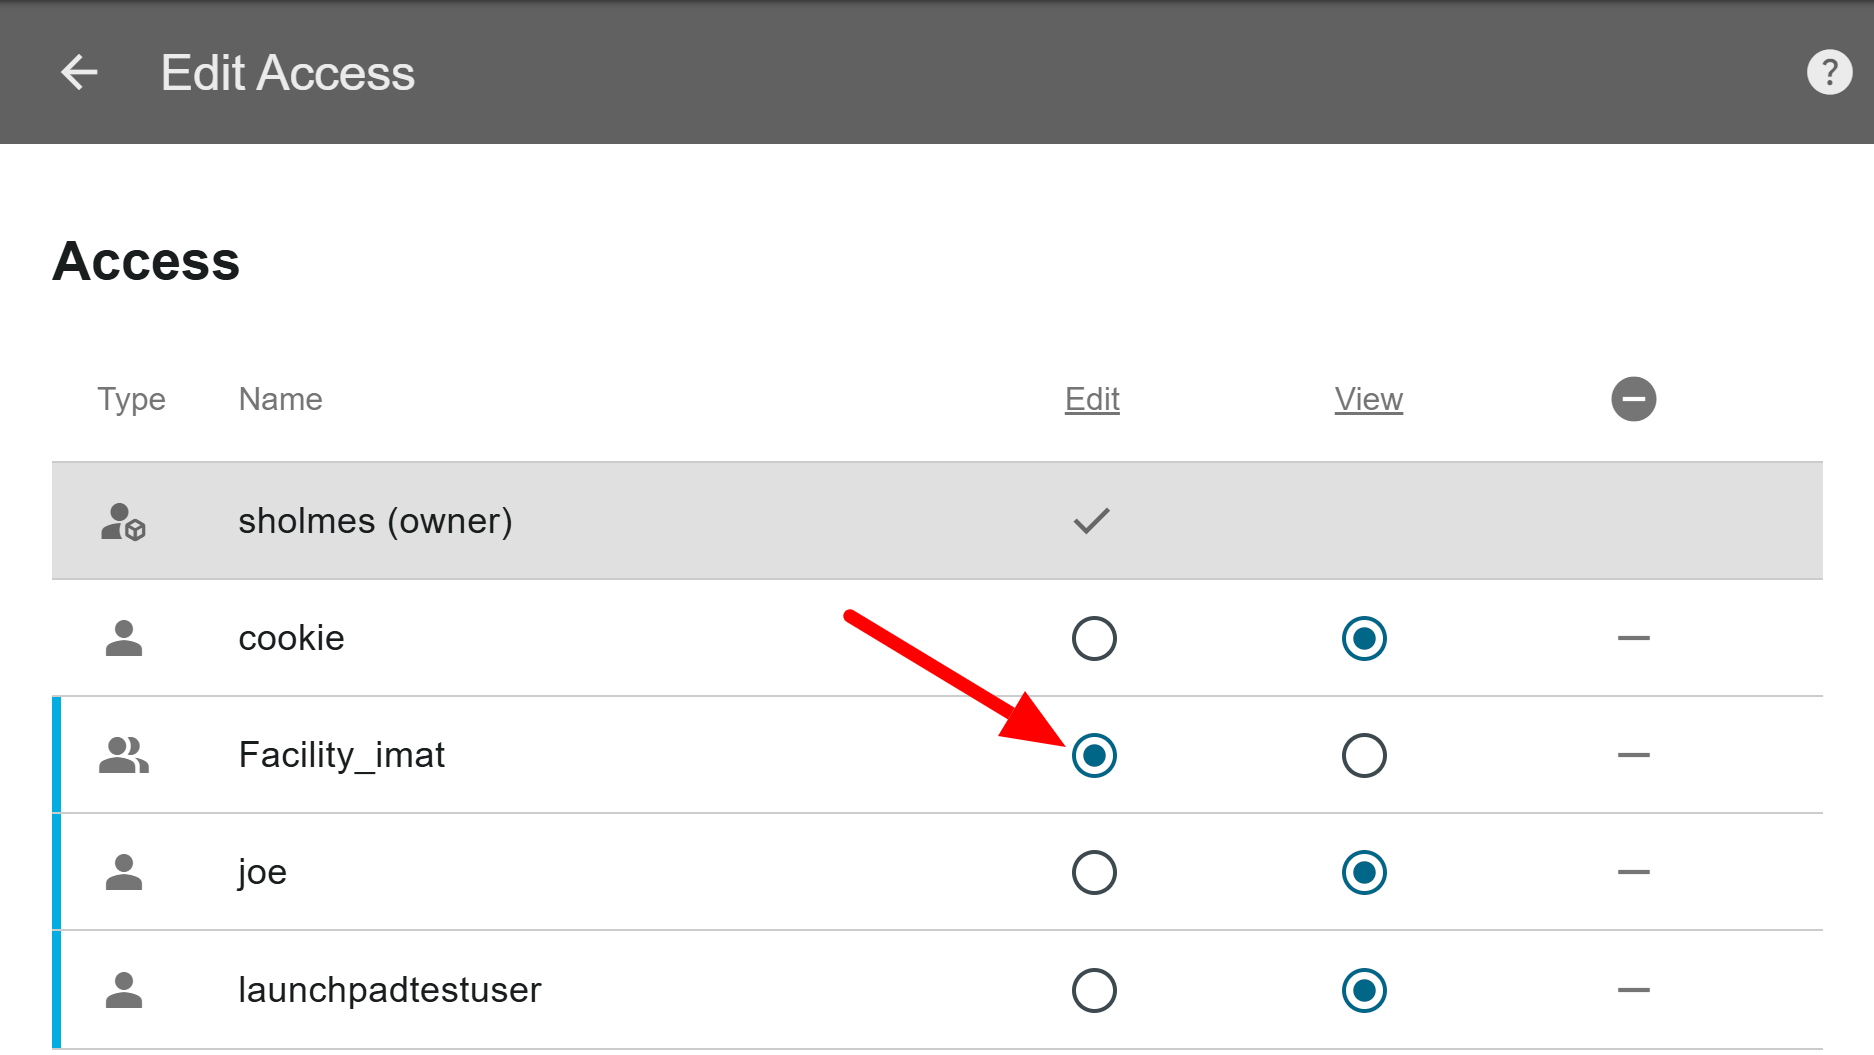
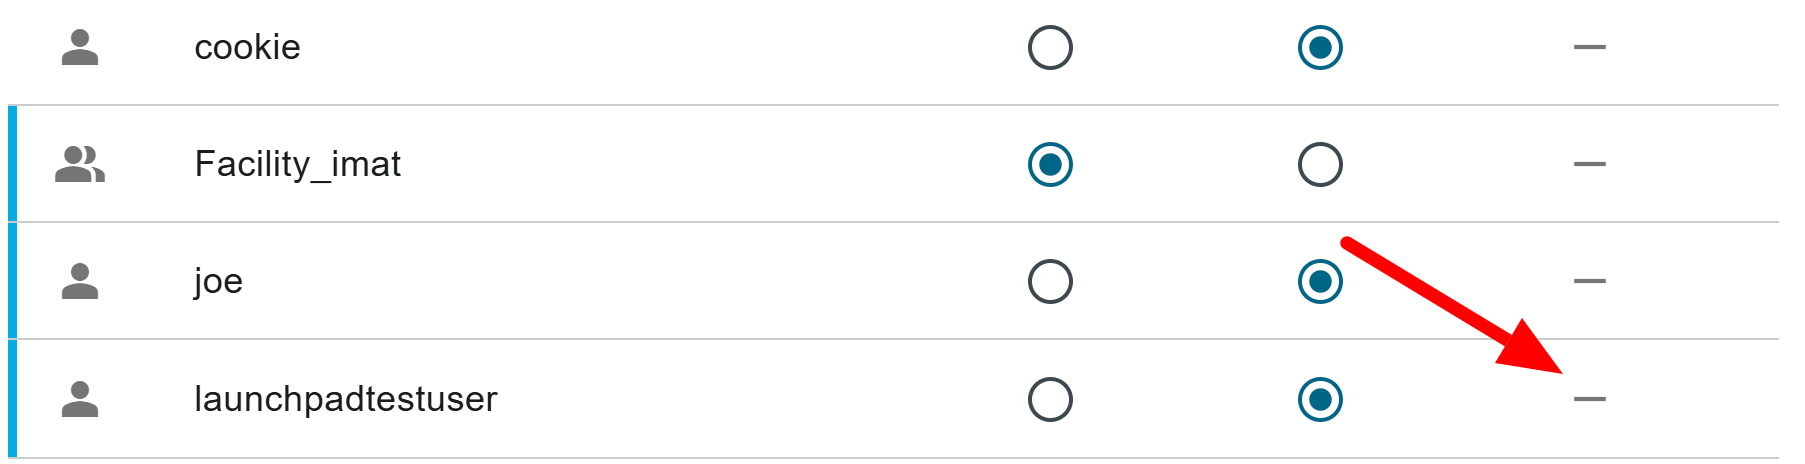
Clicking on the dashboard name opens a detail panel. The access section displays the users or groups that currently have access to the dashboard. Locate and click on the dashboard you'd like to edit. The owner of the dashboard cannot have his or her permissions changed, but all other users and groups can.
 Click on image to zoom
Change Permissions
Clicking the radio button under Edit or View determines what each user or group can do with the dashboard. Click on the heading of each column to change all users and groups to that permission or click to choose the permissions individually.
A blue line to the left of the row indicates that the permissions have changed but have not yet been saved.
Click to save the changes and return to the Sharing home screen.
 Click on image to zoom
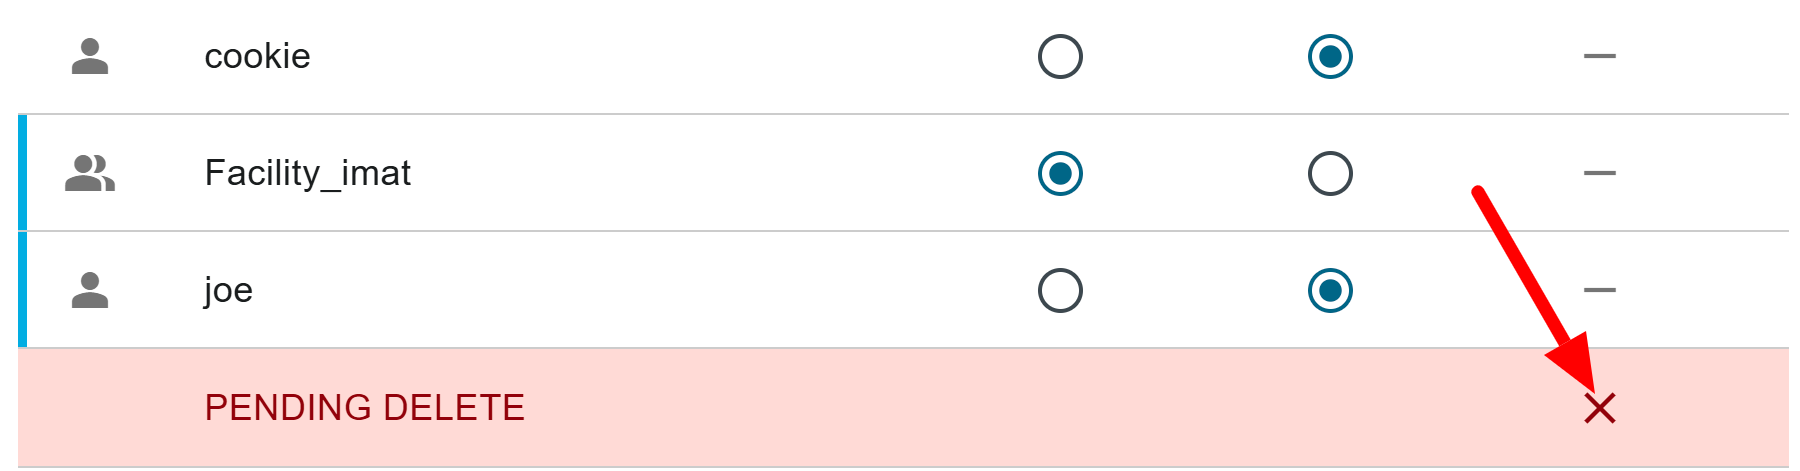
Revoke Access
To revoke access to the dashboard, click next to the name that should no longer have access to the report. The line is highlighted in red, and the user is removed once is clicked.
Clicking restores the user to the original permissions.